The Split Order Process can be used when an order is created and the there’s not enough product to complete the order. The Split Order would be the available amount of product on one order, and the remaining balance that is unavailable would be on the split or "Back Order."
Note: This process is for manually created orders (not for EDI orders).
To create a Split Order:
1.Select the Shipping Tab.
2.Choose Create Order and the system will go to the Build Order screen.
3.Select a Customer from the drop-down menu.
4.Select a Warehouse from the drop-down menu.
5.Enter a Ref# that is unique for this customer.
6.Click the Save button to begin creating the order. The system will go to the full display of the Build Order screen.

To create a Split Order (continued):
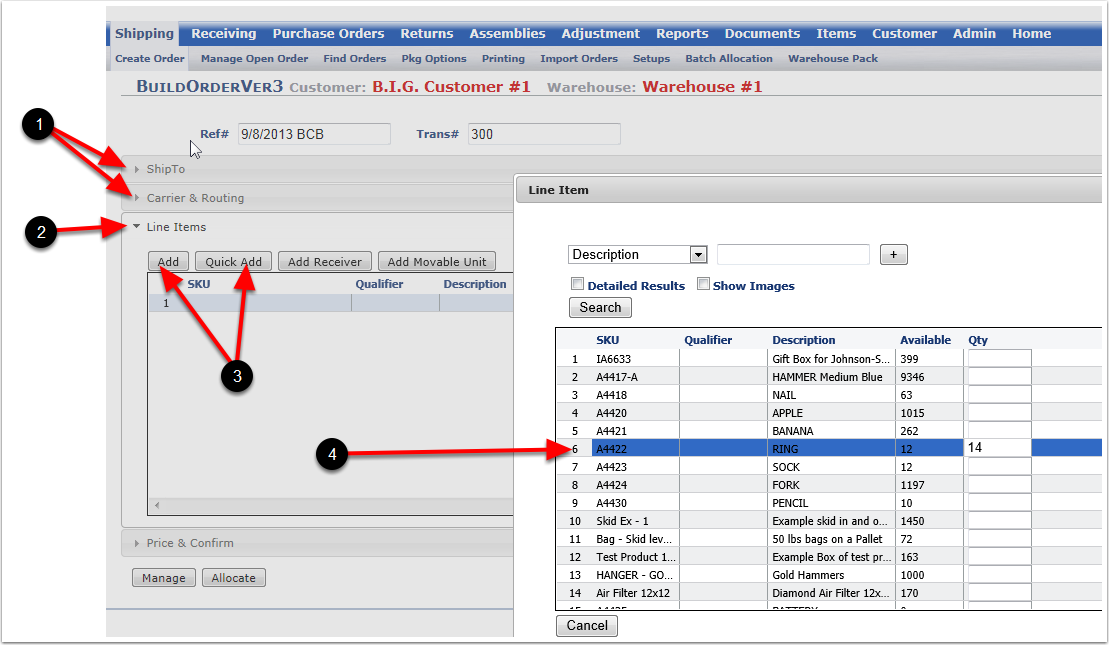
1.Enter the Ship To information.
2.Enter Carrier & Routing information.
3.Enter Line Item information by selecting the Add or Quick Add feature to select a SKU. The system will bring up the Line Item pop-up window.
4.The Line Item example is showing 12 units available of SKU A4422. The customer requested a quantity of 14 units. A quantity of 2 will go to the split order. The split order will use the reference number of the current order with a -1 added to the Reference number. Add the SKU quantity of 14.
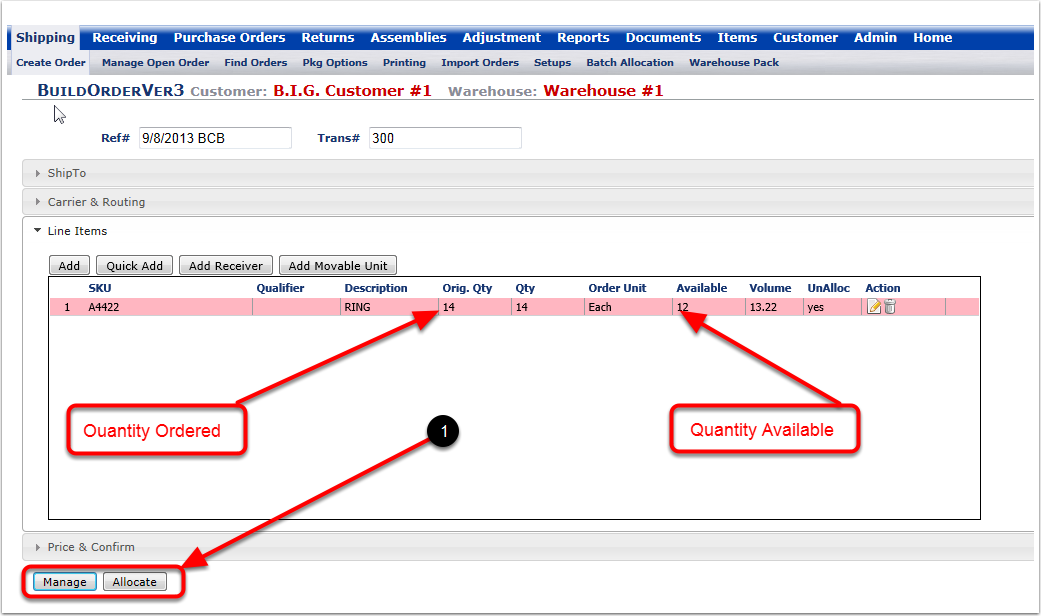
1.The Allocate button, may or may not be active in your 3PL. If it is visible, select it to Allocate product to the order. Then, select Manage and the system will take you to Manage Open Order screen. If the Allocate button is not visible, simply select the Manage button and the system will go to the Manage Open Order screen.
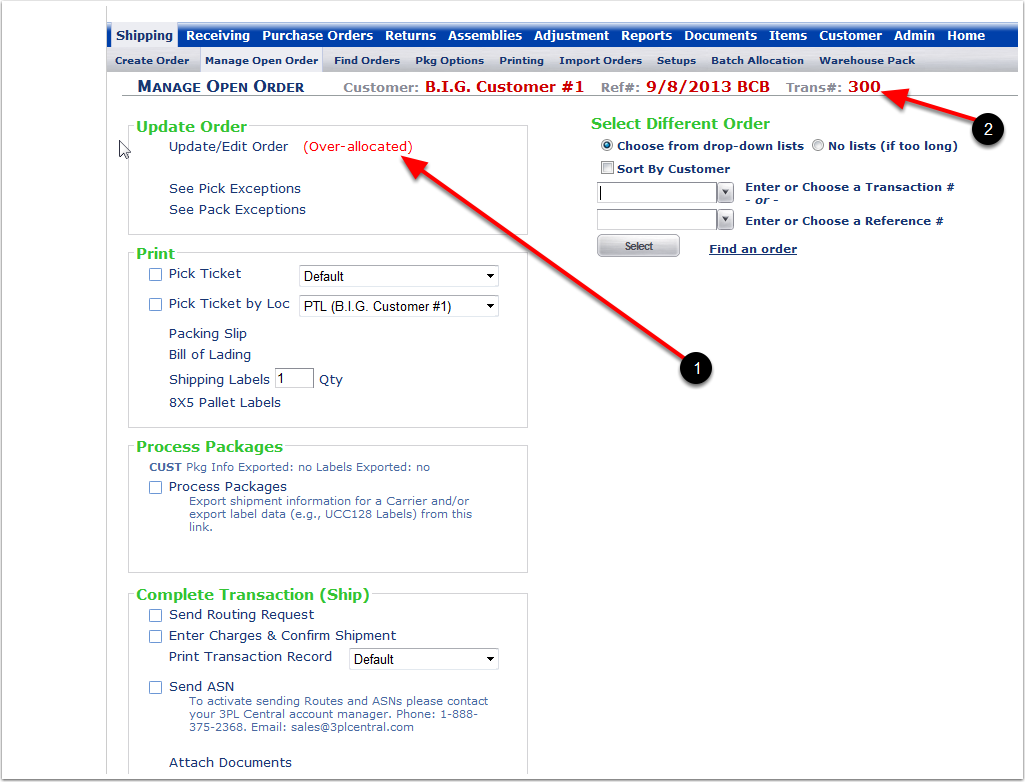
1.The order is showing (Over-allocated).
2.Note the Transaction number 300. This will be needed for the split order process.
To split the Over-Allocated Order:
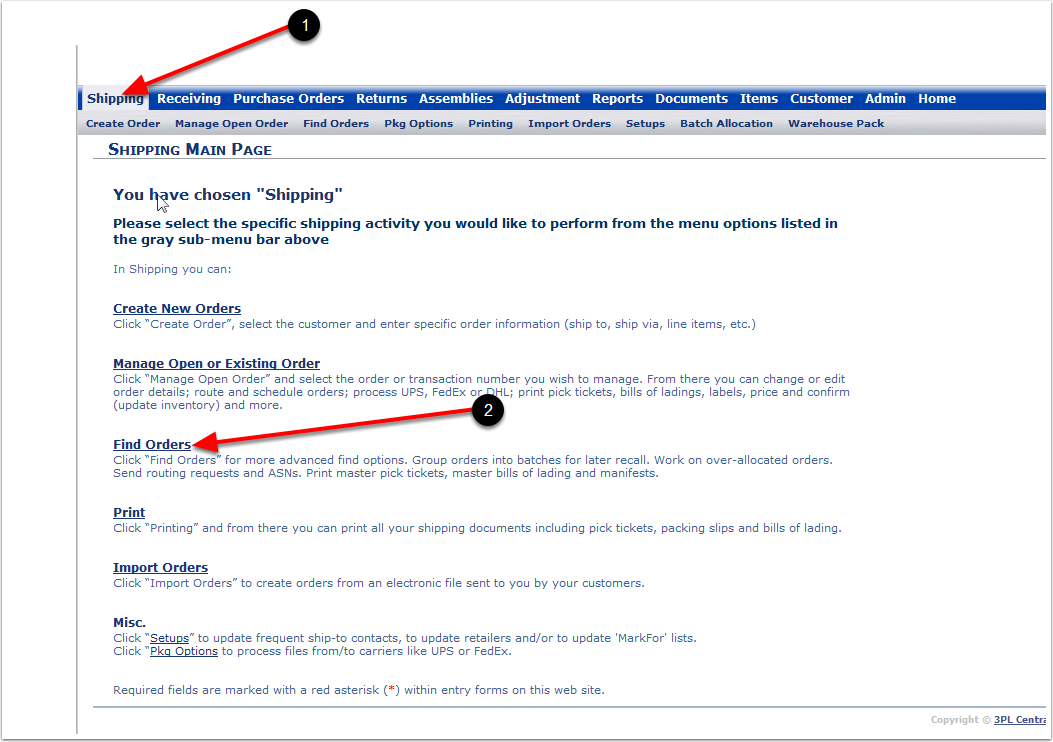
1.Select the Shipping Tab.
2.Select Find Orders and the system will go to the Find and Manage Orders screen.
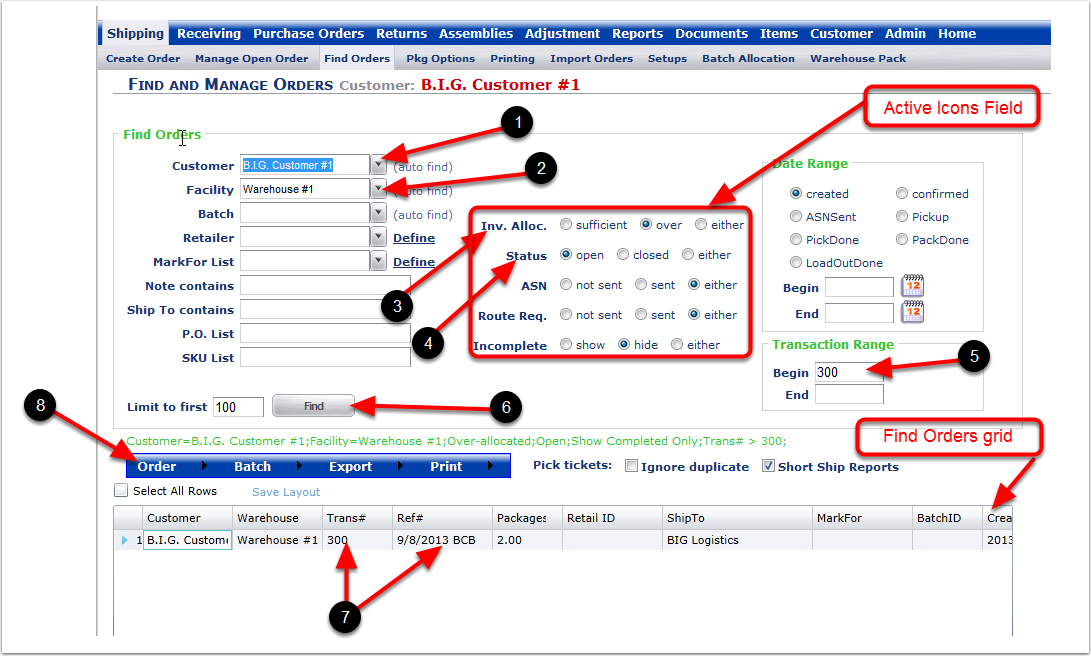
To split the Over-Allocated order:
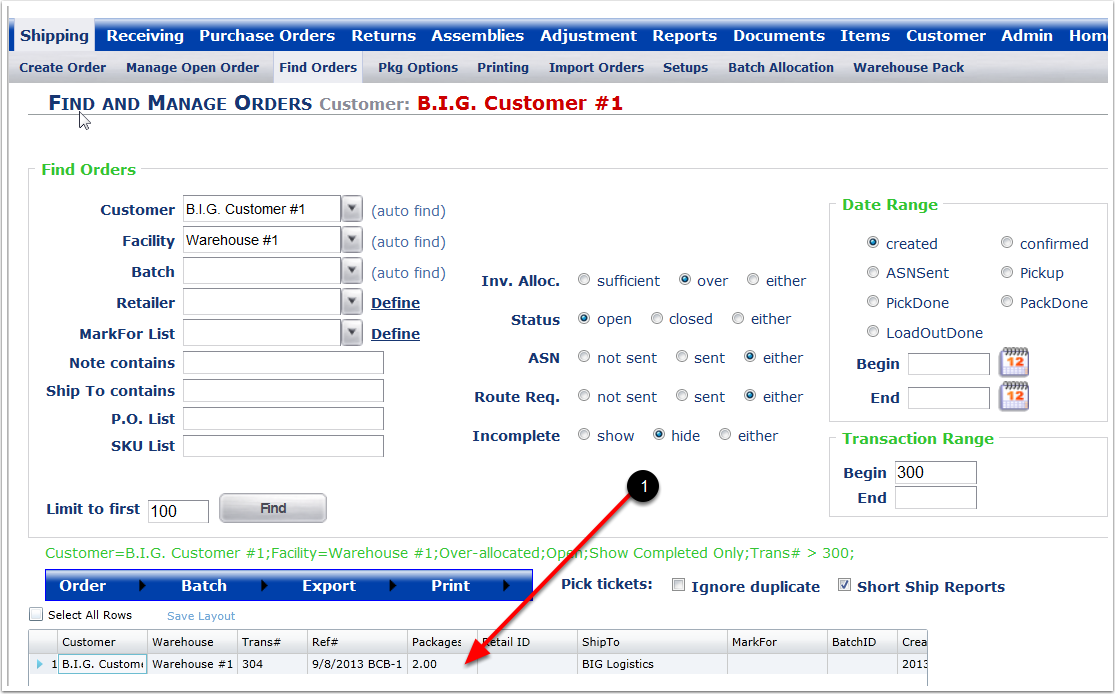
1.Select a Customer.
2.Select a Warehouse.
3.Inv. Alloc.: Choose over.
4.Status: Choose open.
5.Begin: Enter the example Transaction number 300.
6.Click on the Find button.
7.The example Transaction number 300 in the grid and the Reference number 9/8/2013 BCB (Highlight this order).
8.Hovering a mouse over the Order menu will display options below. Choose the Split Overallocated Orders Option and the system will open a message window.
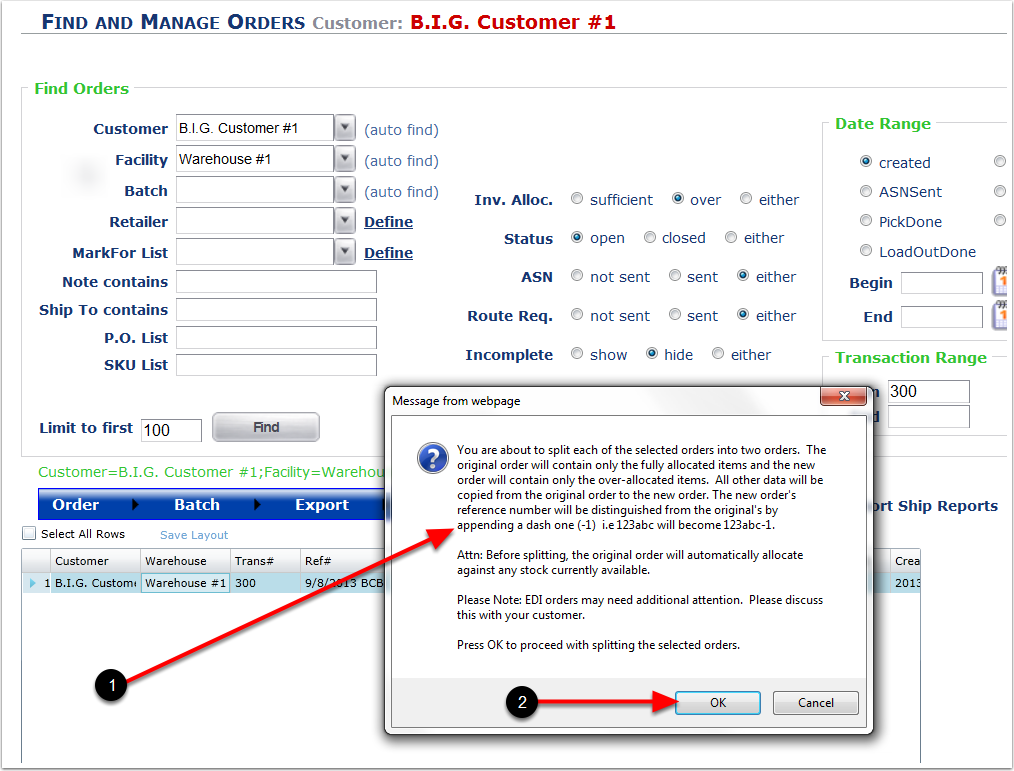
1.The message states that the split over-allocated process will create a second order using the current reference number and will add a -1 to the reference number on the new order.
2.Choose OK to proceed and the system will split the order. Stock will automatically be allocated to the original order.
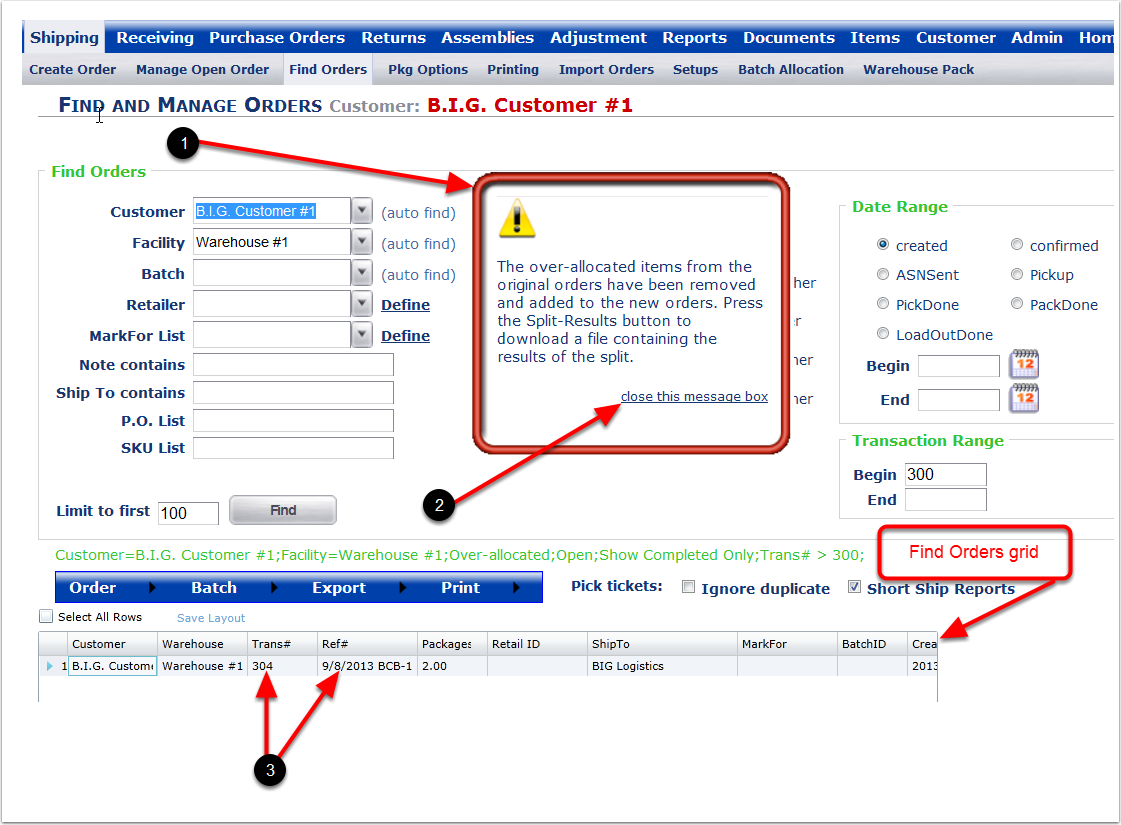
1.The message window is stating that the over-allocated items from the original order have been removed. The Find Orders grid is now showing the remaining split (or the back order of items that were unavailable at the time of the original order).
2.Close the window.
3.The remaining split from the original order. Note the reference number now has a -1 and the new transaction number is created because it is now a new "separate" order.
1. After closing the message box, the system is showing the over-allocated order.
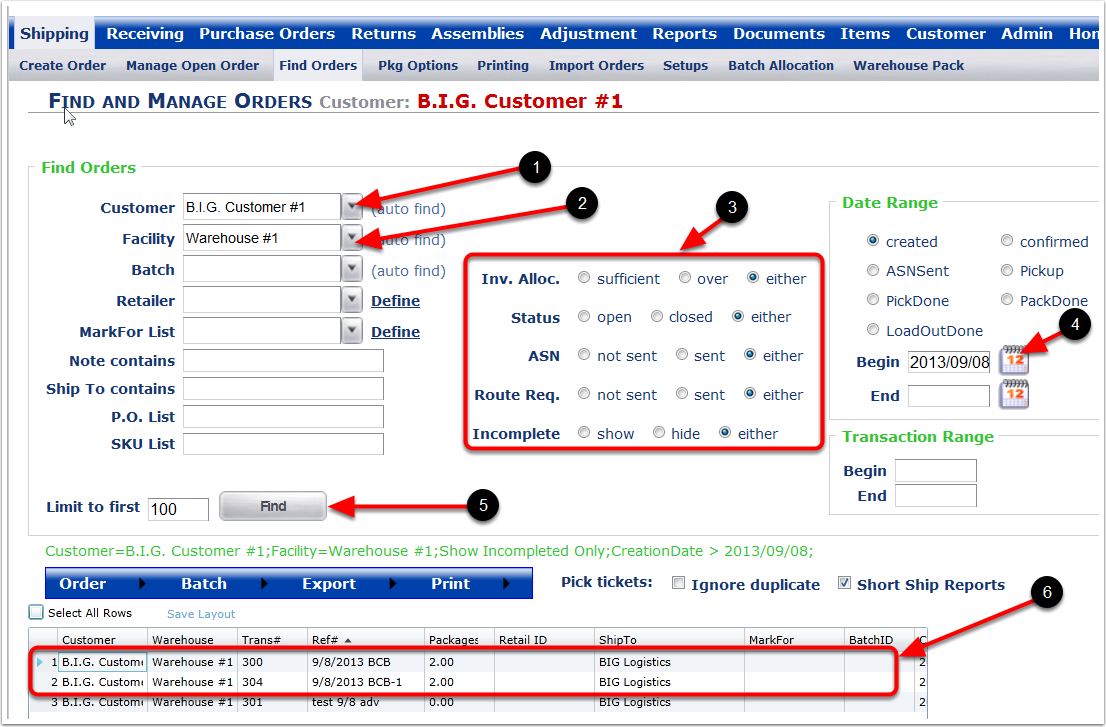
From the Find Orders screen:
1.Select a Customer from the drop-down menu.
2.Select a Facility from the drop-down menu.
3.Choose the radio buttons you want. Choose either for all fields.
4.Enter the date or the date range of the orders.
5.Click on the Find button.
6.The original order and the split (over-allocated) order (Click on the Ref# column and this will sort the orders alphabetically by reference value).
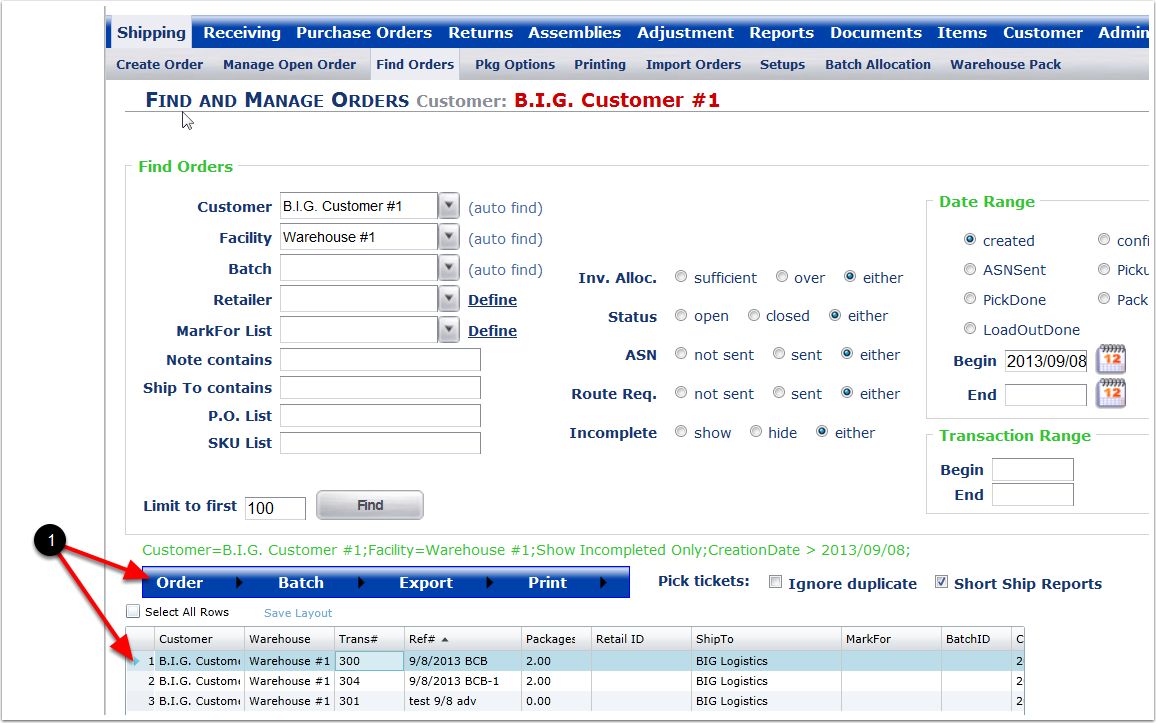
From the Find Orders screen:
1. Highlight the original order (Transaction number 300) of the split, hover over Order and select Manage from the drop-down list. The system will take you to the Manage Open Order screen.
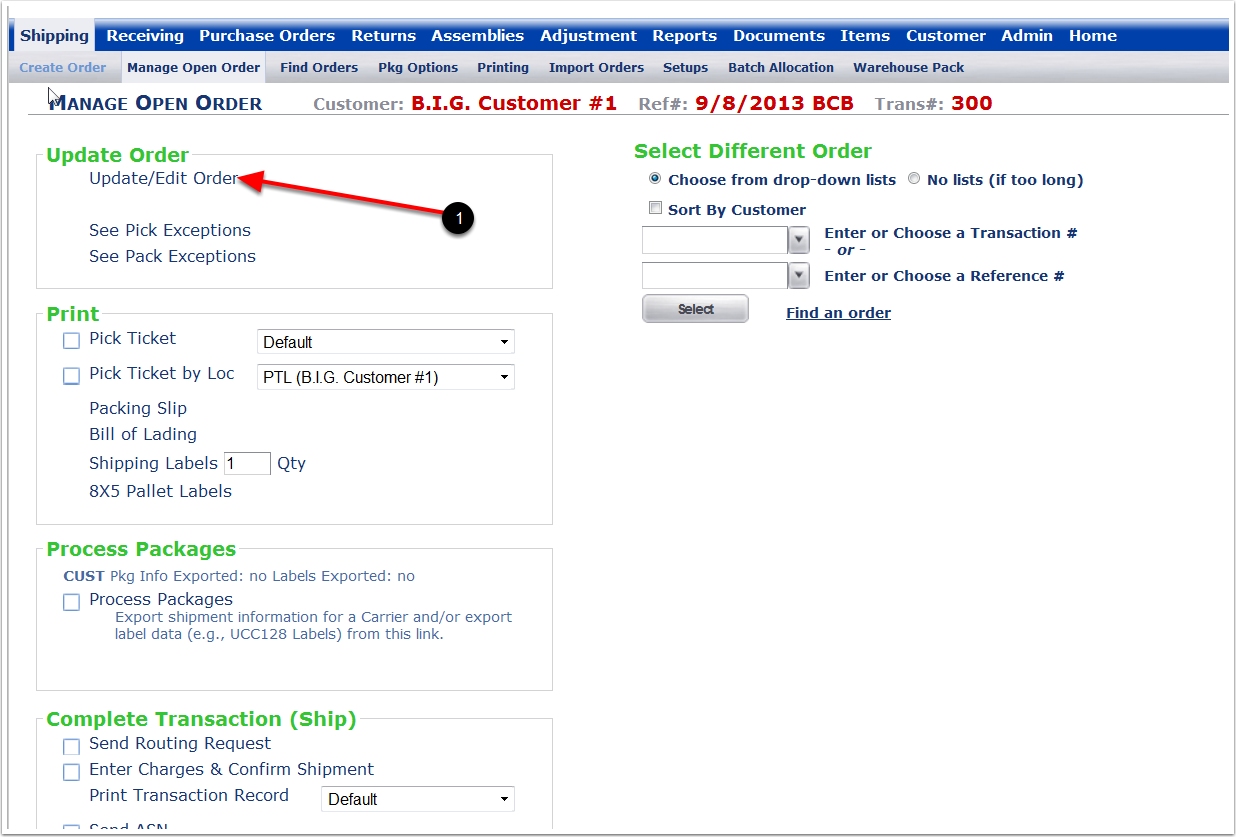
1. To View the details of the order Click on Update/Edit Order. The system will go to the Build Order screen.
In the Build Order screen:
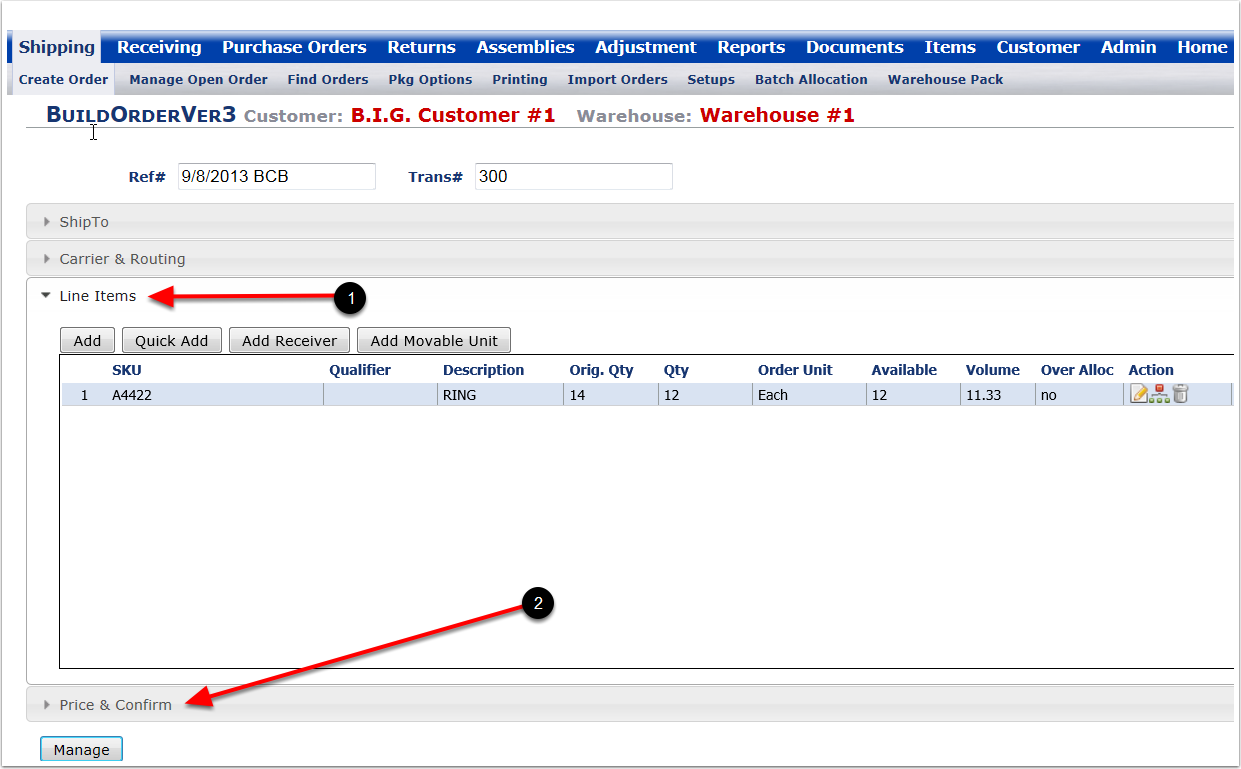
1.Click on Line Items. The system is showing the details of the Transaction #300. Note: the orig. Qty is 14 but the order Qty is 12. The line item is blue (Not Pink) reflecting the available quantity is sufficient for this order.
2.Click on Price & Confirm, enter charges, and then confirm the order.
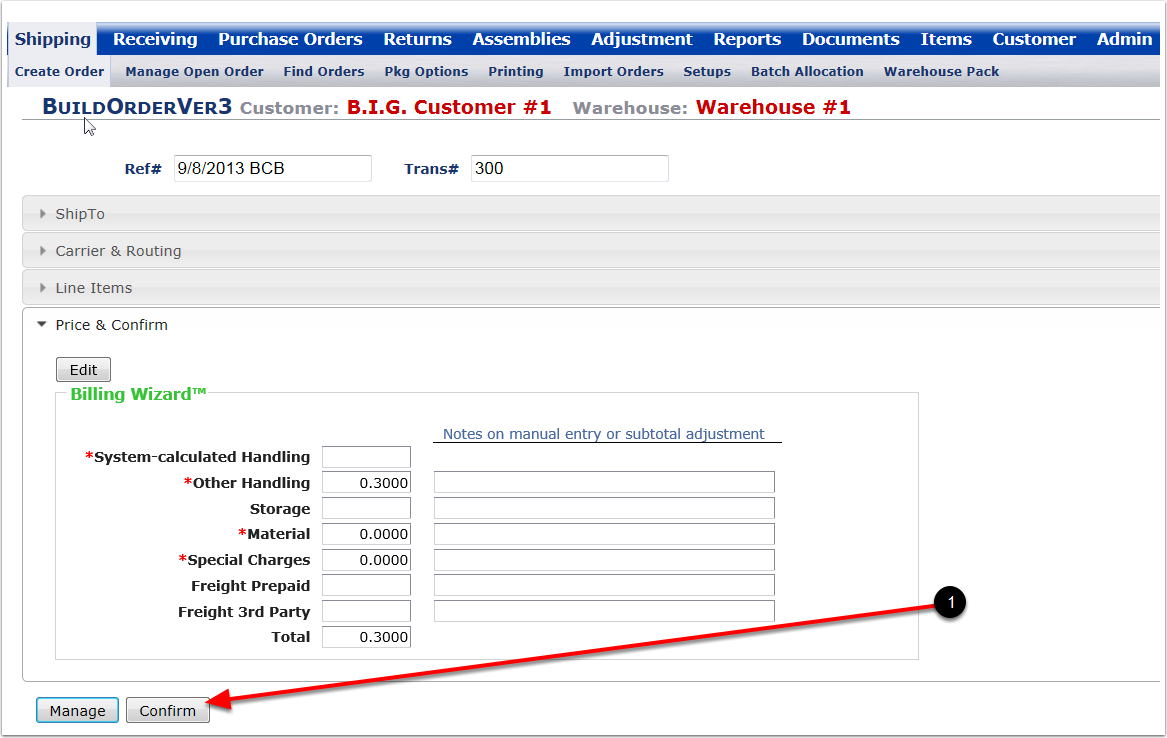
1. Choose Confirm and the confirmation window will appear.
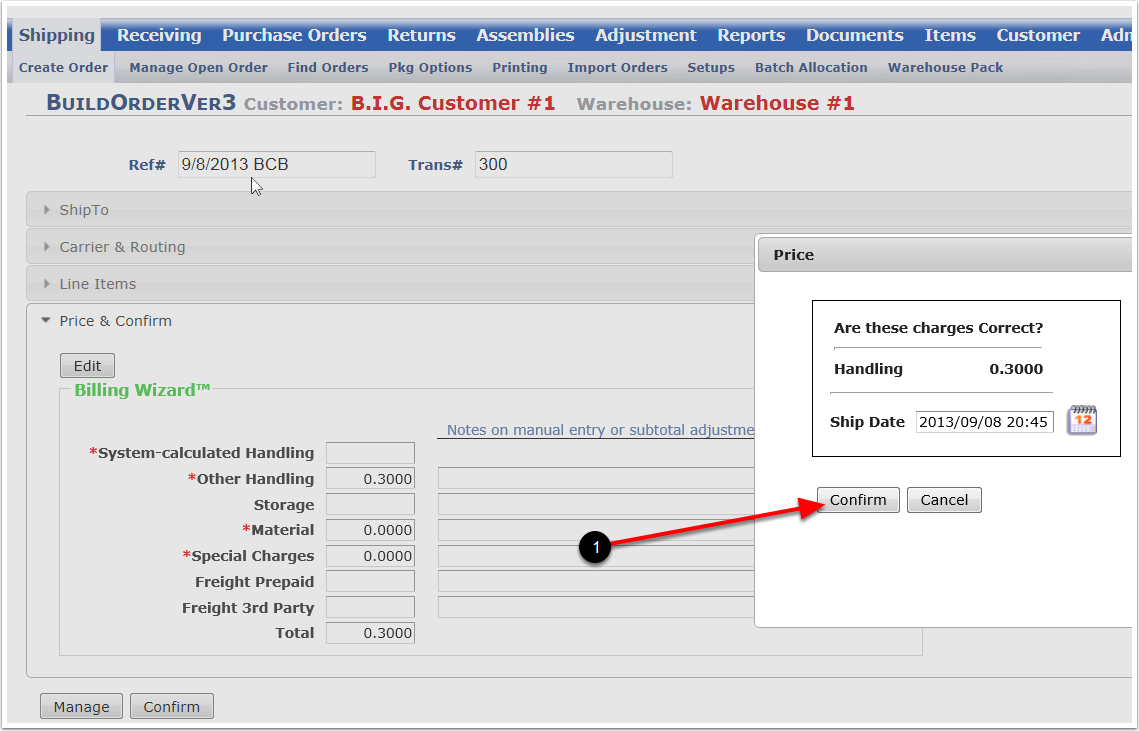
1. Choose Confirm and the Order will be completed. The system will go to the Manage Open Order screen.
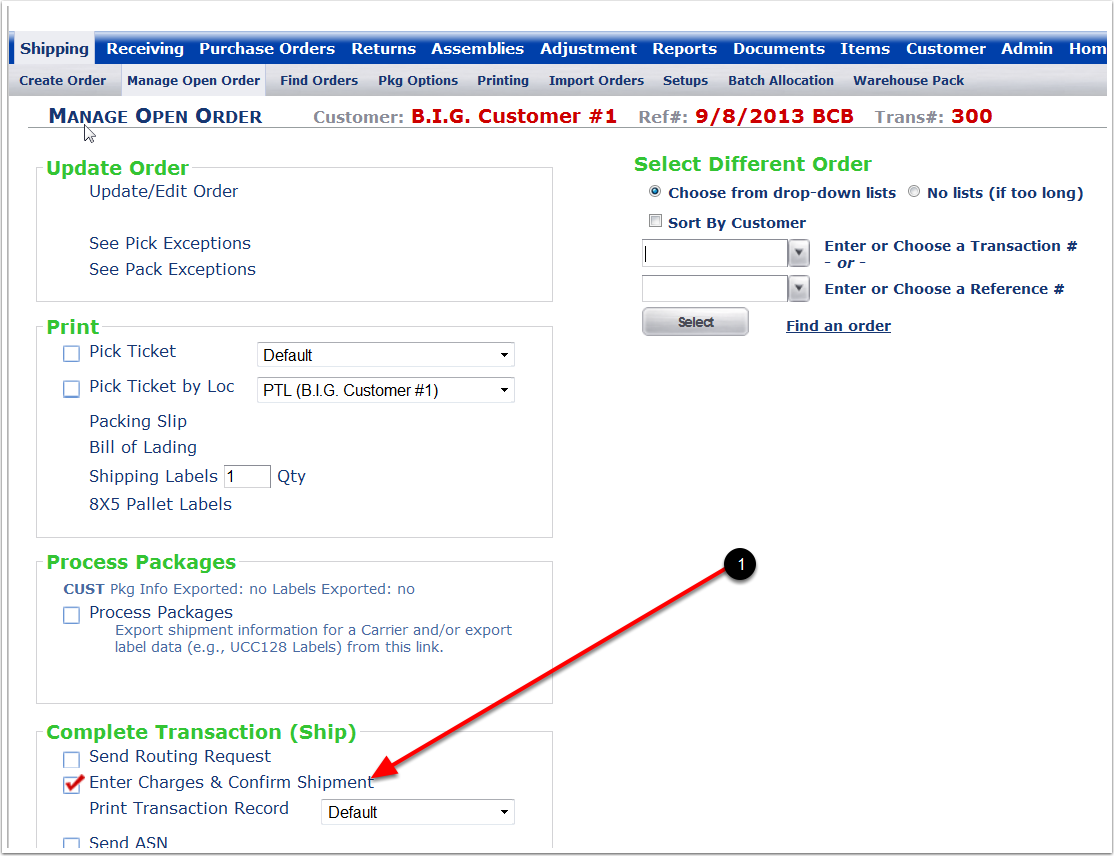
1. Order is confirmed.
To review the second part of the split order (a.k.a. the "Backorder"):
1.Select the Shipping Tab.
2.Choose Find Orders.
3.Select a Customer from the drop-down menu.
4.Select a Facility from the drop-down menu.
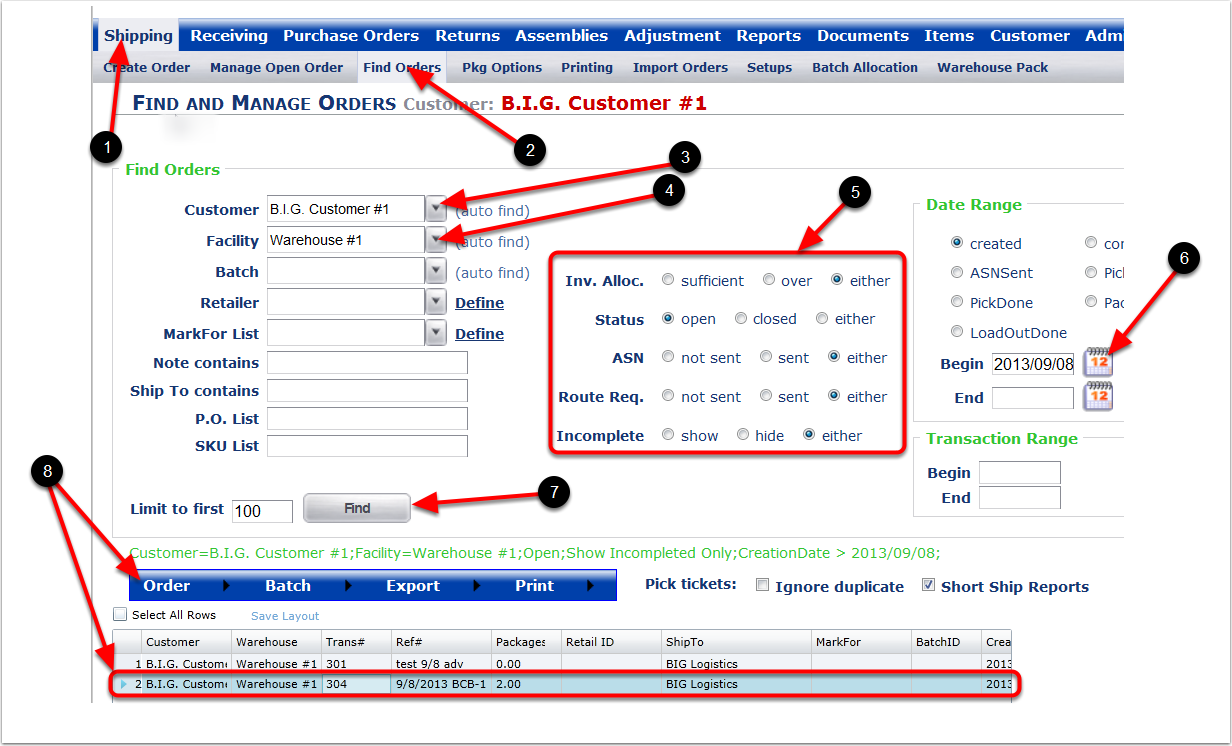
5.Enter open for the Status radio button. Enter either for all other radio buttons.
6.Enter the date or the date range of the orders.
7.Click on the Find button.
8.The second part of the split order (The Over-Allocated order). Highlight the original order (Transaction number 304). Hover a mouse over Order and select Manage from the drop-down list. The system will take you to the Manage Open Order screen.
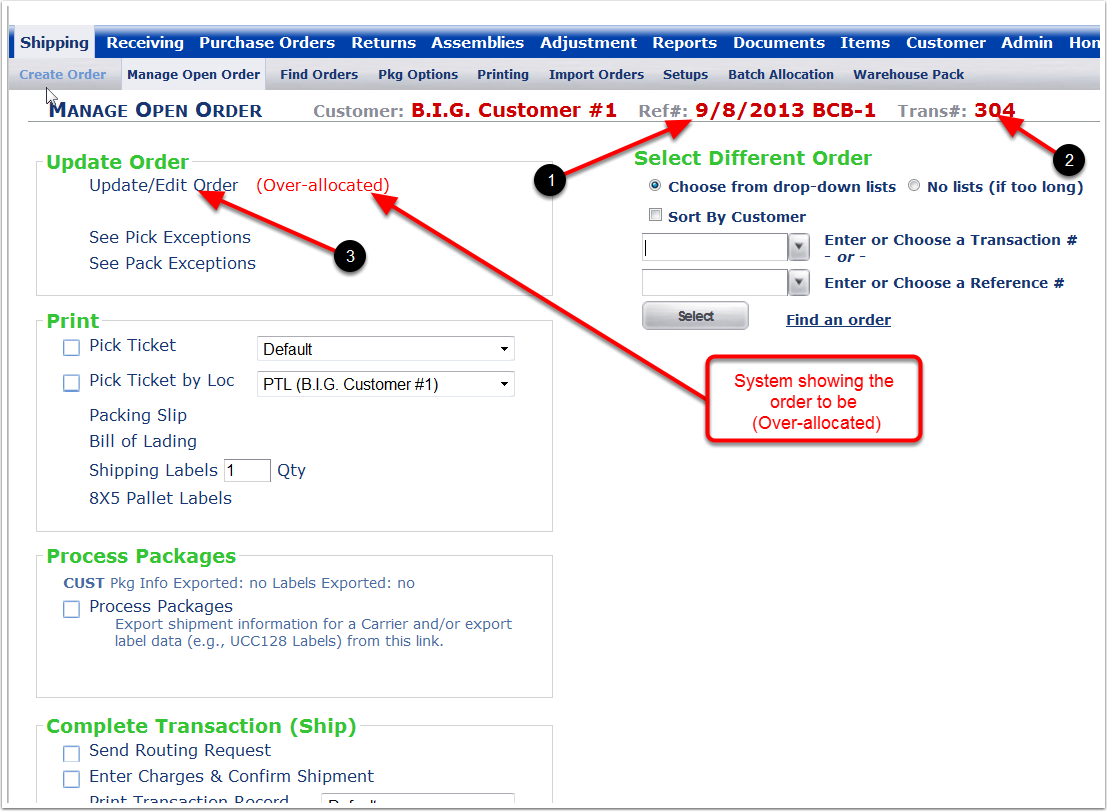
1.The Reference number with the -1 added to the end of the original Reference number (the -1 is automatically added by the system when the order is split).
2.The Transaction number 304.
3.To View the details of the order - Click on Update/Edit Order. The system will go to the Build Order screen.
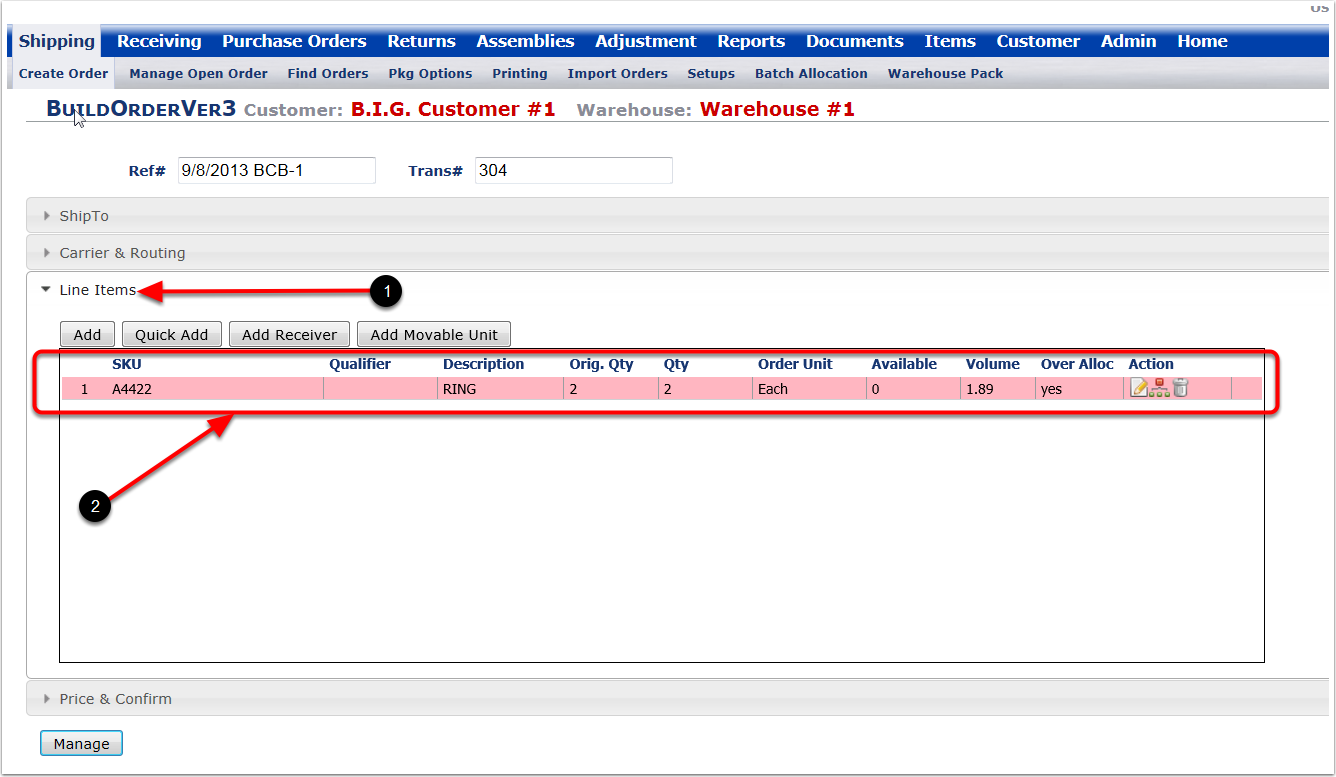
1.Click on Line Items.
2.The system is showing the Qty of 2 that is selected as over-allocated (or on Backorder).
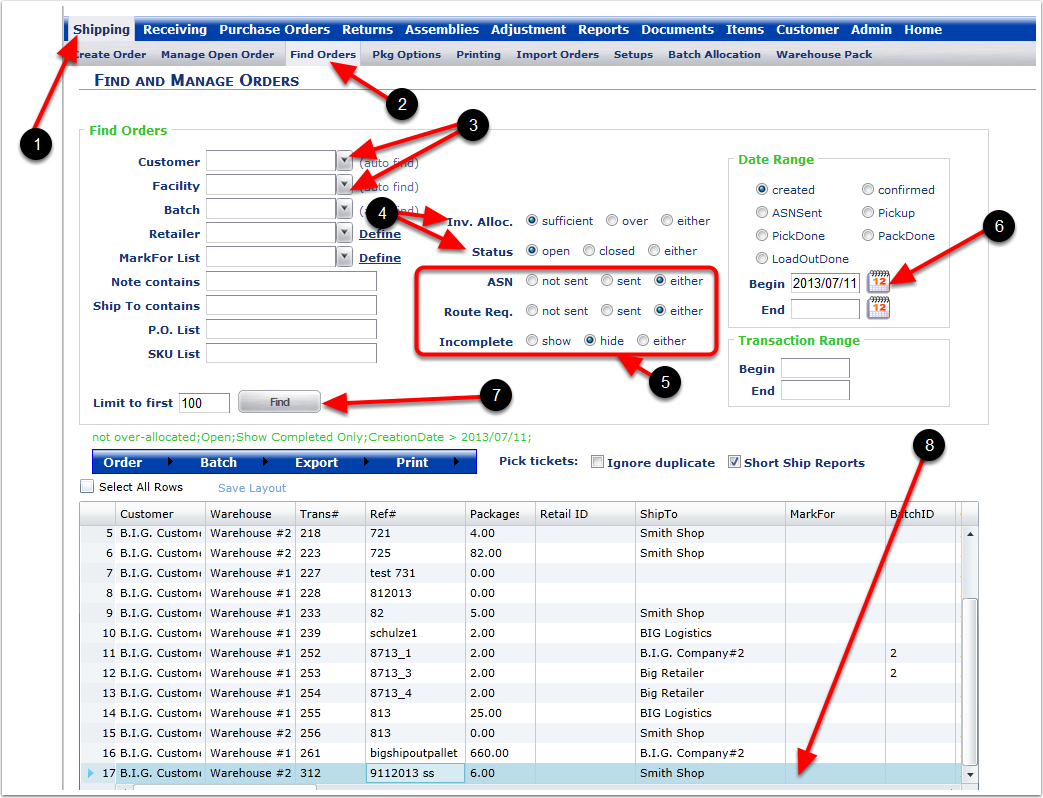
To view a list of Short-ship orders:
1.Choose the Shipping Tab.
2.Choose Find Orders.
3.Select a Customer, and then select a Facility.
4.For Inv. Alloc choose over and for Status choose open.
5.For ASN, Route Req. and Incomplete choose either.
6.Narrow the search by date. Enter a Begin date (Example 2013/07/11).
7.Click the Find button.
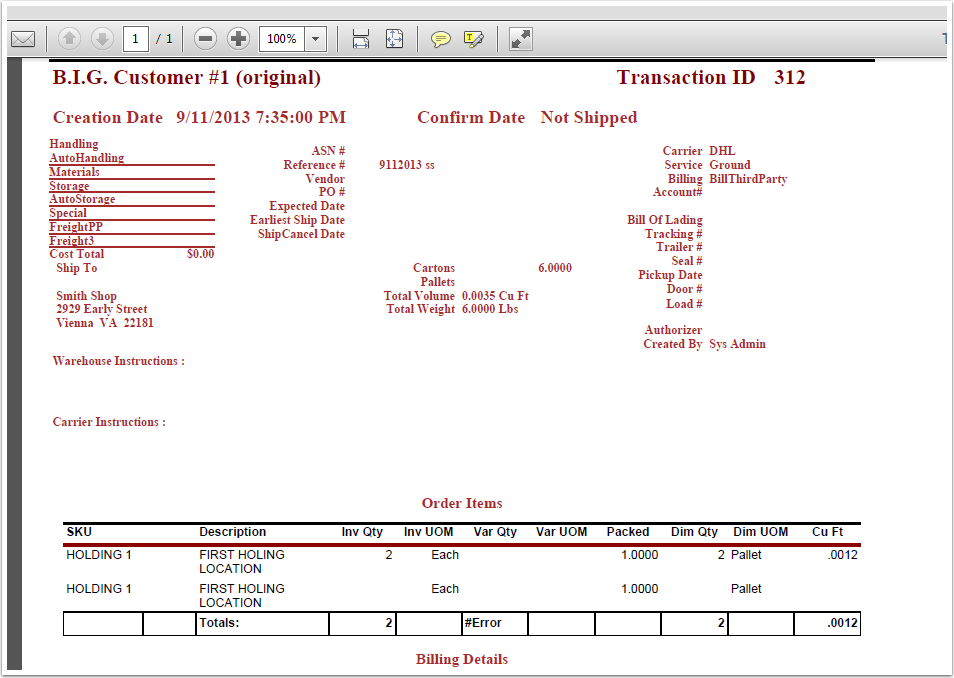
8.The Short-ship example Transaction #312.
1. Hover over the Print menu. From the drop-down menu select Transaction Report. The report will open on a computer as a PDF.
