Import |
  
|
Import |
|
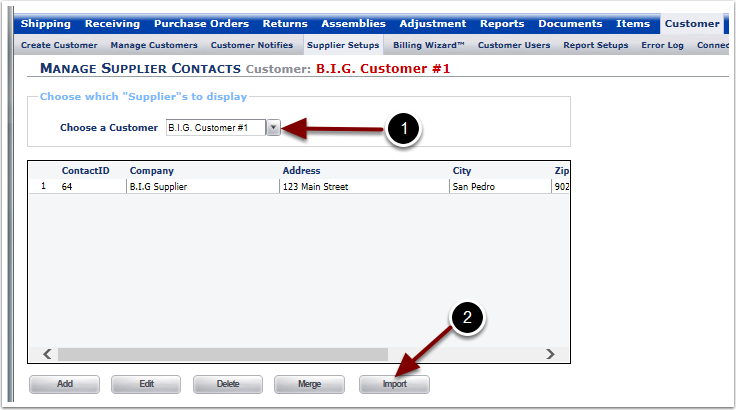
To Import a mass upload of Supplier Contact information for a Customer:
1.Select a Customer from the Choose a Customer drop down menu.
2.Select the Import button. The user is sent to the Import Contact Screen on the Shipping/Setups page.
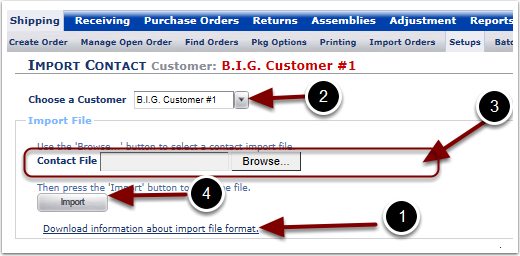
To perform a mass upload of Supplier Contact information the user must first create a Supplier Contact file and then import that file into the system
1.Click the Download information about import file format link to open up the Contact template in Excel. Complete the Contact template by following the instructions called out in the Excel file. Save the file as Text/Tab delimited file type.
Note: The Import Contact template is shared between importing Receiving and Shipping Contacts.
2.Select a Customer from the drop down menu.
3.Click the Browse button and select the flat file of contacts that you just created.
4.Click on the Import button to upload the contact file into the system.
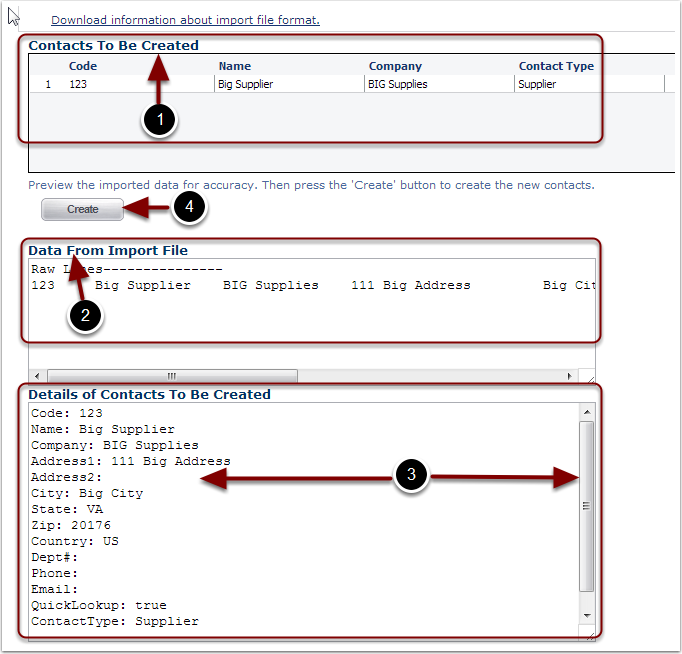
After selecting the Import button in the prior page, the user will see the Supplier Contact information from the file populated in the 3 following sections:
1.The Contacts To Be Created grid contains a preview of the file data mapped to the Contact field
2.The Data From Import File grid contains a preview of the raw file data
3.The Details of Contacts To Be Created grid contains a preview of the raw file data mapped to each specific Contact field
4.The user should verify that data is accurately populated. Select the Create button to create the Supplier Contact. If the data is incorrect, correct the data in the import file you just created and repeat the steps needed to Import the file.
Once the Supplier contact data has been uploaded, it can be Viewed as described at the beginning of Supplier/Setups section.