Manage 'MarkFor' Lists |
  
|
Manage 'MarkFor' Lists |
|
This screen requires you to pick a Customer to work with before proceeding. If you've come from Find Orders with a Customer selected, that customer will be used here, unless you select someone different.
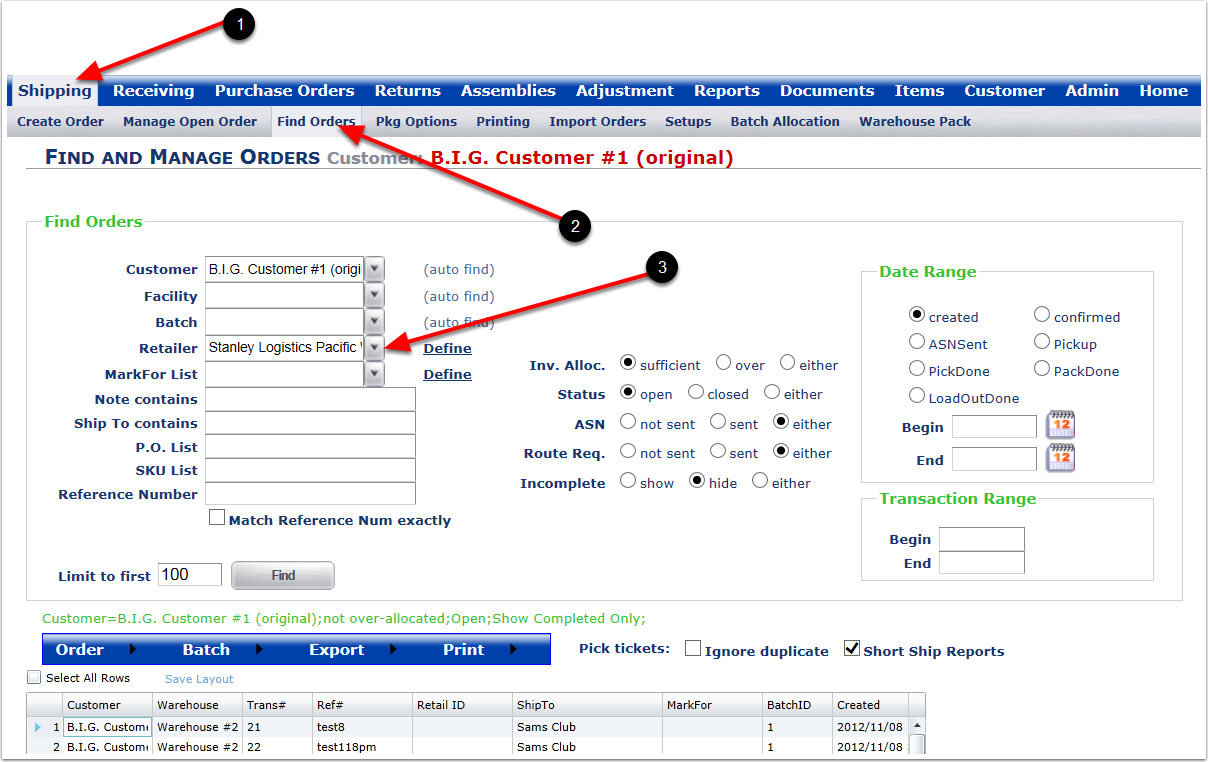
In the Find And Manager Orders Screen, the Retailer can define the search parameters when looking for orders:
1.Select the Shipping Tab.
2.Select the Find Orders Tab.
3.Select a Retailer from the Retailer dropdown menu list (Example: Stanley Logistics Pacific West).
MarkFor Lists are used to help customers to maintain various ID's for quick selection. For example, if each day of the week you ship to the same destinations for a customer, you could create five lists, one for each day of the week. A "MarkFor" Lists is used in conjunction with the Find Orders screen. This feature allows the user to "flag" or "mark" orders as a designated group.
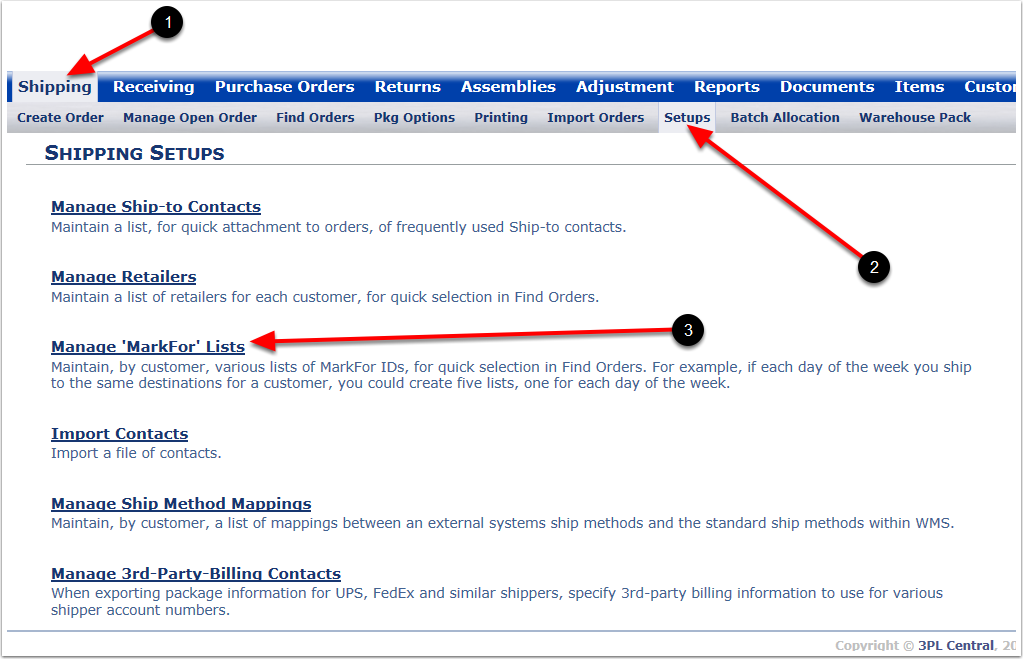
To Manage "MarkFor" Lists:
1.Select the Shipping Tab.
2.Select the Setups Tab.
3.Select Manage "MarkFor" Lists to make changes to MarkFor IDs in the Find Orders section of the system. The system will go to the Manage Retailers screen.
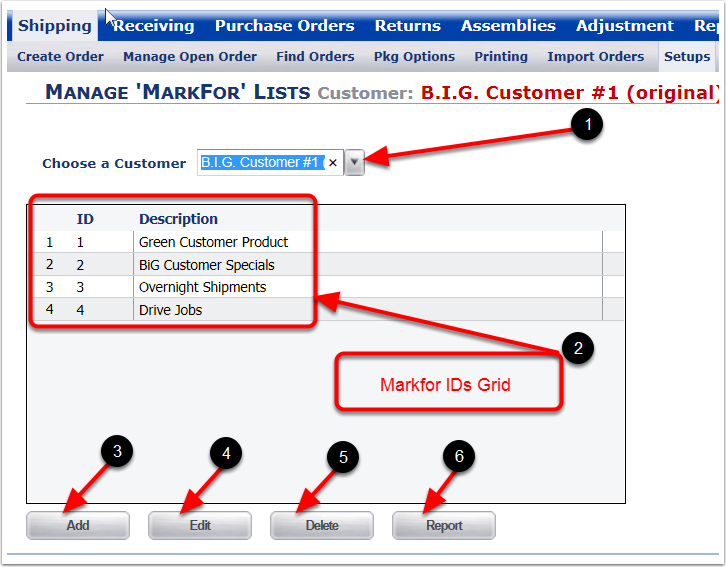
To Add, Edit, Delete or run a Report for a MarkFor ID:
1.Select a customer from the Choose a Customer dropdown menu.
2.In the grid the ID number will be generated by the system when creating a new MarkFor ID. The Admin user can create an ID number and Description.
3.Click Add button to create a new MarkFor ID.
4.Click Edit button to edit a MarkFor ID.
5.Click Delete button to delete a MarkFor ID from the system.
6.Click Report button allows user to print the report.