Batch Item Update |
  
|
Batch Item Update |
|
The Batch Item Update guide walks through general steps used to make various changes to Items that were created in the system. By the time you are ready for this Batch Item Update section it is assumed you have already created Items manually in the system or by an import template. There are some limitations to changes that can be made through the Batch Item Update process. Contact support@3plcentral.com if you do not see a specifc change listed in this guide.
In this Batch Item Update section, you will learn how to:
•Change a SKU name
•Enable fields that were not previously active
•Allows for the activation or deactivation of Movable Unit, Haz-Mat and other fields. This is a part of the Movable Unit Setup when Movable units are not manually created through the Item, create Item process but through the Item Import process.
To begin the Batch Item Update process:
1.Navigate to Items found in the menu bar
2.Select Batch Item Update from the submenu bar or click on Batch Update Items from an Electronic file from the Items screen.

The Batch Item Update process begins with exporting the Items for a customer to a file format to make changes:
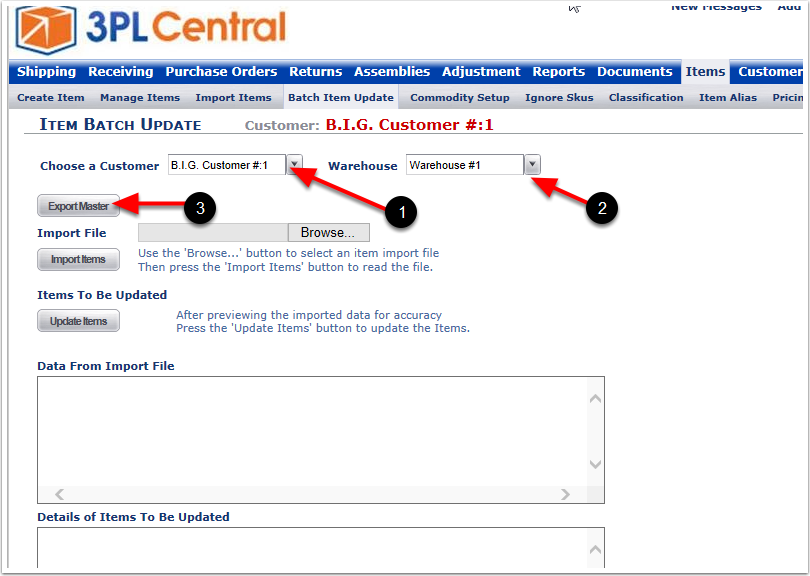
1.Select a Customer from the dropdown menu.
2.Select a Warehouse (if there is more than one Warehouse in the database).
3.Click on Export Master at the system will generate the data into a file that can be opened or saved to your computer.
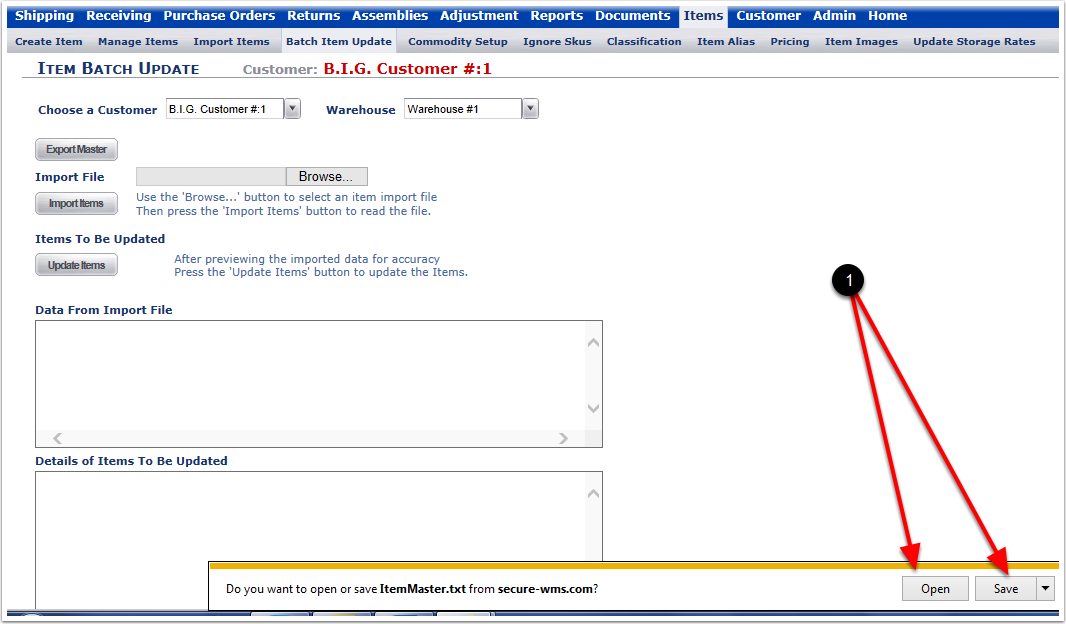
1. Open or Save the file (for this example we will save the file in a .txt format).
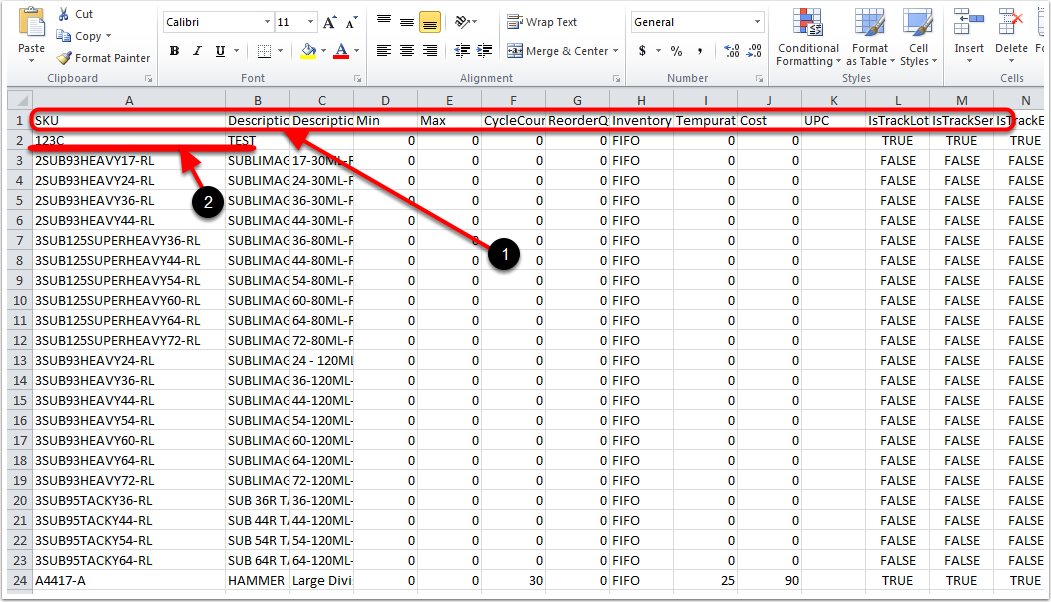
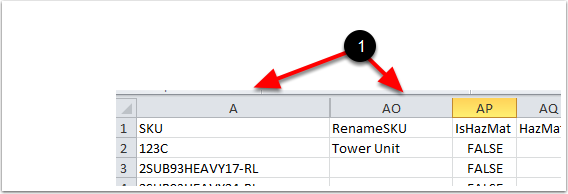
This is a view of the .txt file format opened in Microsoft Excel. All fields related to an item can now be viewed and edited, and those changes can then be saved
1.All of the item field headers.
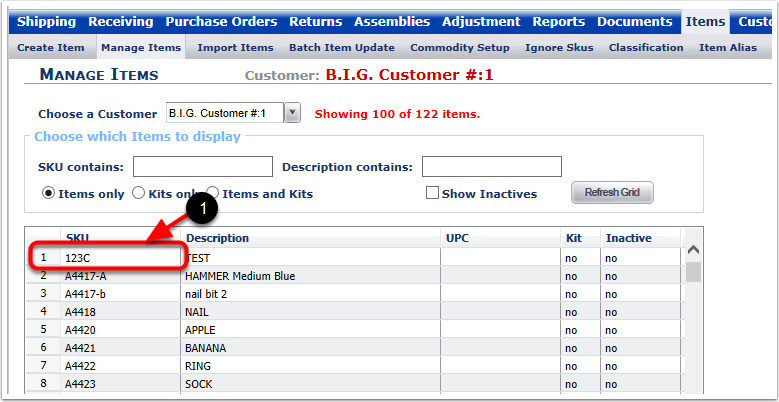
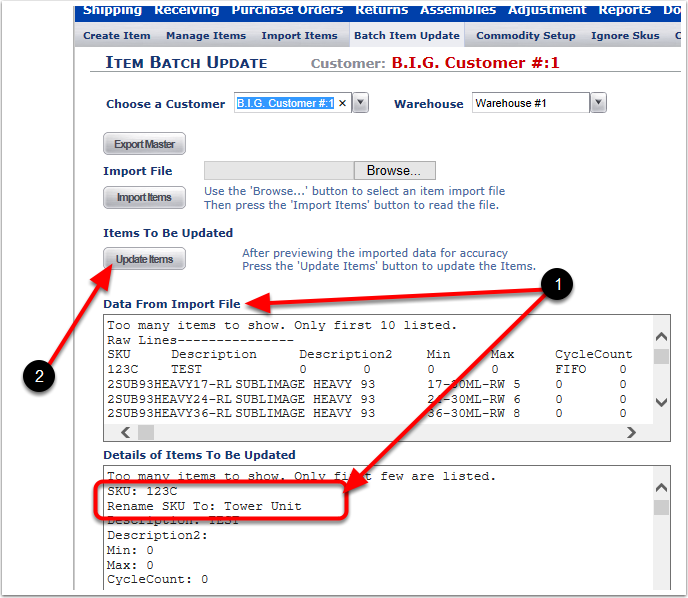
2.In this example, we will change SKU 123C showing a description TEST.
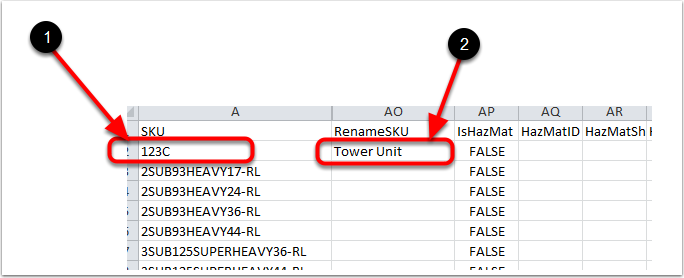
One of the most common uses of the Batch Item Update is the changing of the SKU name. The History of a SKU that has a name change will remain (i.e. the inventory will remain with the new SKU name).
1.The original SKU in Column A.
2.The new SKU name in Column AO.
Here is a view of the Item before the Batch Item Update is complete.
1. The SKU with its original name.
After making all of the changes, the header rows will remain and the file will be saved as Text Tab Delimited.
1. For this examples Columns B - AN are hidden so the columns A and AO an be reviewed together.
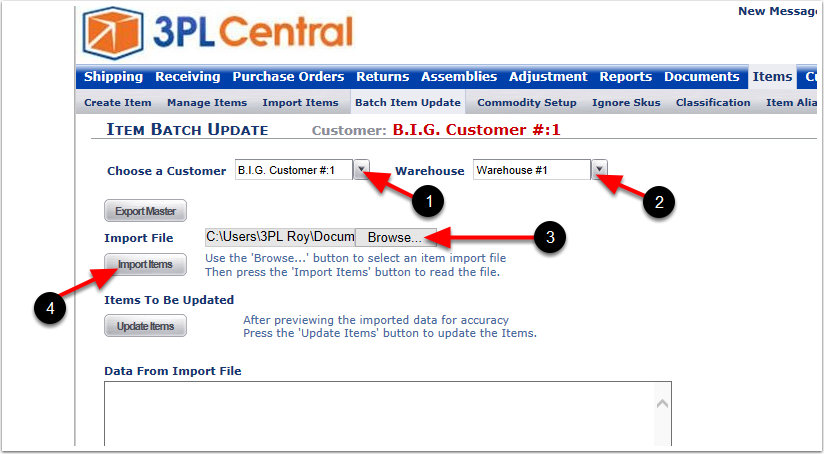
To begin the Batch Item Update process:
1.Select a Customer from the dropdown menu.
2.Select a Warehouse from the dropdown menu.
3.Browse and select the Text Tab Delimited file that contains the changes to the SKU 123c.
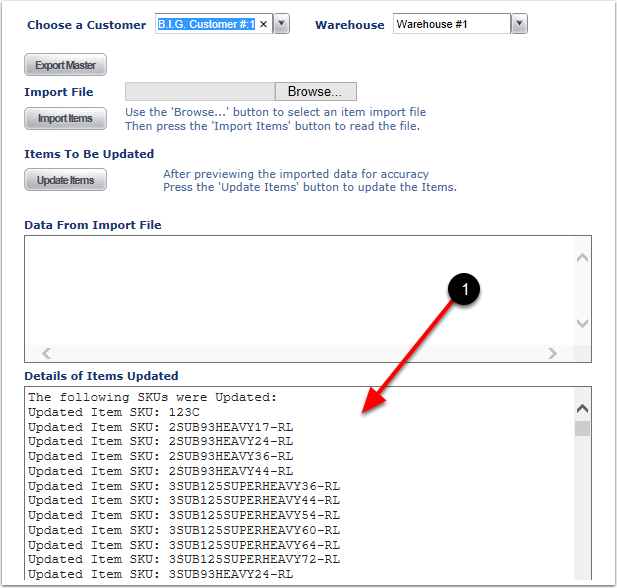
4.Click on Import Items to bring the file in with the changes. The details of the file will be displayed below.
1.You may review the import details.
2.If it all looks good, click on Update Items.
1. Batch Item Update is completed.
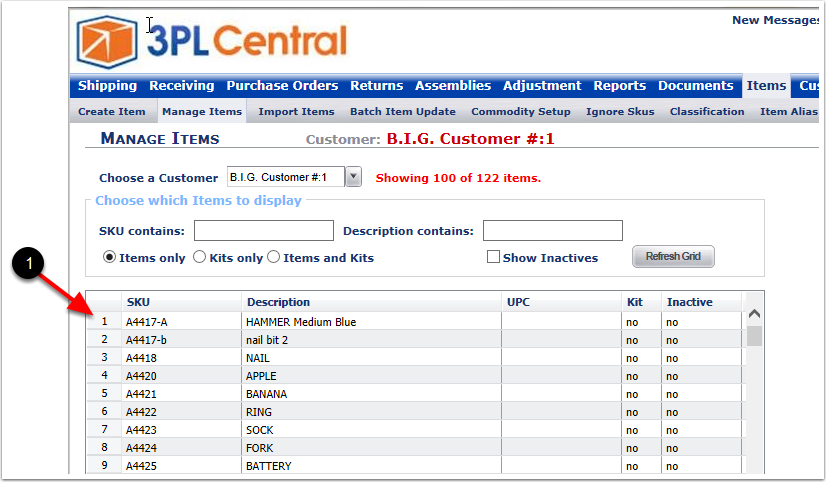
Changes can be viewed in the Items - Manage Items screen.
On the Manage Items screen:
1. The old SKU name 123c is no longer visible.
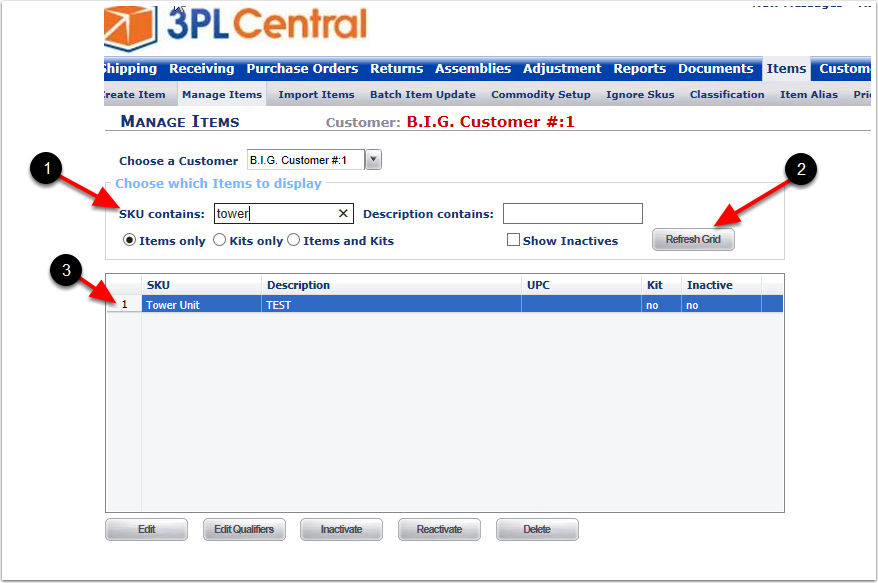
1.Type in the new SKU name (Example: Tower).
2.Click on Refresh Grid to bring up the SKU.
3.The new SKU name Tower Unit is now showing. The old SKU name is gone but the description and all other attributes remain.
Here's a line from the Stock Status report is showing that no other attributes have changed.
