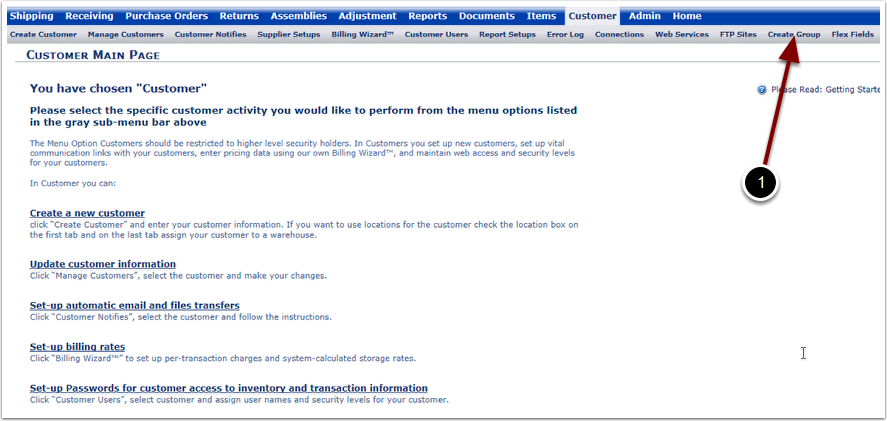
The Create Group menu option provides a way for users to allow your customers to view other customer or divisional data through Cross Customer Visibility Grouping. Once a Group has been created, refer to the Customer/Customer Users guide to assign the Group to a Customer User who will then control the access of the group. This will control the ability to view data, orders, reports, etc.
1. Select the Create Group menu option and the user is sent to the Customer Group page.
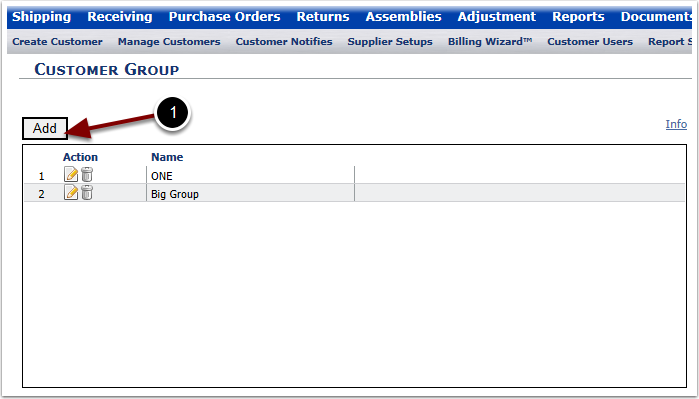
The Customer Group page allows a user to Add a Customer Group.
1. To Add a Group, select the Add button and you will be taken to the Customer Group page.
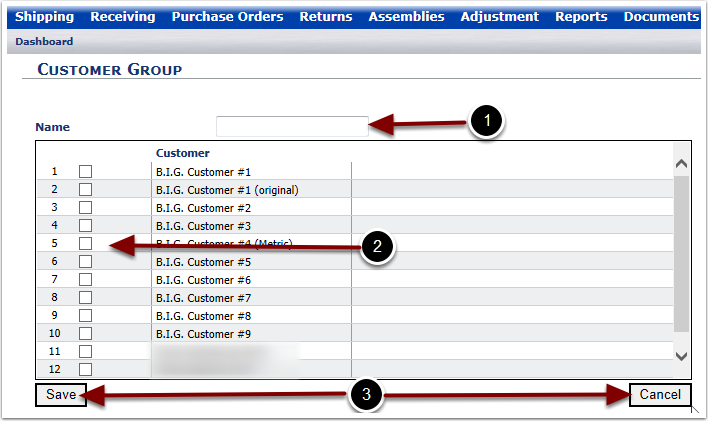
To Add a Customer Group
1.In the Name field type in the Group Name.
2.In the grid, place a check in the boxes for Customers that should be in the group. Leave the box empty if a Customer should not be a part of the group.
3.Select Save to save the modifications made, or Close to return to the Customer Group page.
The Customer Group page allows a user to View or Edit the contents of a Customer Group.
1. To View/Edit a Group, select the Edit icon (paper and pencil) in the Action column and you will be taken to the Customer Group page.
![]()
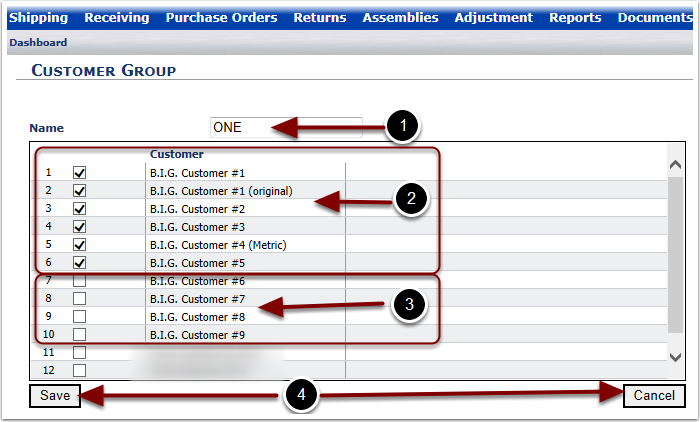
Selecting the Edit icon on the previous page displays the Customer Group page listing all Customers, with checkmarcks in the Customers in the selected Group.
1.View the Group Name field.
2.The Customers with a check mark are part of the selected group.
3.The Customers without a check mark are not part of the selected group.
Edits can be made by Checking or Unchecking the Customers in the selected group.
4.Select Save to save the modifications made, or Close to return to the Customer Group page.
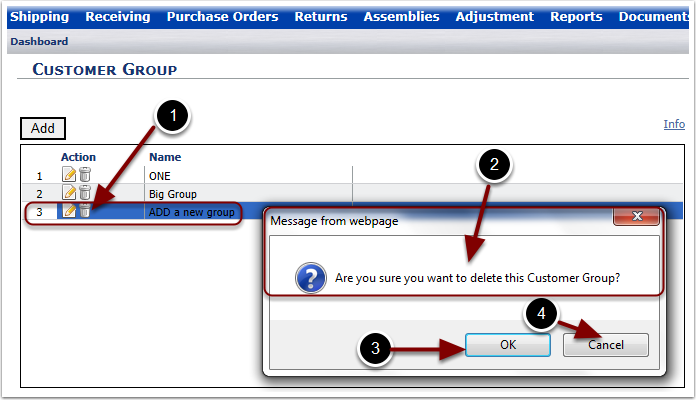
The Customer Group page also allows a user to Delete a Customer Group.
1.To Delete a Group, select the Delete icon (trashcan) in the Action column.
2.The user is prompted with a message asking if you are sure that you wish to delete this Group.
3.Select OK to continue with deleting the Group.
4.Select Cancel to cancel deleting the Group.
