Flex Fields |
  
|
Flex Fields |
|
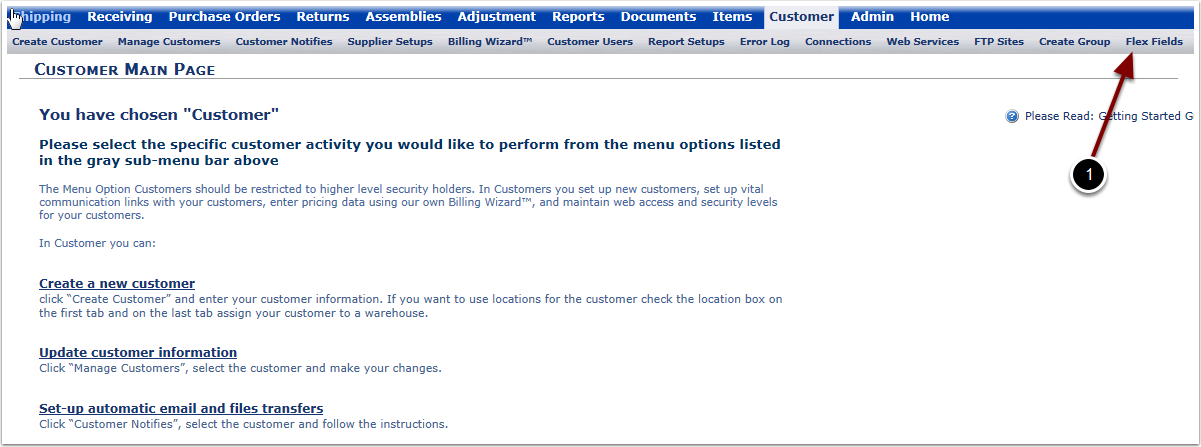
The Flex Fields menu option provides a way for users to provide additional fields captured for Transactions.
1. Select the Flex Fields menu option the Flex Fields page.
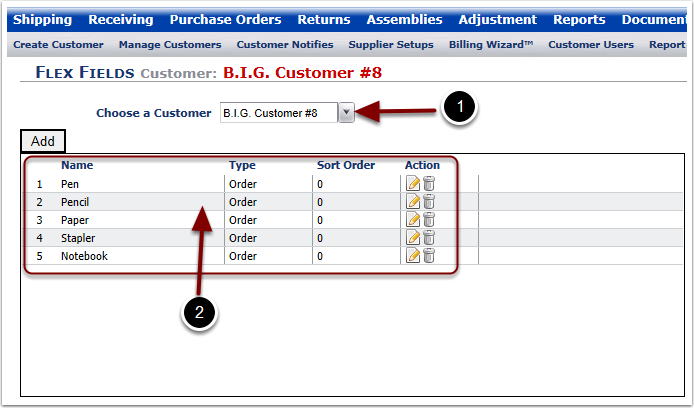
Once the Flex Fields link was selected in the previous page, View Flex Fields for a Customer:
1.Select a Customer from the Choose a Customer drop down menu.
2.Any Flex Fields that exist for the Customer will be displayed in the results grid.
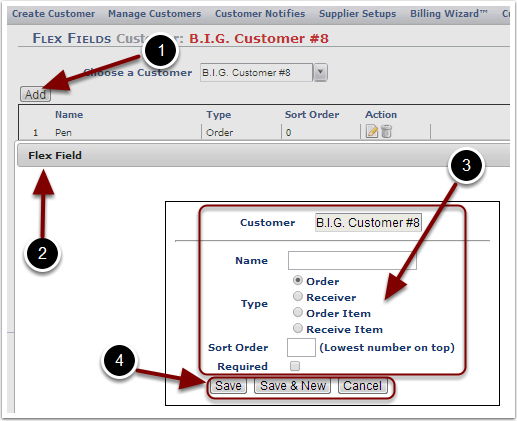
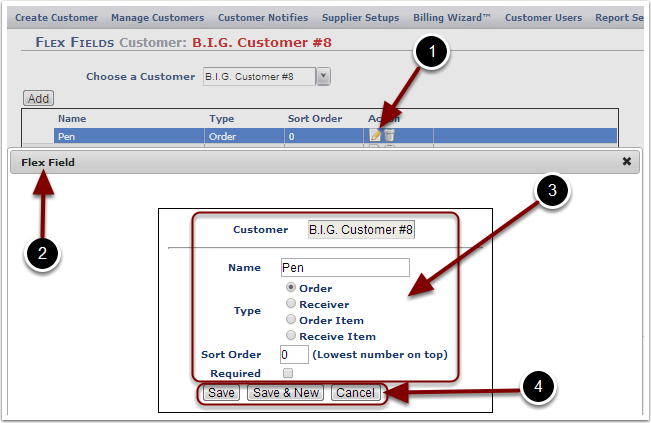
To Add a new Flex Field:
1.Select the Add button.
2.The Flex Field Pop Up Box will display.
3. Add the contents of the Flex Field as required.
a.View Customer as chosen in the Flex Fields Page.
b.Add the Flex Field Name.
c.Add the Flex Field Type: Order, Receiver, Order Item, Receiver Item.
d.Add the Sort Order for the Flex Field. Fields with Zero (0) will be at the top of the list.
e.Add the box to indicate if the Flex Field is Required.
4.Select Save to Save the new Flex Field and return to the Flex Fields Page. Select Save & New to Save the new Flex Field and Create a New Flex Field. Select Cancel to not Save the New Flex Field and return to the Flex Fields Page.
To Edit an existing Flex Field:
1.Highlight the Flex Field, then click the Edit icon to edit it.
2.The Flex Field Pop Up Box will display.
3.Edit the contents of the Flex Field as required.
a.View Customer as chosen in the Flex Fields Page.
b.View/Edit the Flex Field Name.
c.View/Edit the Flex Field Type: Order, Receiver, Order Item, Receiver Item.
d.View/Edit the Sort Order for the Flex Field. Fields with Zero (0) will be at the top of the list.
e.View/Edit the box to indicate if the Flex Field is Required.
4.Select Save to Save the Edits and return to the Flex Fields Page. Select Save & New to Save your changes and Create a New Flex Field. Select Cancel to not Save the Edits and return to the Flex Fields Page.
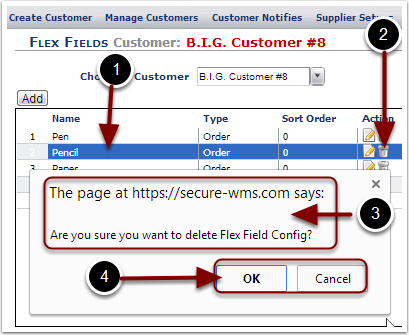
To Delete an existing Flex Field:
1.Highlight a Flex Field to Delete.
2.Select the trash can icon to Delete the Flex Field.
3.The user is prompted with a message asking if you are sure that you wish to Delete this Flex Field.
4.Select OK to continue with deleting the Flex Field and the Flex Field will be removed from the results grid. Select Cancel to stop the Delete action and return to the Flex Fields Page.