Import Locations |
  
|
Import Locations |
|
If we’re going to add multiple Locations and we’d rather do import of Locations, we can use a Location Import Spreadsheet (Note: The Location Import Spreadsheet Template can be requested from Support@3PLCentral.com).
1.Details on how to complete the spreadsheet.
2.Minimum required field to be completed.
3.Locations to be created (The 4 Location rows in our example cover a few different scenarios for creating Locations).
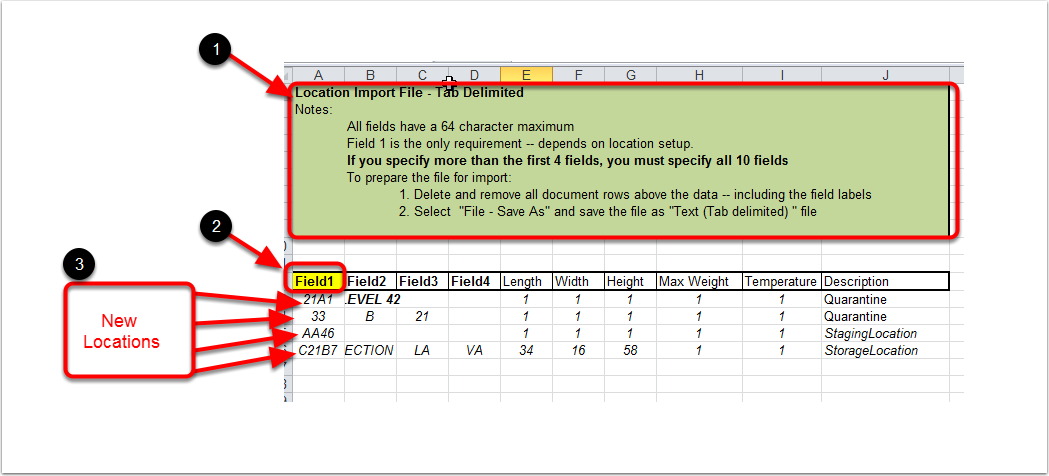
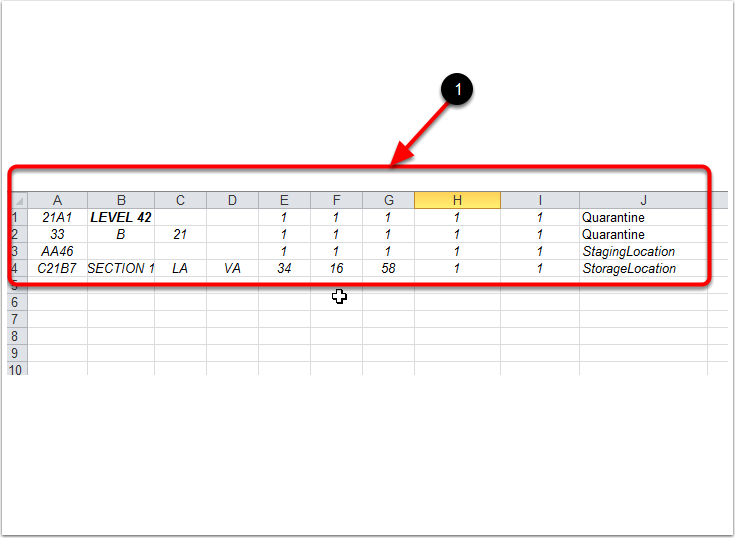
1. Listed are all of our Locations for import. Per the import instructions, deleted the header rows. And now save the import file as Text (Tab delimited). Note: When creating new locations, the automatic default for location type will always be StorageLocation unless you list a specific Location type on the import sheet.
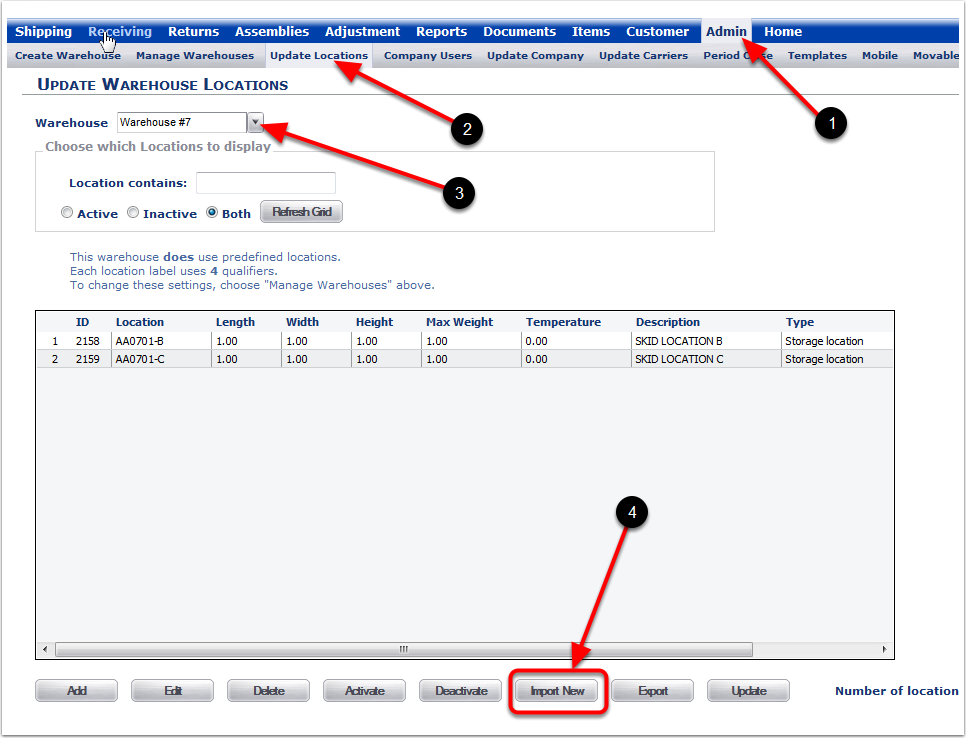
After complete the Location Import Spreadsheet:
1.Choose the Admin Tab.
2.Choose the Update Locations Tab.
3.Select a Warehouse for the Locations to be added.
4.Choose the Import New button and the system will take you to the Import Locations screen.
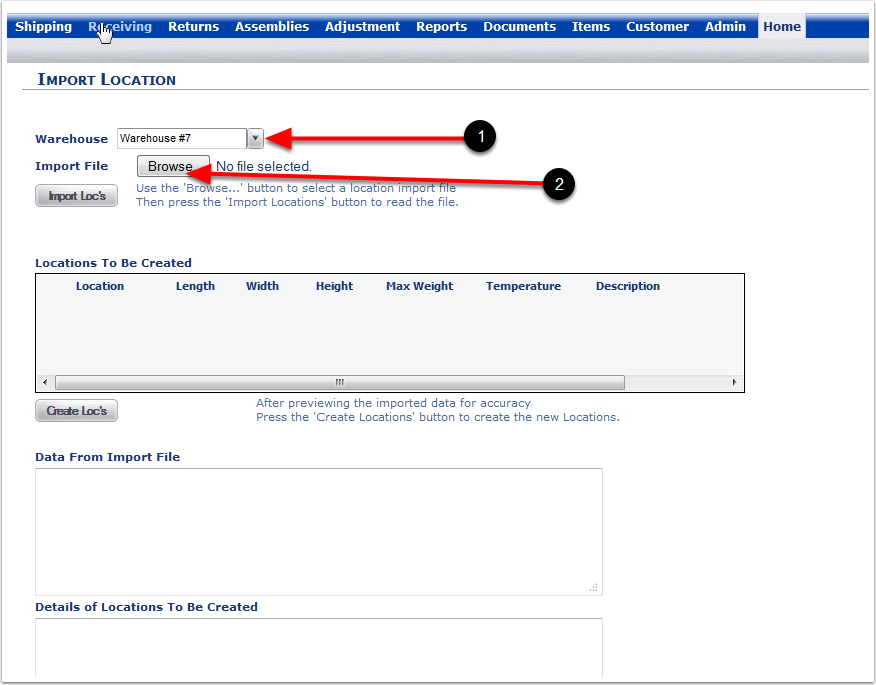
1.Select a Warehouse (The system default is the Warehouse you previously selected on the Update Warehouse Locations screen).
2.Choose the Browse button to locate your Location Import Spreadsheet. This will bring up your computer's Open File dialog.
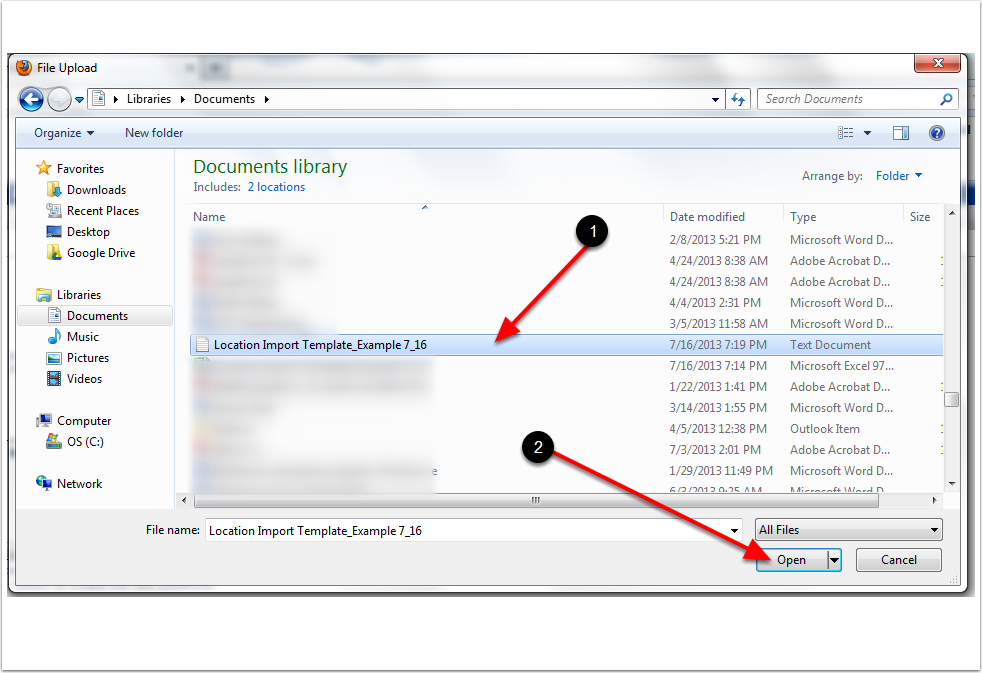
1.Select the Location Import Spreadsheet you made earlier.
2.Choose Open (Open is the selection for a Windows 7 OS. Other systems may vary for a file selection).
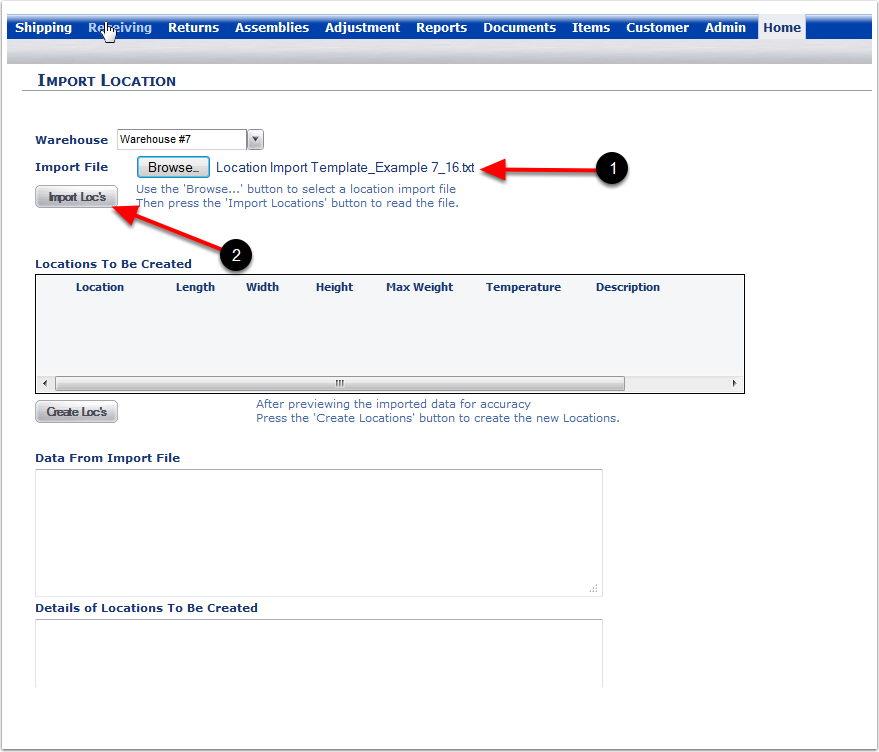
1.The Import File name should now appear next to the browse button.
2.Choose the Import Loc's button.
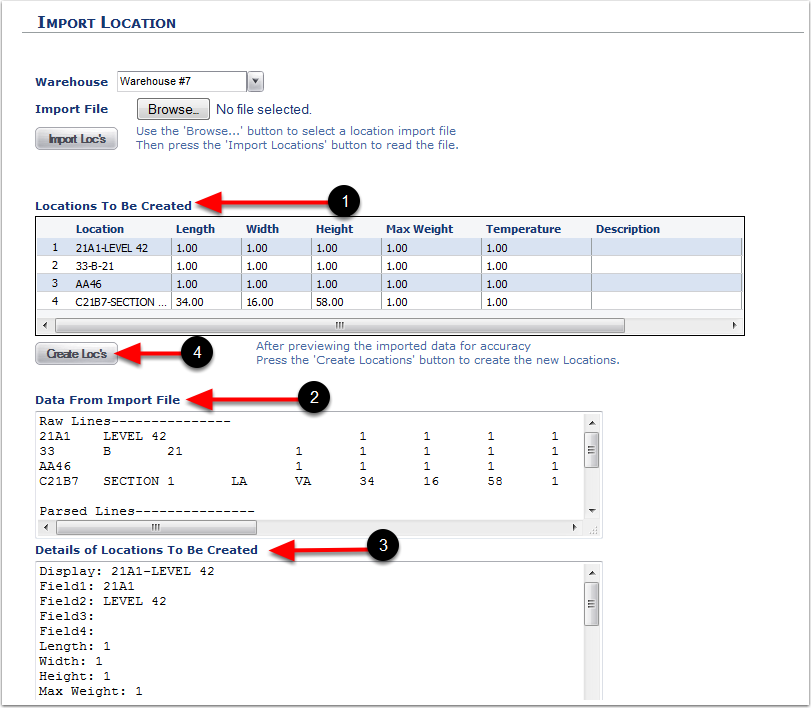
1.Locations To Be Created is the name of the grid showing the content of your import file, as it was read by our parser.
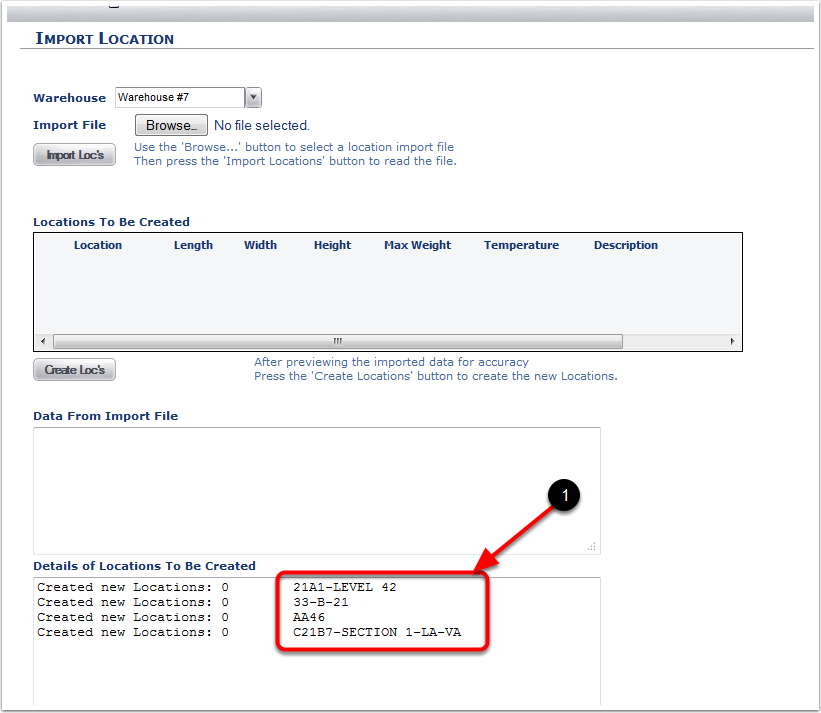
2.Data From Import File shows raw lines of data from the import file.
3.Details of the Locations To Be Created shows that same information in a somewhat more readable format.
4.If all of the data looks correct, choose the Create Loc's button. This will import the New Locations.
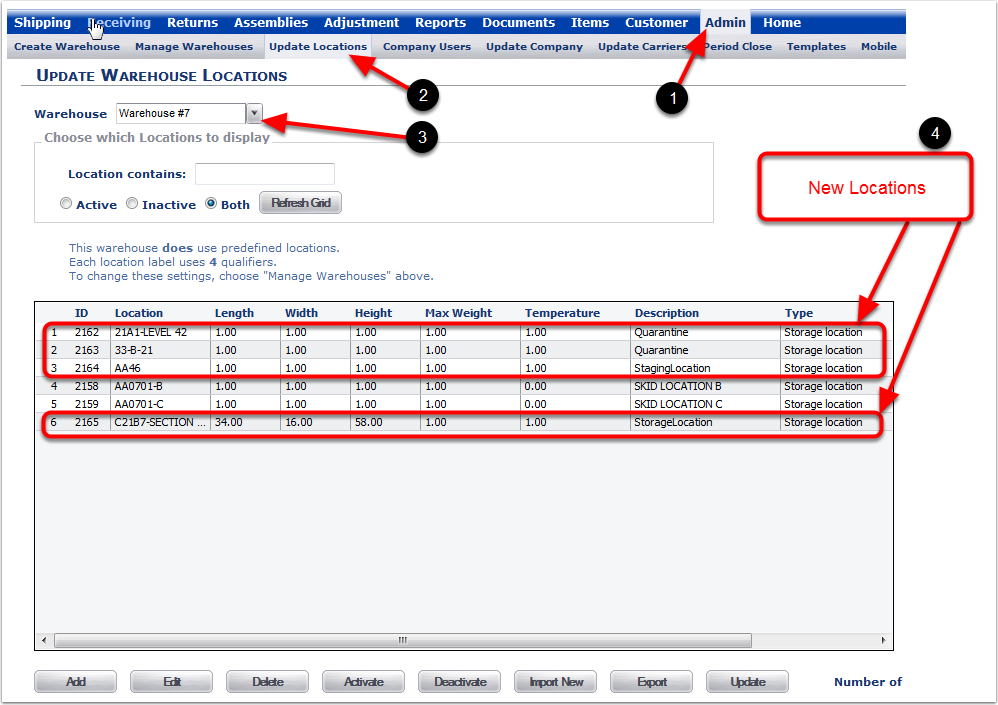
1. Details on New Locations.
To view the New Locations:
1.Choose the Admin Tab.
2.Choose the Update Locations Tab.
3.Select the Warehouse that has the New Locations created from the File Import.
4.The New Locations.