Export and Update Locations |
  
|
Export and Update Locations |
|
Exporting Locations will allow you to make changes to multiple Locations and import those changes back into your Warehouse.
To Export Multiple Locations:
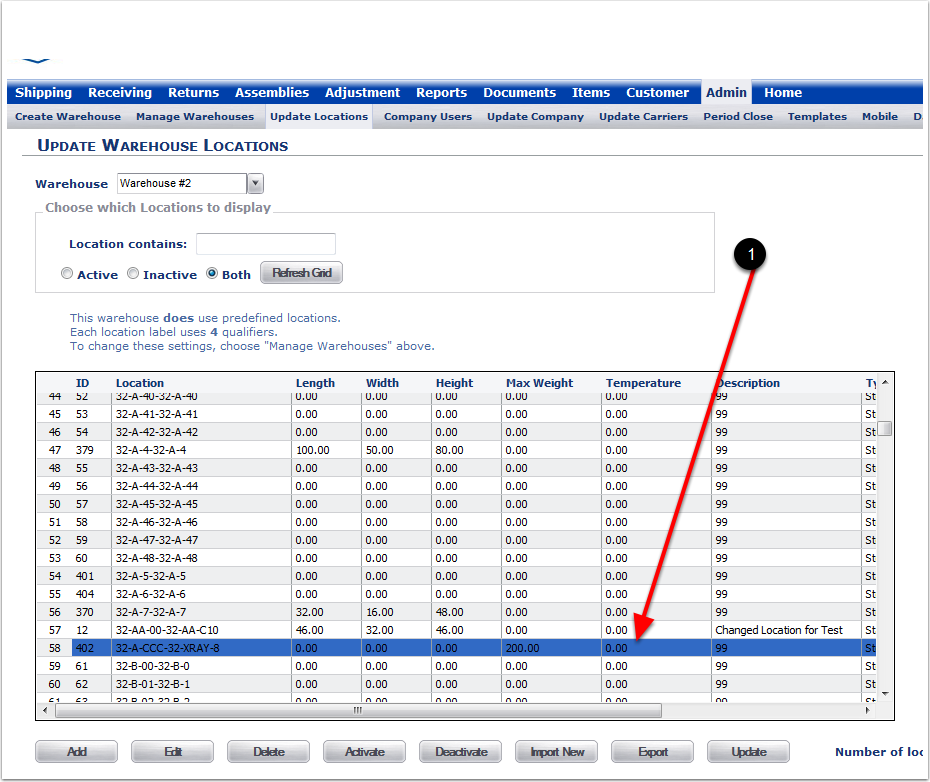
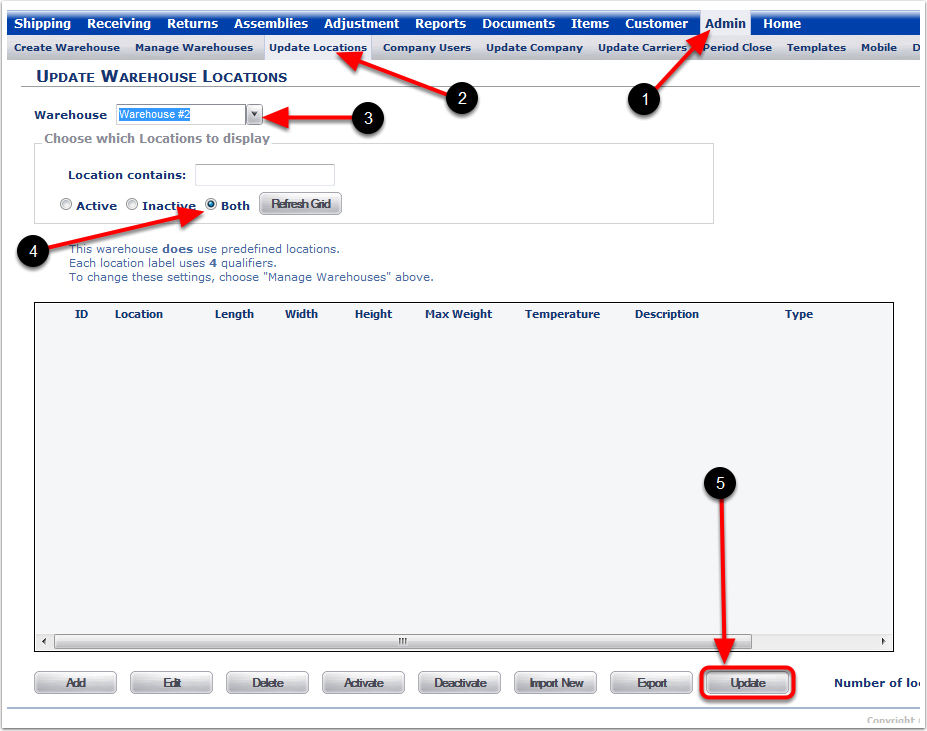
1.Choose the Admin Tab.
2.Choose the Update Locations Tab.
3.Select a Warehouse.

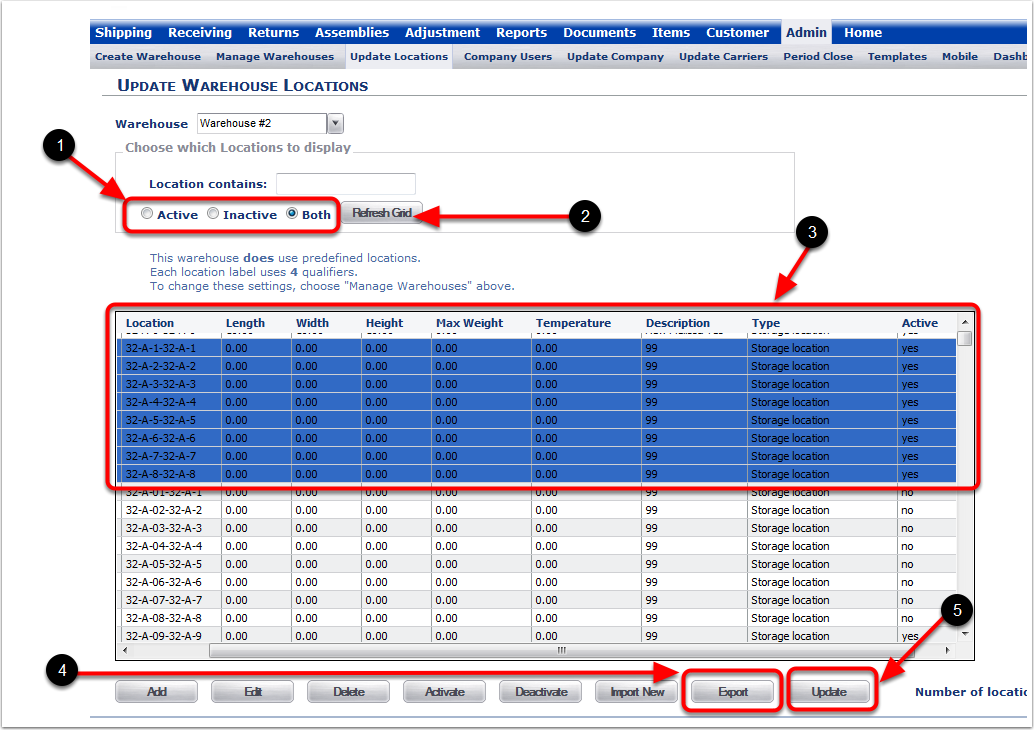
1.Choose Active, Inactive or Both to find the Locations for export.
2.Click the Refresh Grid button.
3.Highlight the Locations that will be exported.
4.Click the Export button and the system will take you to the file export pop-window (Windows 7 OS - Other operating systems may vary for a file export).
5.The Update button feature will play a role in this update at the end of the Export steps.
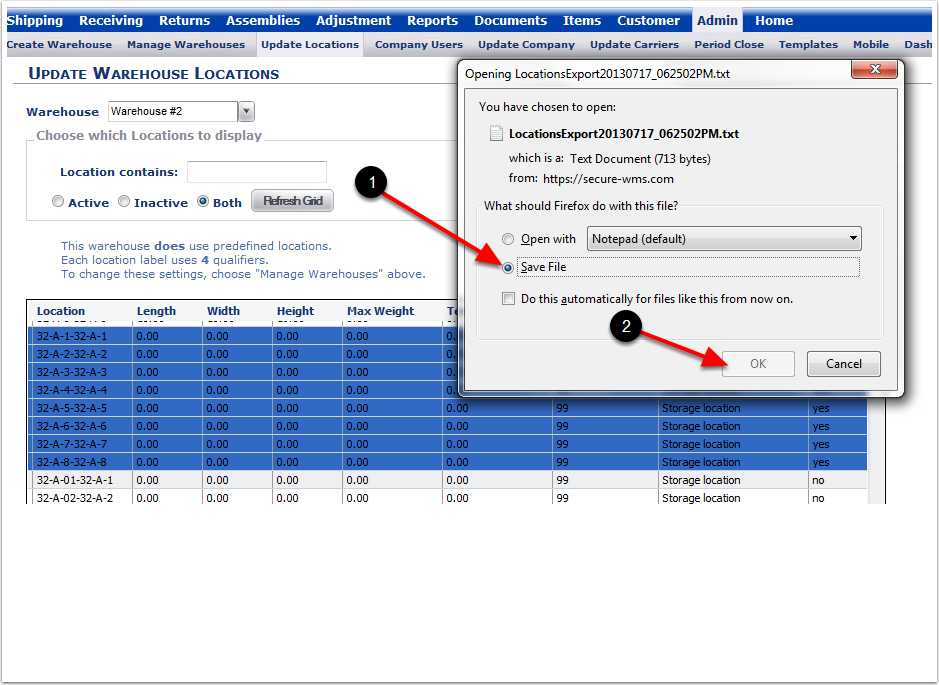
To save the exported Locations:
1.Choose Save.
2.Choose OK (the OK button will be active after you select the Save File).
1.After opening the file in Excel, the Text Import Wizard - Step 1 of 3 pop-up window will appear.
2.Choose the Finish button.
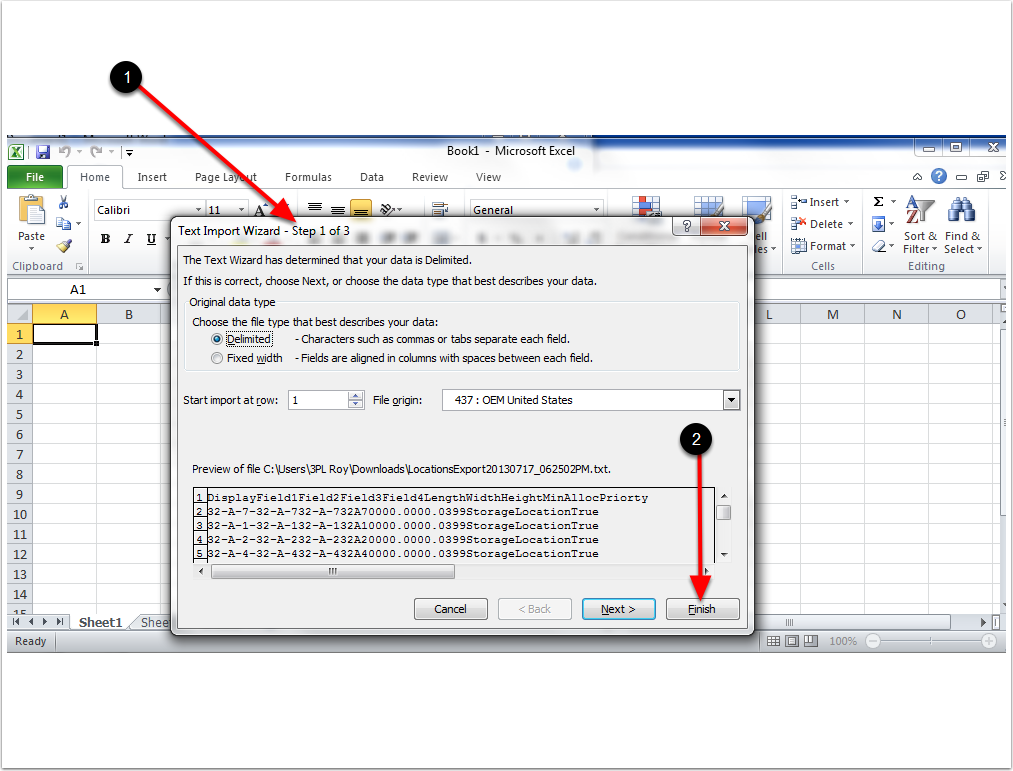
After choosing Finish button in the Text Import Wizard, you will see the Location Data Fields. You can make changes to the fields.
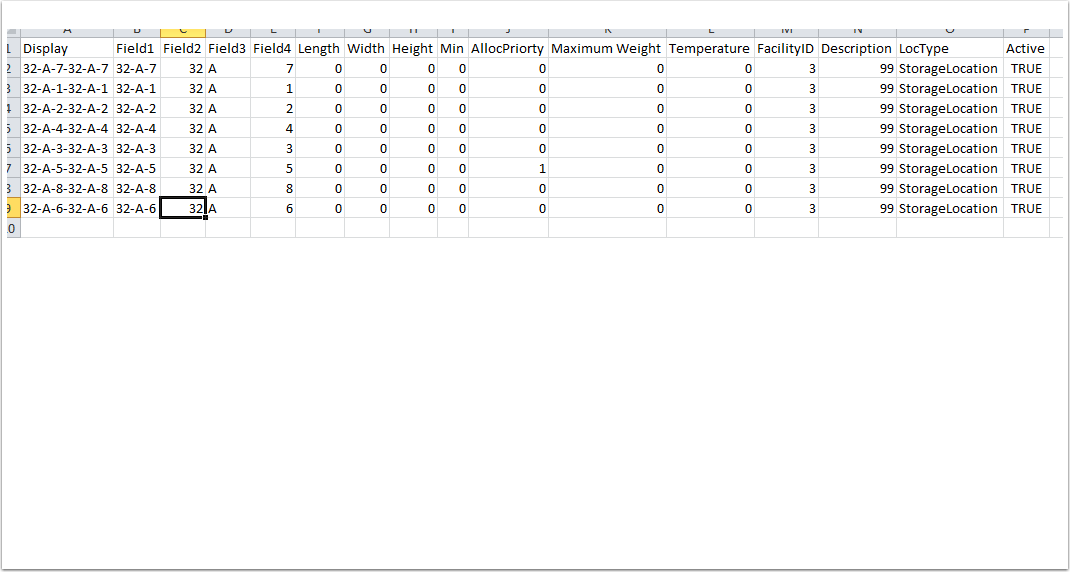
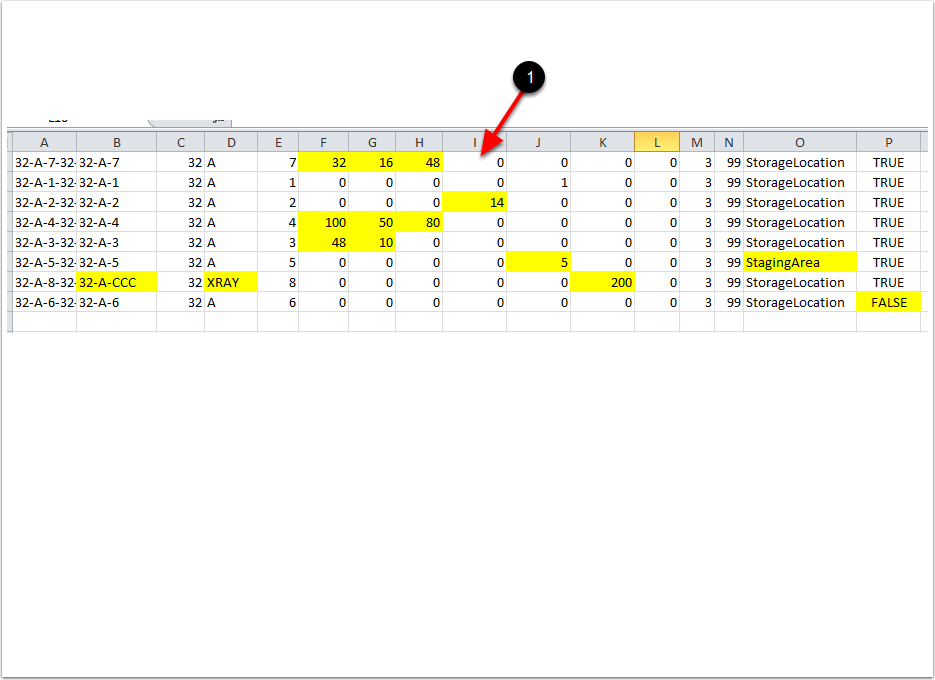
1. Below are some highlighted changes. This is an example of what will be imported back into the system. Delete the header row and save the file as Text (Tab delimited). Name the file as you'd like.
To import and exported file of Locations that were edited, you will import the file choosing the Update button by doing the following:
1.Choose the Admin Tab.
2.Choose the Update Locations Tab.
3.Select a Warehouse.
4.Choose Both to prepare for importing the edited file.
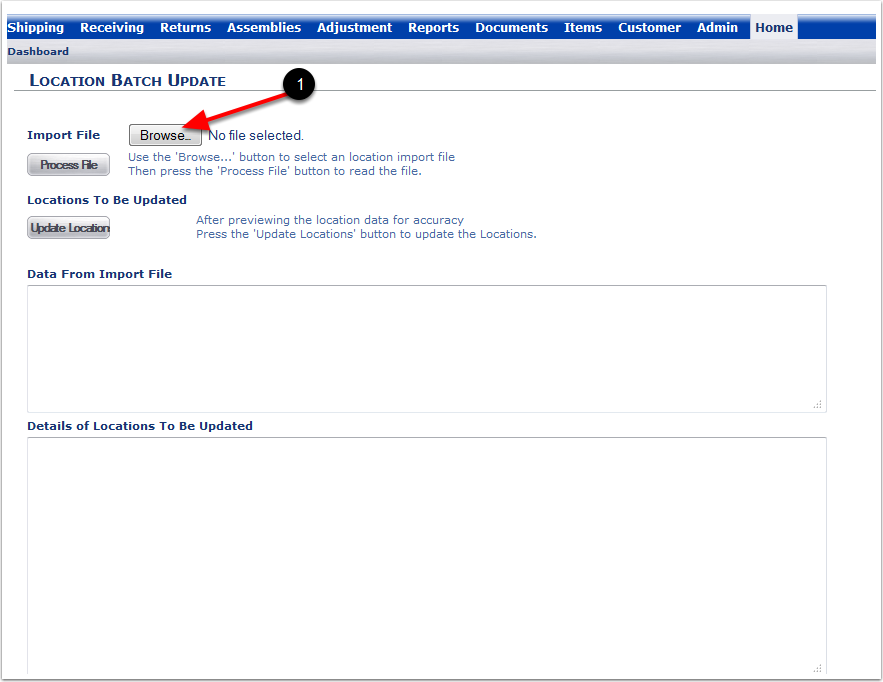
5.Choose the Update button and the system will take you to the Location Batch Update screen.
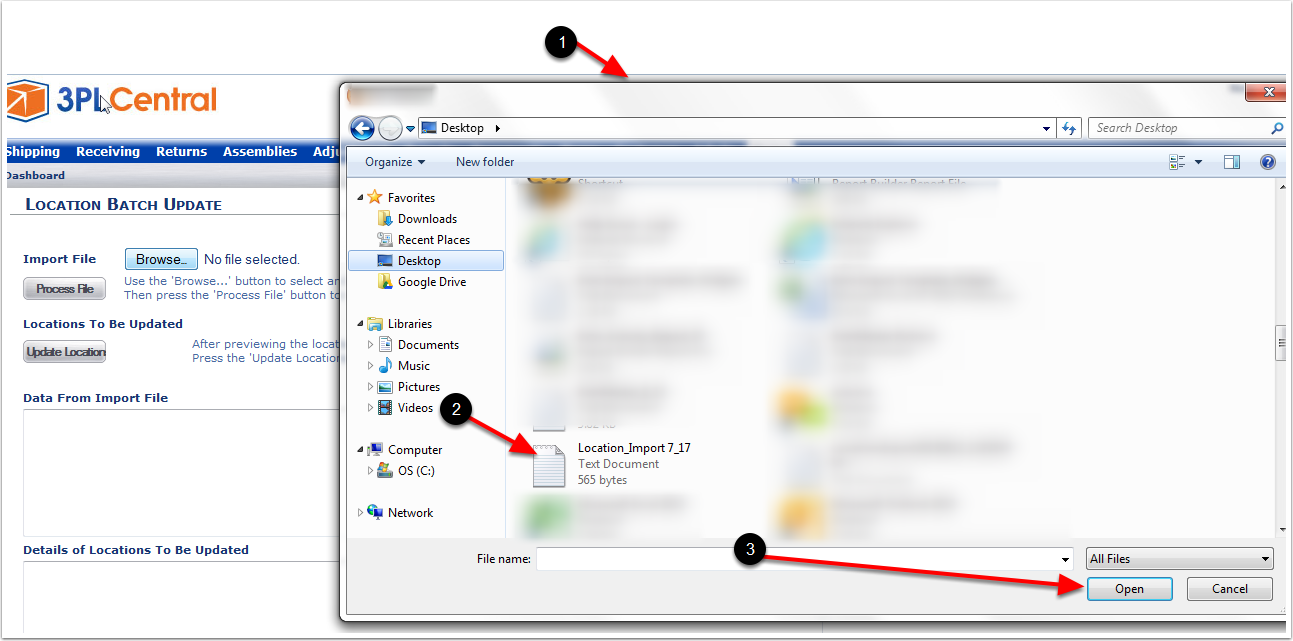
1. To import the edited file: choose the Browse button to locate the file. This will bring up your computer's file window.
1.File pop-up window.
2.Choose the Location file.
3.Choose Open (Open is the selection for a Windows 7 OS. Other systems may vary for a file selection).
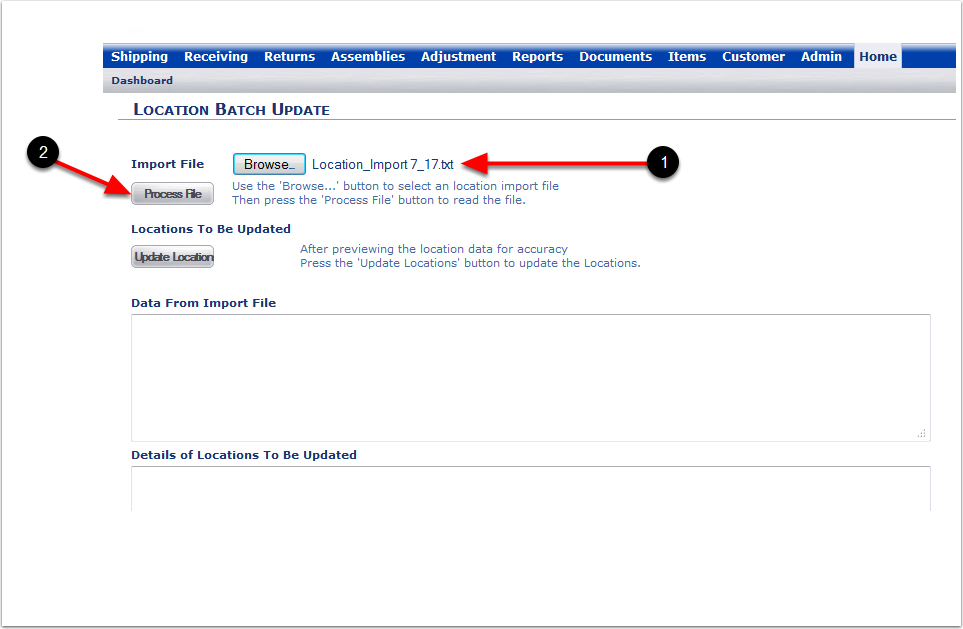
1.File name you picked to upload.
2.Choose the Process File button to upload the file.
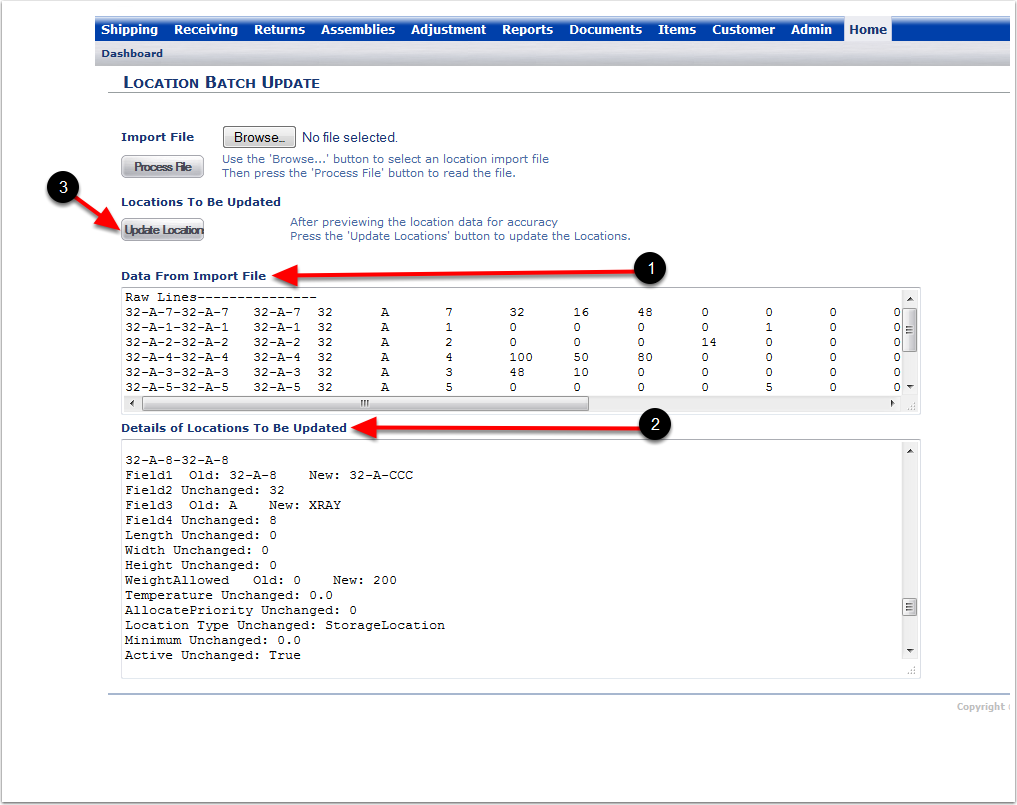
1.After choosing Process File, the Data fields (Raw Lines) will populate.
2.Details of the Locations to be Updated.
3.Choose the Update Location button after you've reviewed the data fields to upload the changes to the Locations.
1. After choosing Update Locations, the Success pop-up window will appear.
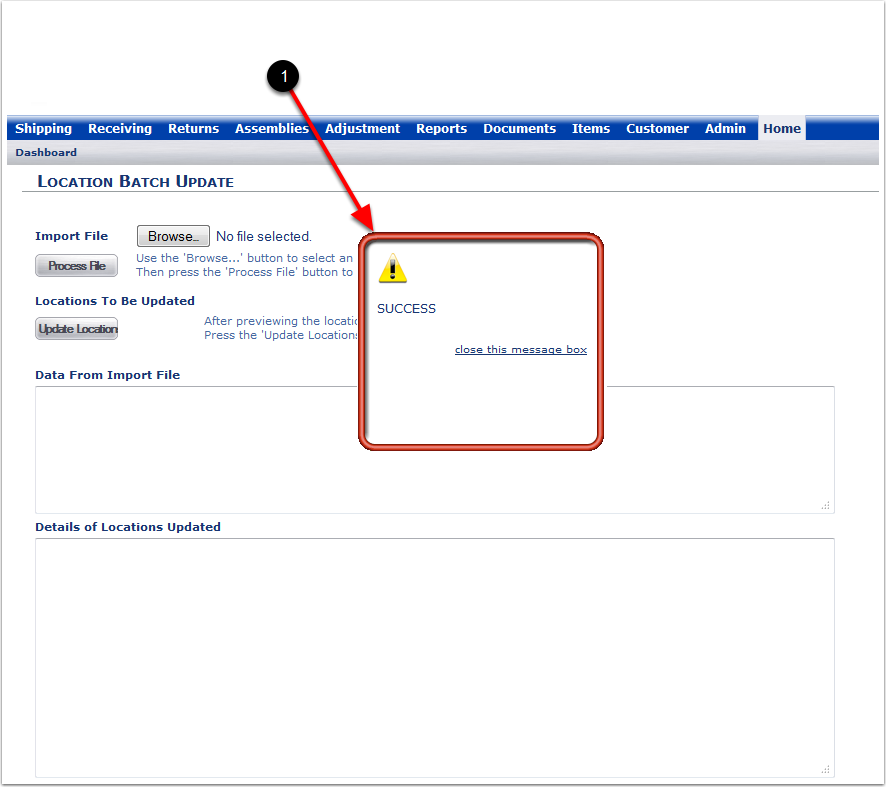
1. After the Update, you can look at one of the Location examples that have been changed. 32-A-8-32-A-8 has been changed and is now 32-A-CCC-32-XRAY-8.