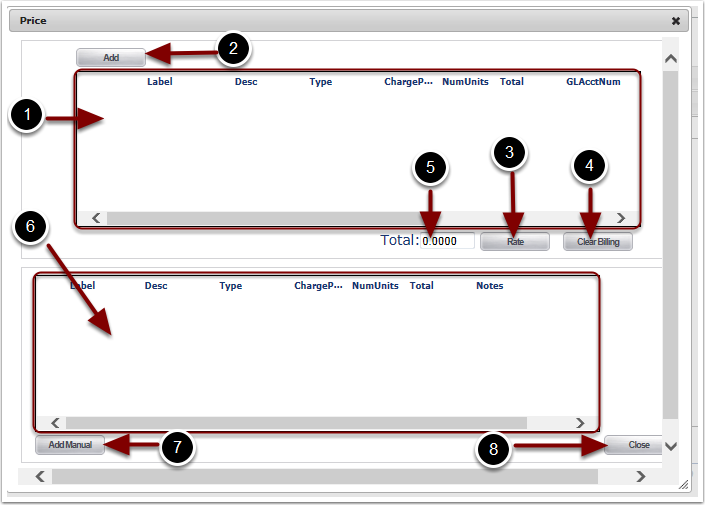
If you select the Edit button on the prior page, the Price pop up tab screen will display with no charges.
1.View the Saved Charges grid
2.To manually Add Billing charges to the Receiver select the Add button. See the following page for an example.
3.To apply pre-defined auto Billing charges, select the Rate button
4.Select Clear Billing button to remove existing Billing charges in the Saved Charges Grid
5.The Total value shows the Total dollars of Billing charges for the Receiver
6.The Bottom grid shows auto calculated Billing charges for the Receiver
7.Select the Add Manual button to Add the manually defined charges into the Price & Confirm section of the Receiver
8.Select the Close button to return to the Price & Confirm section without saving any Billing charges

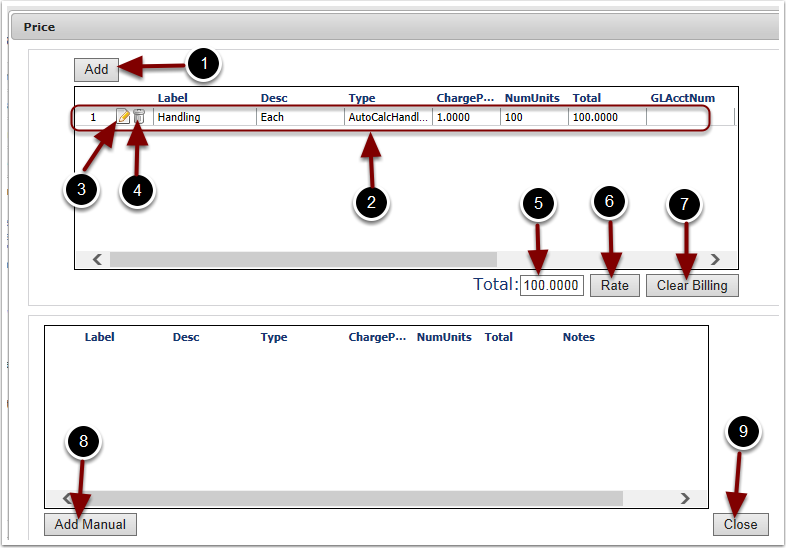
Below is an example of the Price pop up with an existing charge:
1.Select the Add button to define the charge details.
2.View existing charge details in the Saved Charges grid.
3.Select the Edit button to Edit details of an existing charge.
4.Select the Trash Can icon to delete an existing charge.
5.View the Total charge amount in the Total box.
6.Select the Rate button to apply Auto Billing charges defined in the Billing Wizard™.
7.Select the Clear Billing button to remove all existing charges that display in the grid.
8.The Add Manual button saves the specified manual charges and will display in the Saved Charges grid.
9.Select the Close button to return to the Price & Confirm section without saving any Billing charges.
