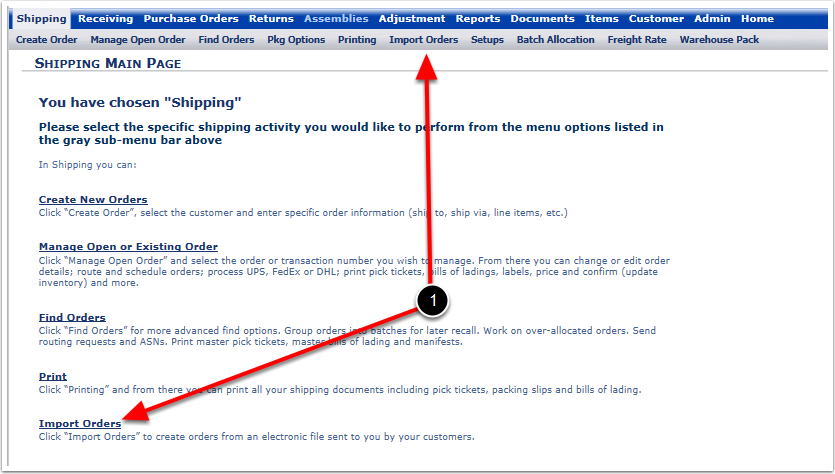
The Import Orders screen option imports text tab delimited file that contains information about a future or current Shipping Order.
1. Choose Import Orders menu option or link and the system prompts you to Import Order Screen.

From the Import Order Screen the user can upload a file that contains shipping order information to automatically create the order.
1.Choose the Customer from the Choose a Customer drop down menu.
2.Select the Warehouse from the Warehouse drop down menu.
3.Select the Browse... button to locate the Order file. This file must be formatted properly in order to be imported. A copy of the Order Import Template file can be obtained from support@3plcentral.com.
4.Ensure the Order File box displays the file name.
5.Select the Import button to begin the file import process.

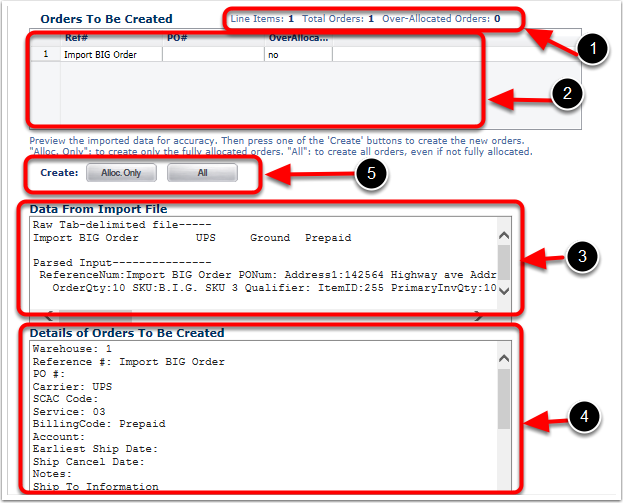
Once the Import button is clicked, the user is presented with the following additional sections on the Import Order screen. The user should review the data for accuracy and then Create the Receiver
1.The top line indicated the total line items of the import and the total orders that are being created. Any Over-Allocated Orders are also displayed.
2.The first grid displays a list of the Orders To Be Created from the imported file. This grid will mainly display the Reference and PO numbers for orders to be created.
3.The Data From Import File displays the file information containing the Reference, Shipping method, Address, Quantity, etc.
4.The Details of Order To Be Created displays Carrier, Notes, Date's etc.
5.Choose Alloc. Only to create only fully allocated order. Choose All to create all orders including orders not fully allocated.
