To Customize reports:
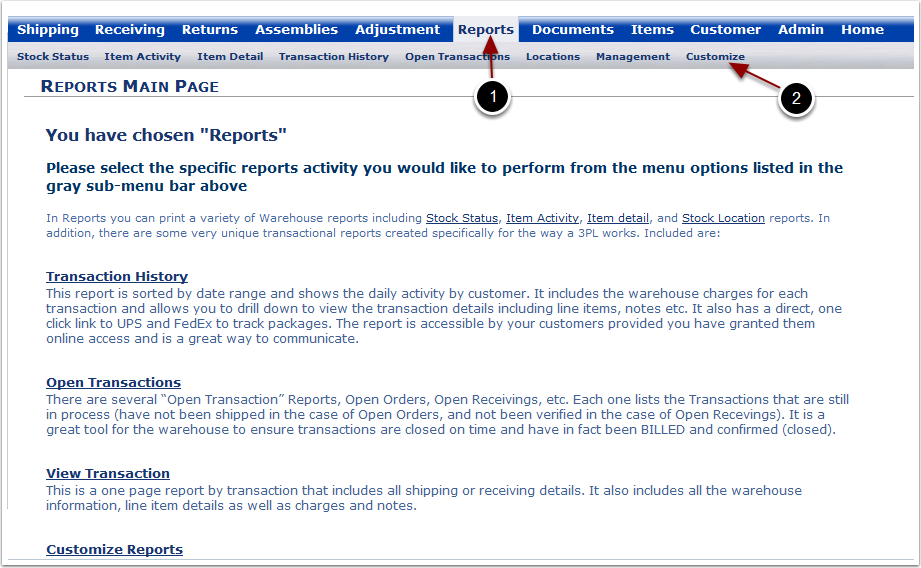
1.Choose Reports from the main navigation menu.
2.Choose Customize from the sub menu.
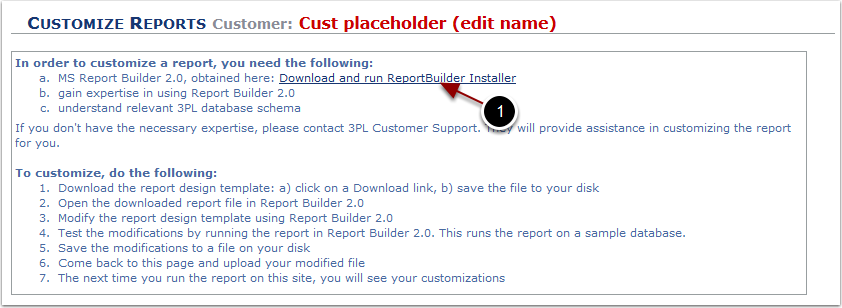
Numerous reports in the system can by customized by using Microsoft ReportBuilder. If you do not have Microsoft ReportBuilder installed on your computer you may download it.
To download ReportBuilder:
1. Clink the link in line a.
A window will pop up after downloading.
To install ReportBuilder:
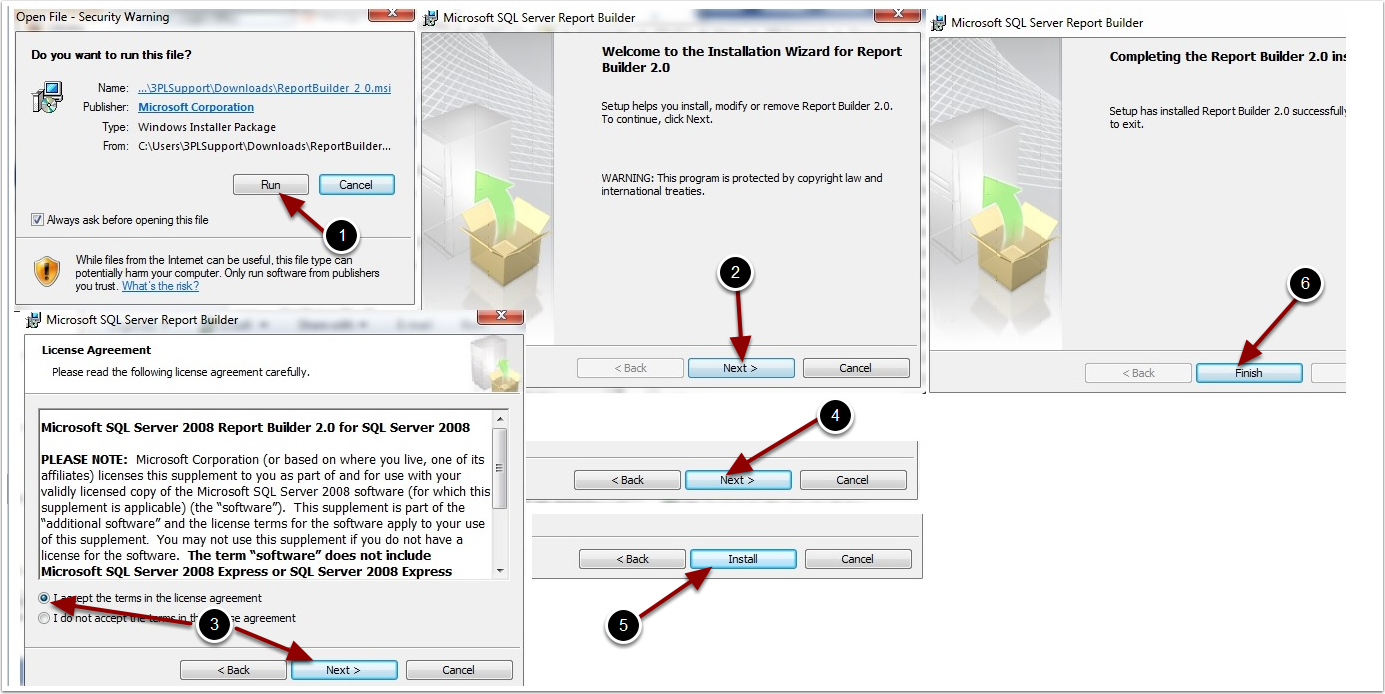
1.After the program has downloaded, double click "ReportBuilder_2_0.msi and select Run.
2.Select Next.
3.Accept the terms of the license agreement and select Next.
4.Select Next 3 more times.
5.Select Install.
6.Select Finish.
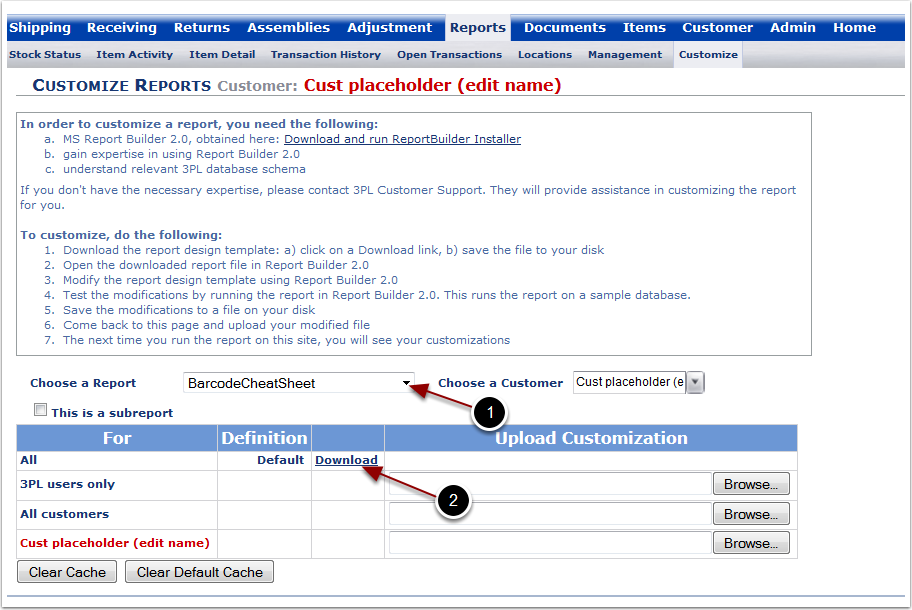
3PL Central has over 60 default reports. You can edit these reports to included additional information or to remove unnecessary information.
To customize a report:
1.Choose a Report you would like to edit by selecting the base report from the drop down menu.
2.Download the default report by clicking the Download link.
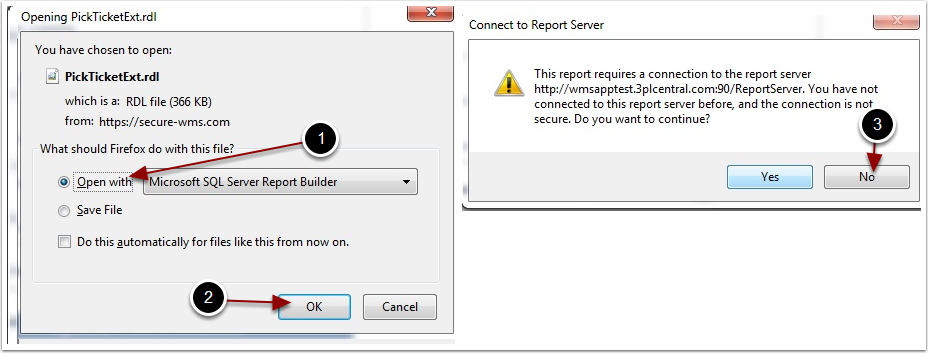
1.Select Open With Report Builder.
2.Select OK.
3.Select No as you do not need a connection to the report server.
Report Builder will now open with the Default Report.
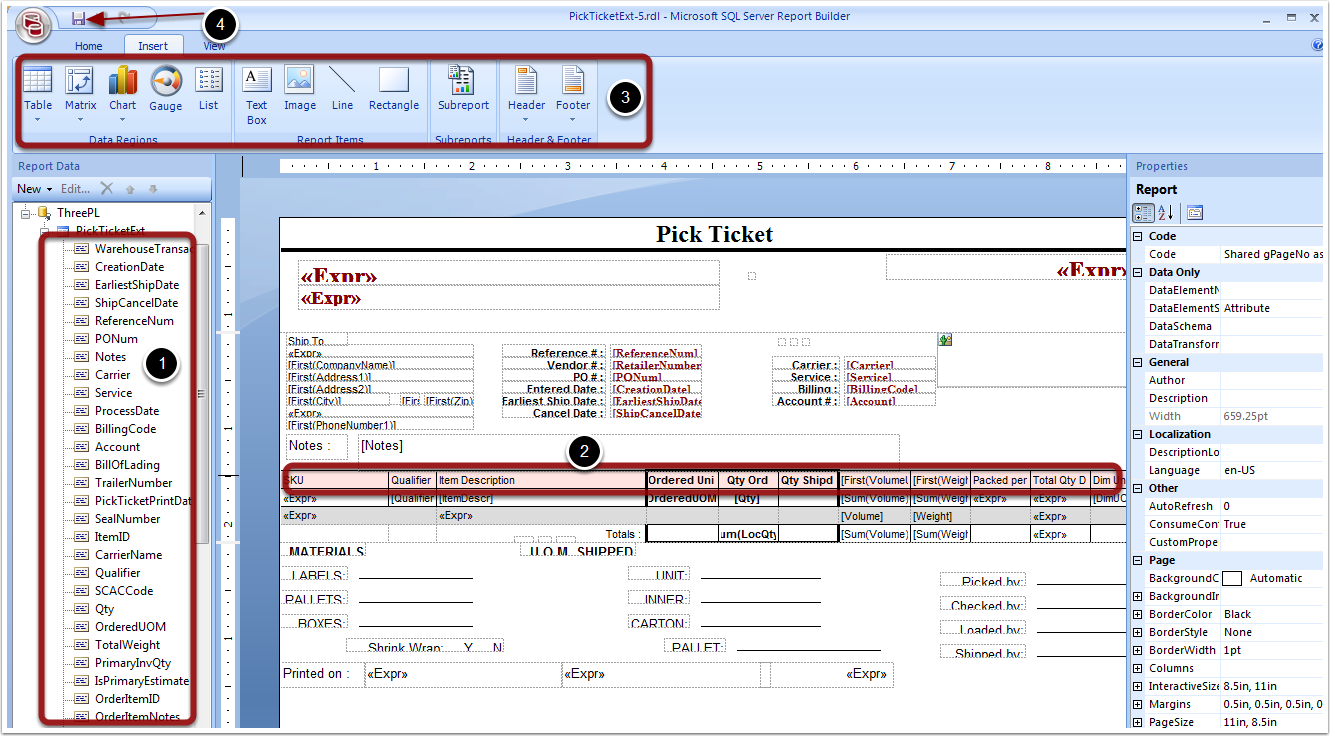
From within Report Builder you can add or remove additional SQL fields, insert images or wording, or alter the layout of any Default Report.
Options available to be changed from within ReportBuilder:
1.List of available fields for inclusion in Report.
2.Edit default fields of the Report.
3.Insert additional text or images.
4.Save the report when done editing.
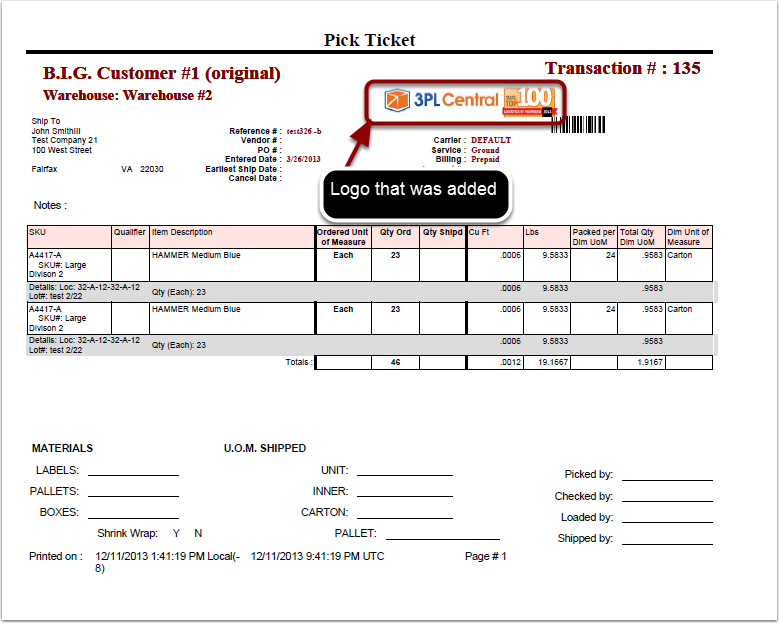
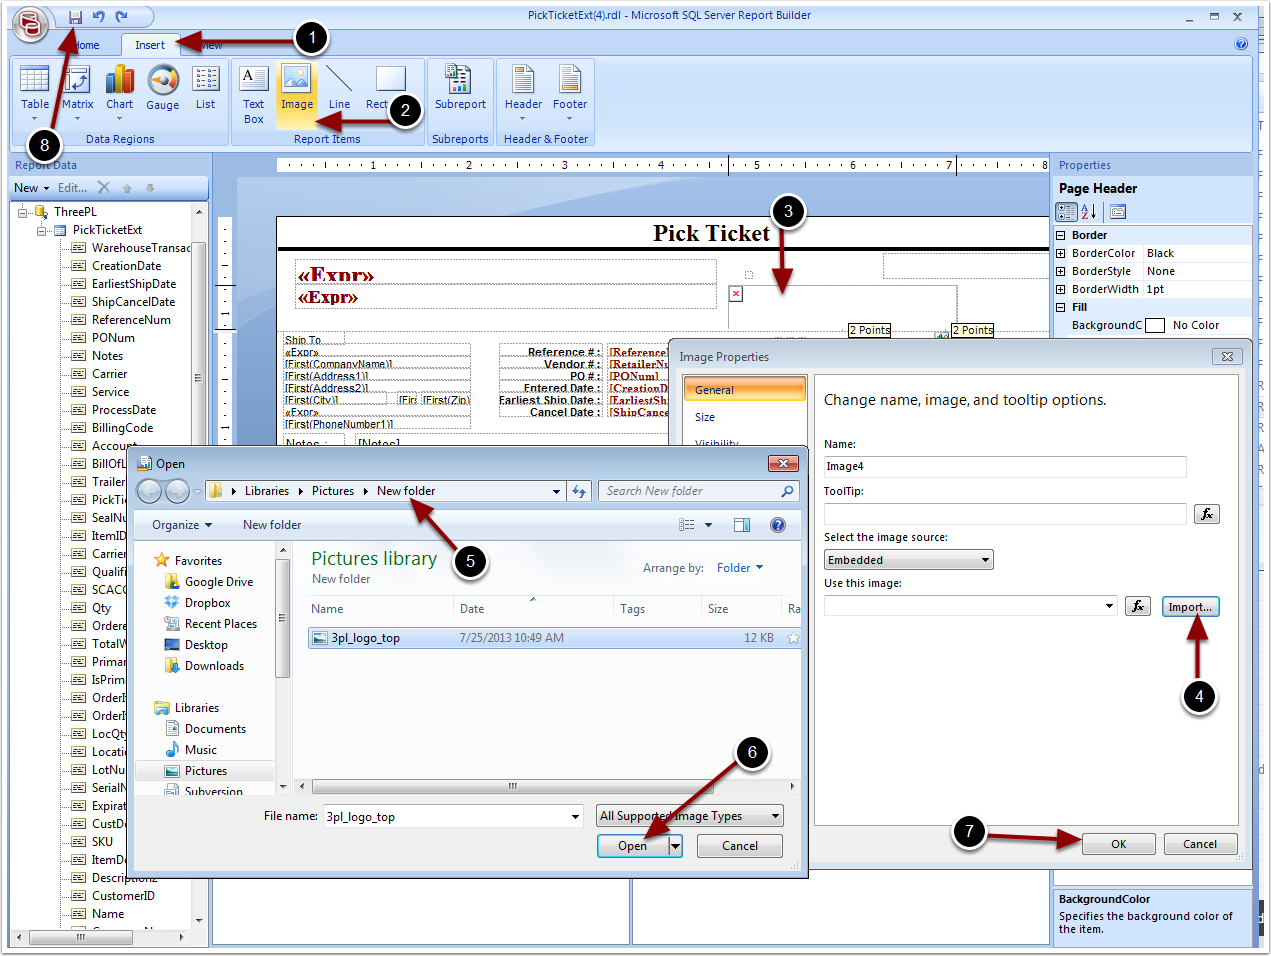
To add a Logo to any Default Report:
1.Select Insert from the top tab.
2.Select Image.
3.Draw a rectangle on the report where you would like to see the logo.
4.Select Import.
5.Find the image on the computer.
6.Select Open.
7.Select OK.
8.Save the file.
Once your report has been customized, you will need to upload that report back to the 3PL Central system. Once the report is uploaded, run the report to test.
To upload a customized report:
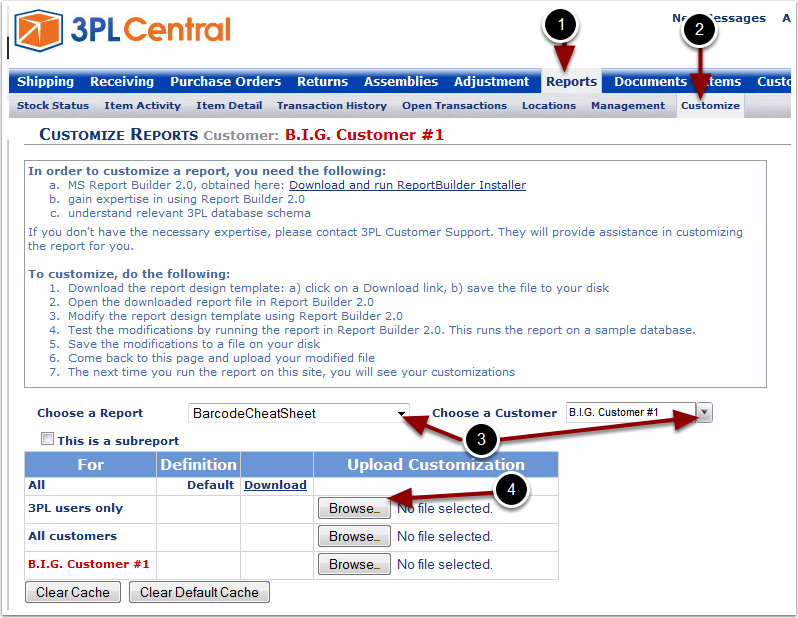
1.Choose Reports from the main navigation menu.
2.Choose Customize from the sub menu.
3.Select the report from the Choose a Report drop down menu. If this report is specific to just a single customer, select the customer from the Choose a Customer drop down menu.
4.Select the appropriate Browse button upload the customized report for the group you want to have access to it.
Each Browse button corresponds to who can view/print this report.
•The Browse to the right of 3PL users only indicates that a warehouse user login can only view the customized report.
•The Browse to the right of all customers allows All Customers users and all warehouse users the ability to view the customized report.
•The Browse located to the right of a red name allows only that customer who is named and warehouse users the ability to view the customized report.
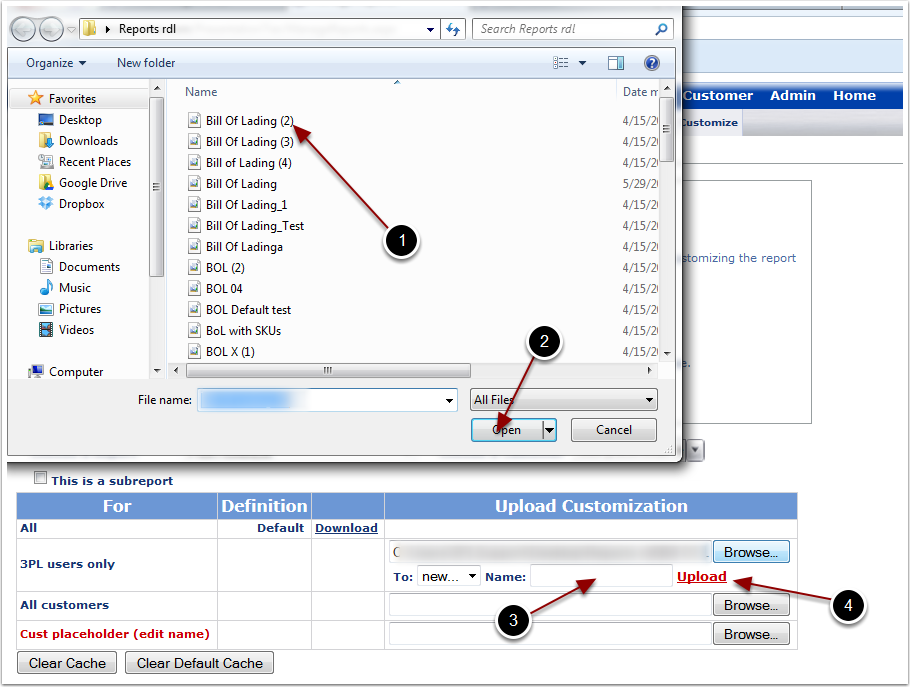
After selecting Browse, you will need to select the customized report from where it is saved on your computer.
1.Select the saved report on your computer.
2.Choose Open.
3.Name the customized report you are uploading. The name entered here will display within 3PL Central to indicate a custom report.
4.Select Upload.
*Note: If your report does not upload it indicates errors were made within the customized report. To troubleshoot errors, review modifications made to the default report. Common errors include incorrect expressions, using the incorrect default report or adding incorrect fields.
