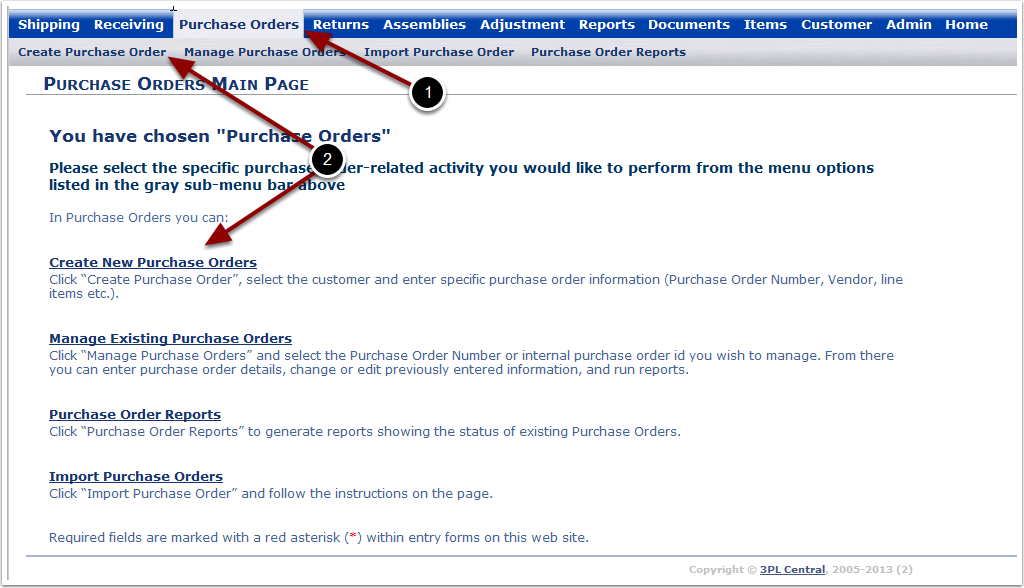
To Create a Purchase Order:
1.Choose the Purchase Orders Tab.
2.Choose Create New Purchase Orders.
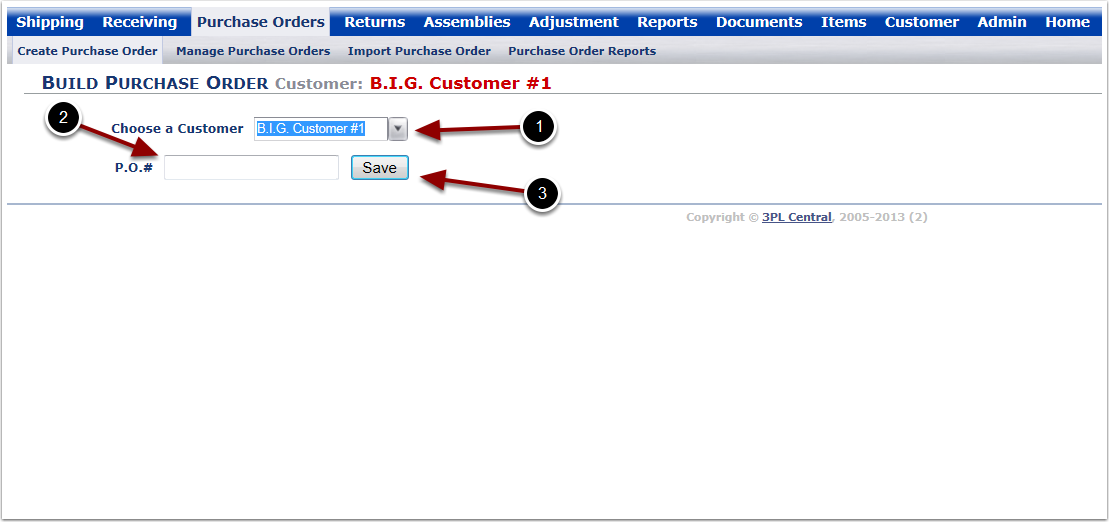
1.Select a Customer from the drop down menu.
2.Enter the Purchase Order Number. This can be any number but is normally provided by a customer's purchasing agent.
3.Click Save. The system will display a PO Header Screen.
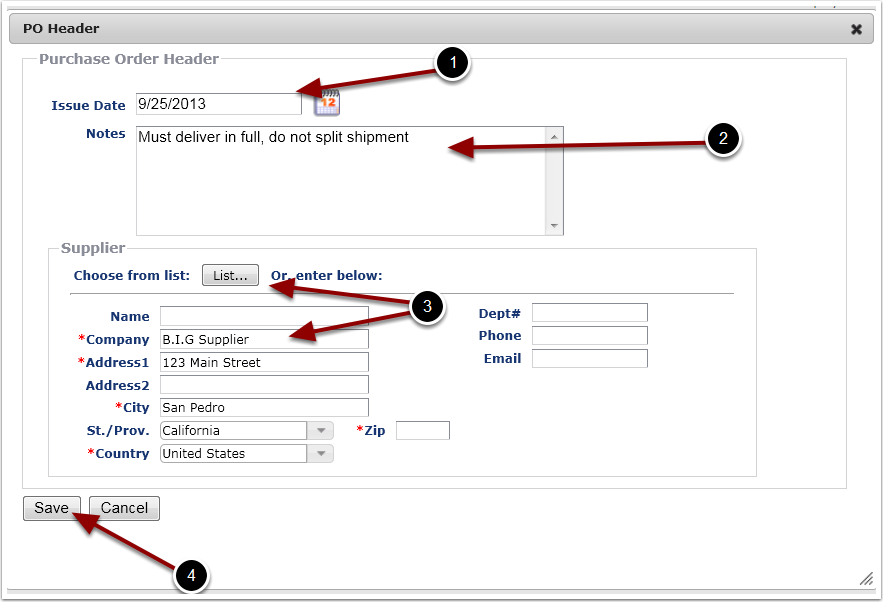
1.Enter the Issue Date.
2.Enter Notes to the supplier (optional).
3.Enter the Supplier Information or select the Suppler from a List of previously used suppliers. A Supplier's information is saved whenever a PO is created.
4.Click Save.
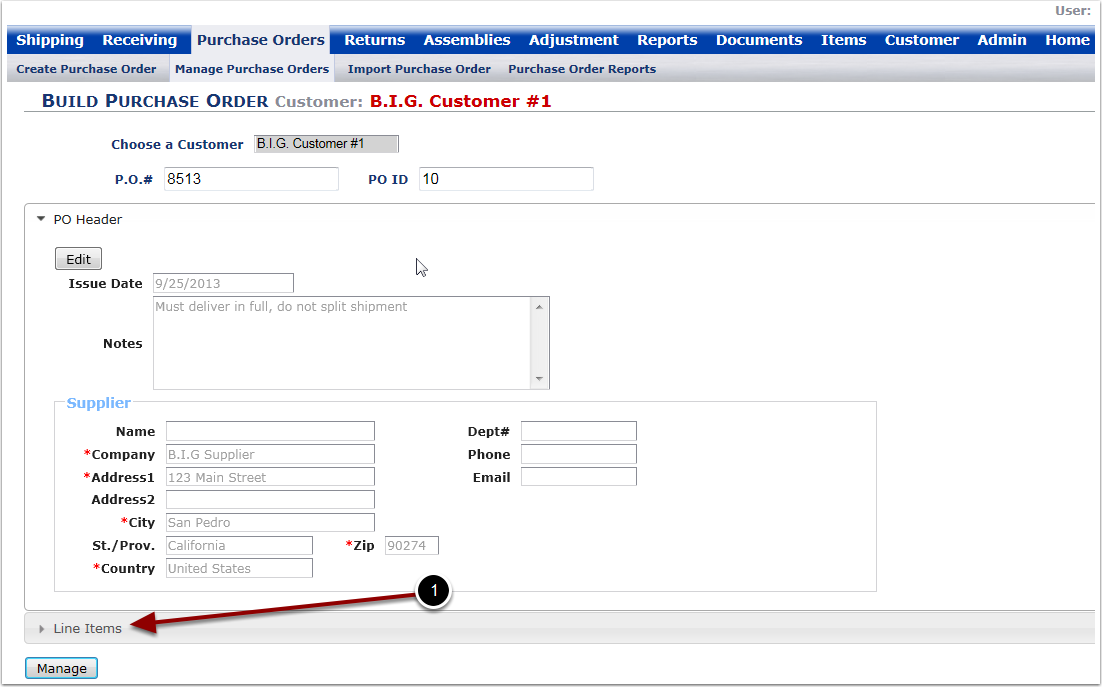
1. To add Line Items to the PO, Click Line Items.
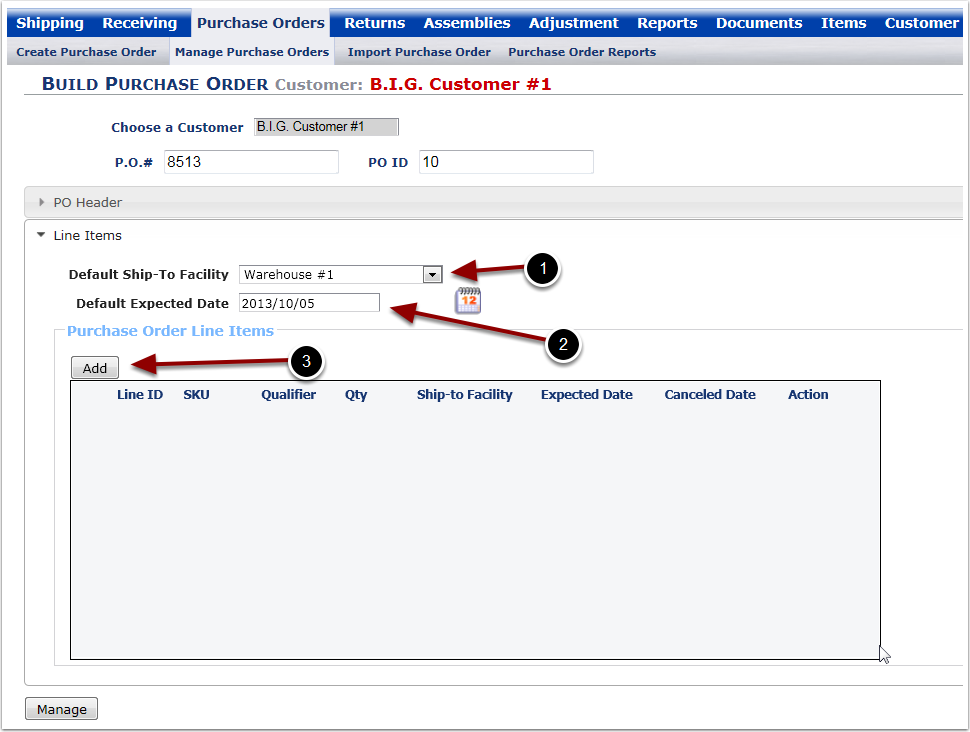
From the Line items Drop down Tab:
1.Select the Default Ship-to Facility from the drop down menu.
2.Enter the Default Expected Date.
3.Click Add to begin adding items to the purchase order. The system will prompt to a line item screen.
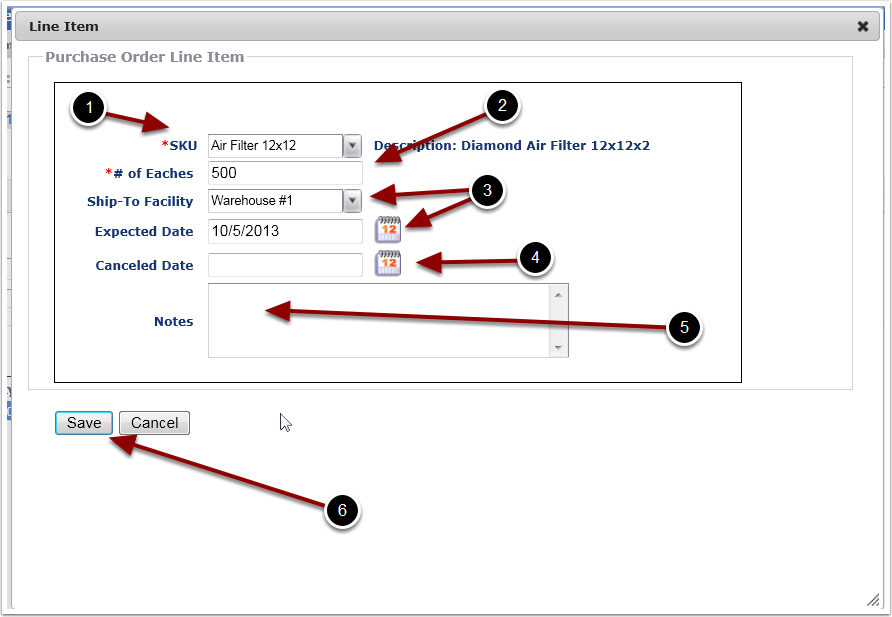
From the Purchase order line item screen:
1.Select the SKU from the drop down menu.
2.Enter the Order quantity (# of Eaches).
3.Ship-To Facility and Expected Date will auto populate from the previous page. If these value differ from the auto populate values, they can be manually changed here.
4.Enter a Canceled Date for the SKU (Optional).
5.Enter any Notes for the SKU (Optional).
6.Click Save.
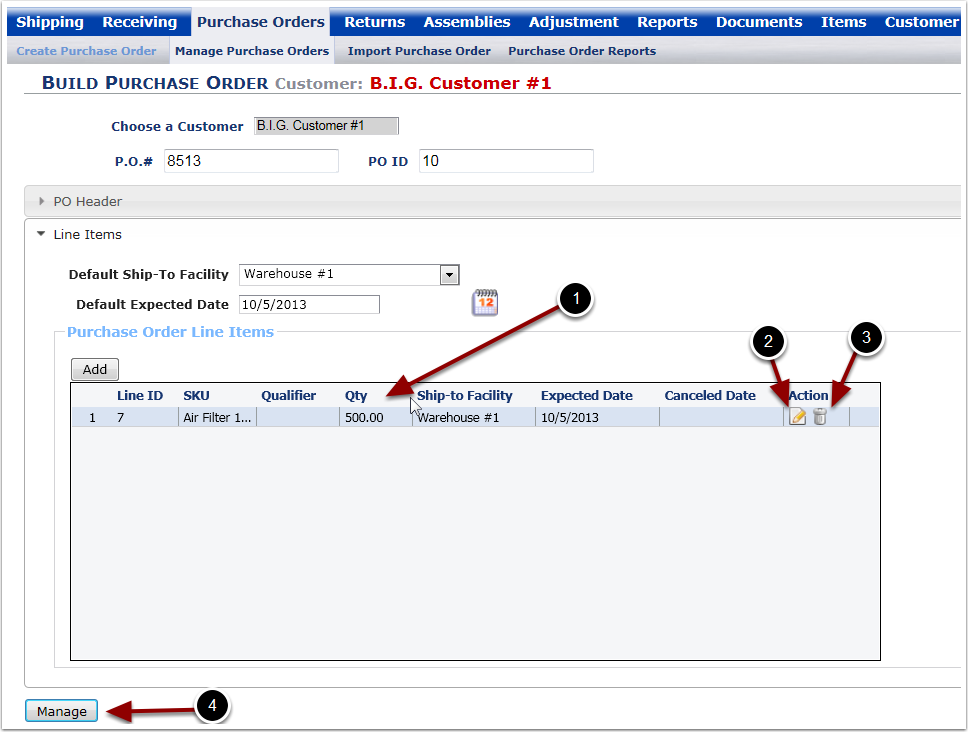
The Completed line item displays in the Purchase Orders Line Items grid. To review, edit or confirm the line item:
1.Completed line item is added to the PO. Repeat the previous steps to add additional line items.
2.Click the Edit Icon to edit the line item.
3.Click the Delete Icon to delete the line item.
4.Click Manage to complete the Purchase Order.
