Add/Edit Users |
  
|
Add/Edit Users |
|
Adding and Editing Customer Users are both done on the same set of screens, so we'll describe the Add process in detail here. The Edit process is the same, except that you start with some of the values you'd normally Add already filled in, and you can change them as needed.
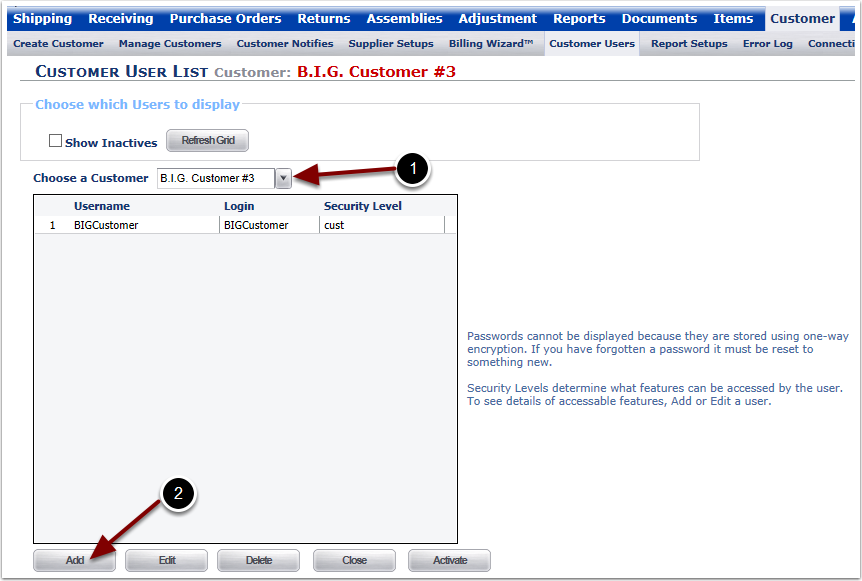
To Add a new Customer User:
1.Select a Customer from the Choose a Customer drop down menu.
2.Select the Add button. The user is sent to a Create Customer User data entry page.
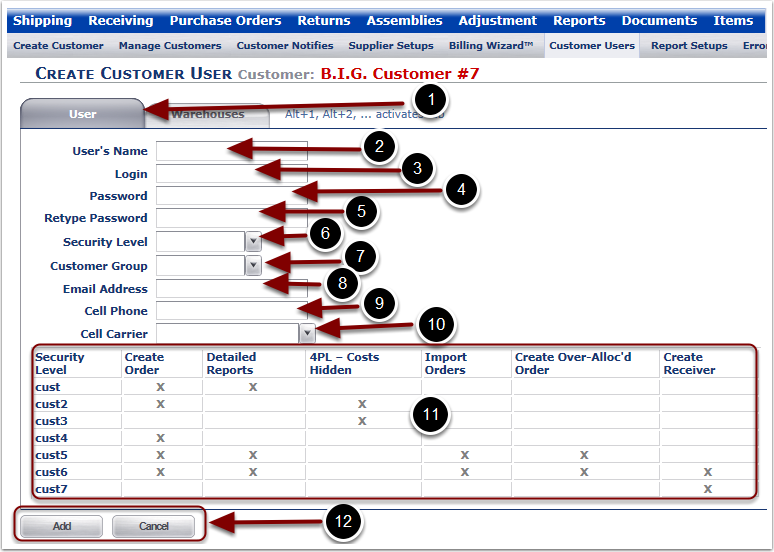
Once the Add button was selected in the Customer User List Page the user is prompted to enter the Customer User information.
1.Select the Warehouse Tab.
2.Enter/Change the Customer's User's Name.
3.Enter/Change the Login.
4.Enter/Change the Password.
5.Retype the Password.
6.Choose/Edit the Security Level from the drop down menu.
7.View the grid to determine the Customer User access per Security Level.
8.Choose/Edit the Customer Group from the drop down menu. More on this feature is found in the Customer/Create Group Guide.
9.Enter/Change the Email Address.
10.Enter/Change the Cell Phone.
11.Choose/Edit the Cell Carrier from the drop down menu.
12.Select the Save button to Save the changes or Cancel to return to the Customer User List page.
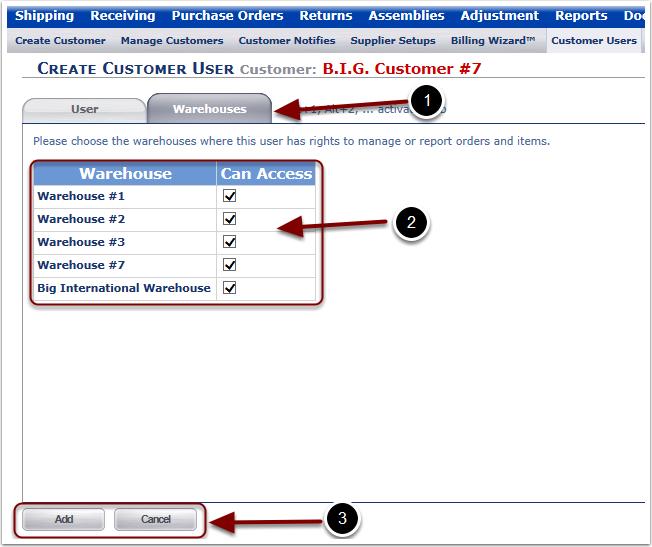
Once the Add button was selected in the Customer User List Page the user is prompted to choose the Warehouse(s) that the New Customer User can access
1.Select the Warehouses Tab.
2.Check or Uncheck the box (s) next to the Warehouse that the Customer user should have access to.
3.Select the Save button to Save the changes or Cancel to return to the Customer User List page.