Per Transaction Billing Setup |
  
|
Per Transaction Billing Setup |
|
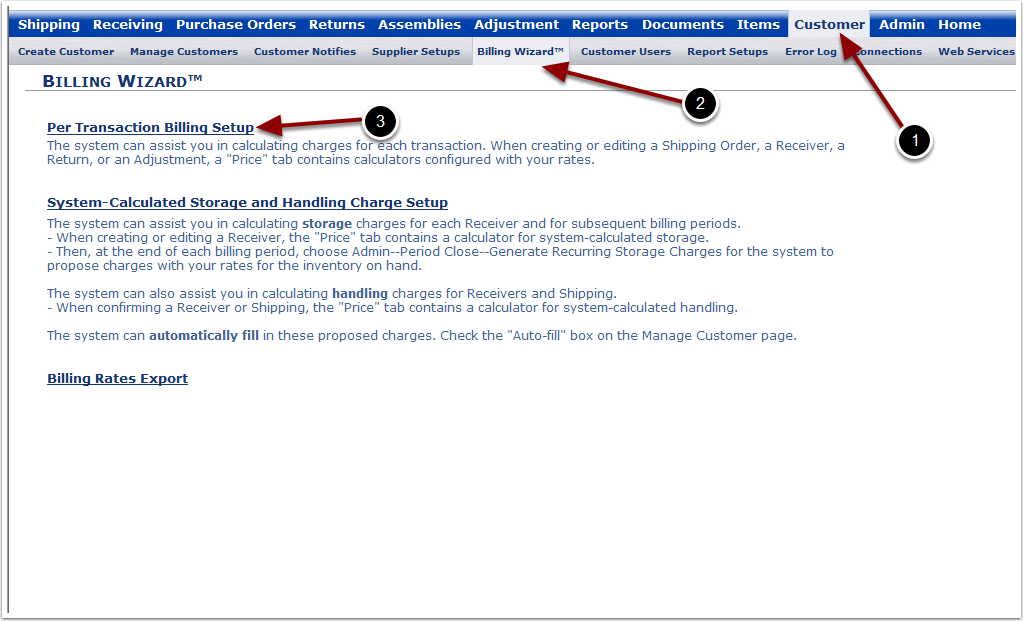
To set up Per Transaction Billing:
1.Click Customer.
2.Click Billing Wizard.
3.Click the Per Transaction Billing Setup link.
The system will take you to the Billing Wizard setup Screen.
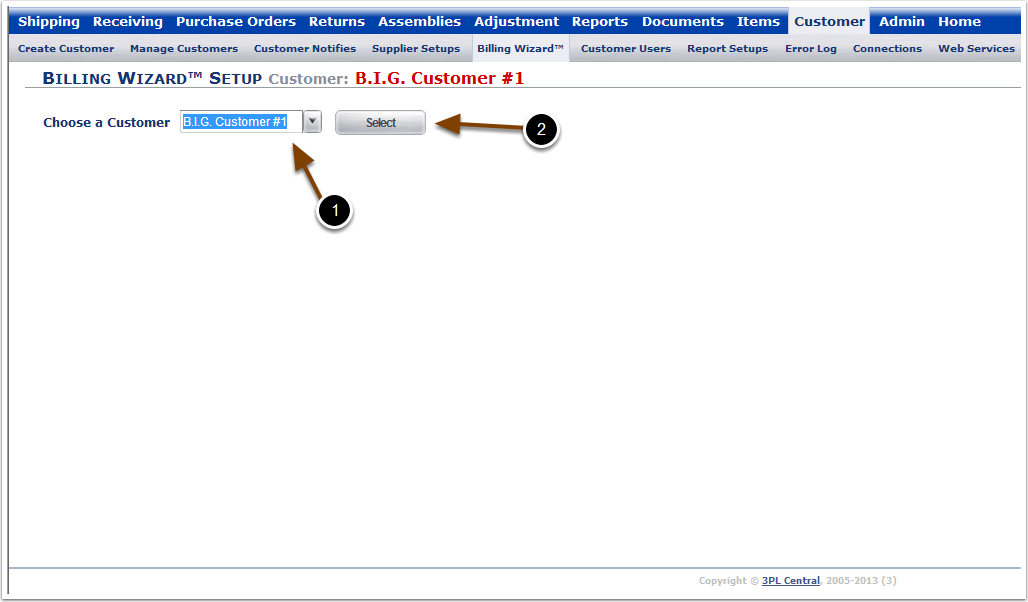
To continue with the Billing Wizard setup:
1.Select the Customer that you are creating charges for from the drop down menu.
2.Click Select and the system will take you to the Billing Wizard Setup Screen to setup charges for that customer.
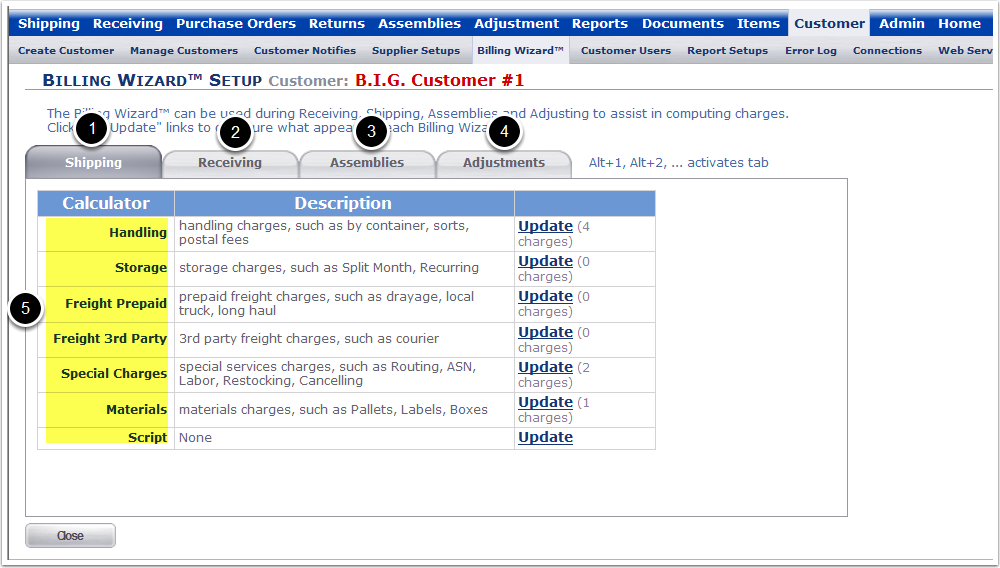
There are four types of transactions that can be set up for Per Transaction Billing charges. The Transaction type options are:
1.Shipping - Charges that apply to a shipping order.
2.Receiving - Charges that apply to the receipt of items.
3.Assemblies - Charges that apply to Kitting and Assembly.
4.Adjustments - Charges that apply to inventory Adjustments.
5.Each transaction type has a variety of Charge categories associated with it. These charge categories are listed under the Calculator header.
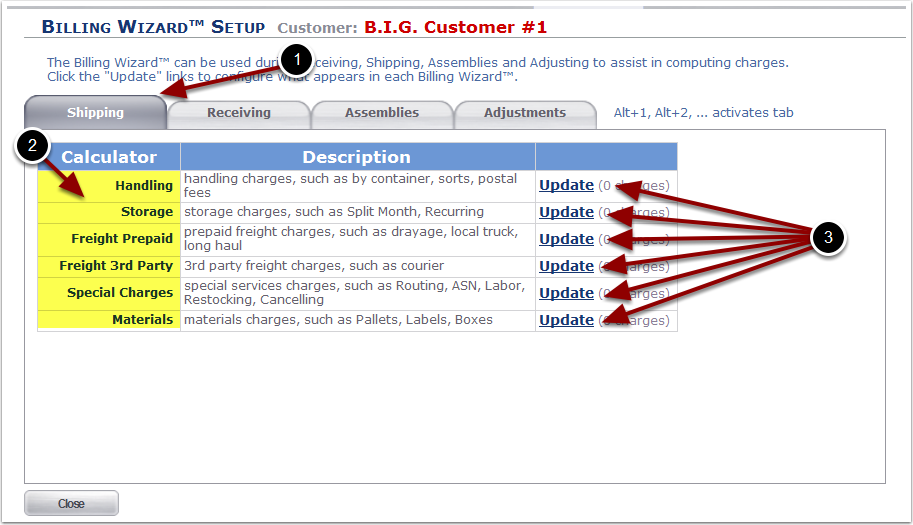
To setup billing charges:
1.Select any tab, we'll use the Shipping Tab for this example, but each of them work the same way.
2.Find the Charge category for the charge you will be setting up. The Charge categories vary depending on the tab you are on. They include: Handling, Storage, Freight Prepaid, Freight 3rd Party, Special Charges and Materials.
3.Click the Update link on the line with the Charge category you want to set the charge up under and the system will open the Charge Screen for that Transaction Type/Charge Category combination.
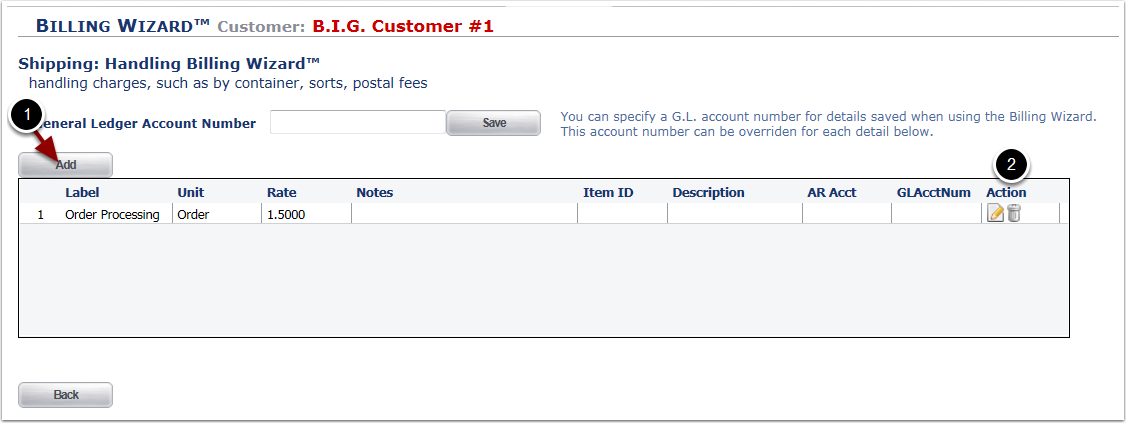
From the charge setup screen you can:
1.Add a new Charge (with the Add button).
2.Delete or Edit an Existing Charge.
You can also see a list of currently defined charges.
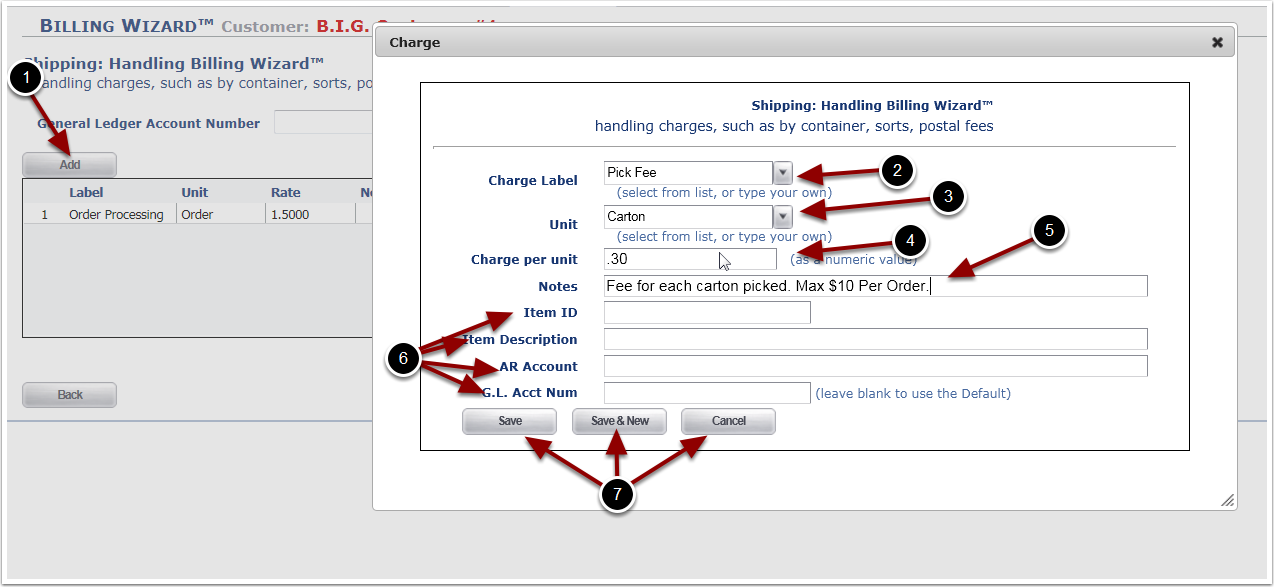
To add a Charge:
1.Click Add and a Charge pop up window will appear.
2.Enter a Charge Label - This will be the name of the charge as it appears on your invoice to the customer. The drop down menu is populated with some recommended charges, however the field is open to any input.
3.Enter a Unit - This is the unit the charge is based on.
4.Enter a Charge Per Unit - This is the dollar amount charged Per Unit. The format for this value is 0.00. Do not enter a "$".
5.Anything you add to the Notes field will appear next to the charge label on the invoice and when applying the charge to a transaction. They can be used to detail what the charge is for, or to denote a maximum value.
6.Item ID, Item Description, AR Account, and G.L. Account can be left blank. They are required when setting up a Quick Books Integration. Please contact support@3plcentral.com if you are interested in the QuickBooks Integration.
7.Click Save to create the charge and return to the Charge Screen, click Save & New to create the charge and open a new Charge pop up window and create another charge, click Cancel to go back with out creating the charge.
Charges that have been created are displayed in the table on the charge screen. From this page you can manage existing charges.
1.Click the Edit icon to bring up the same window you used to create the charge, and edit the charge there.
2.Click the Delete icon to remove the charge from the list.
