Adjust Inventory |
  
|
Adjust Inventory |
|
To increase an inventory amount to an SKU:
1.Choose the Adjustment Tab.
2.To adjust Inventory up or down, choose the Adjust Inventory Up and Down link. The system will take you to the Adjust Inventory screen.
Note: Although this is considered to be a one-time adjustment, you can created an adjustment opposite of the one created if you feel that a correction needs to be made.
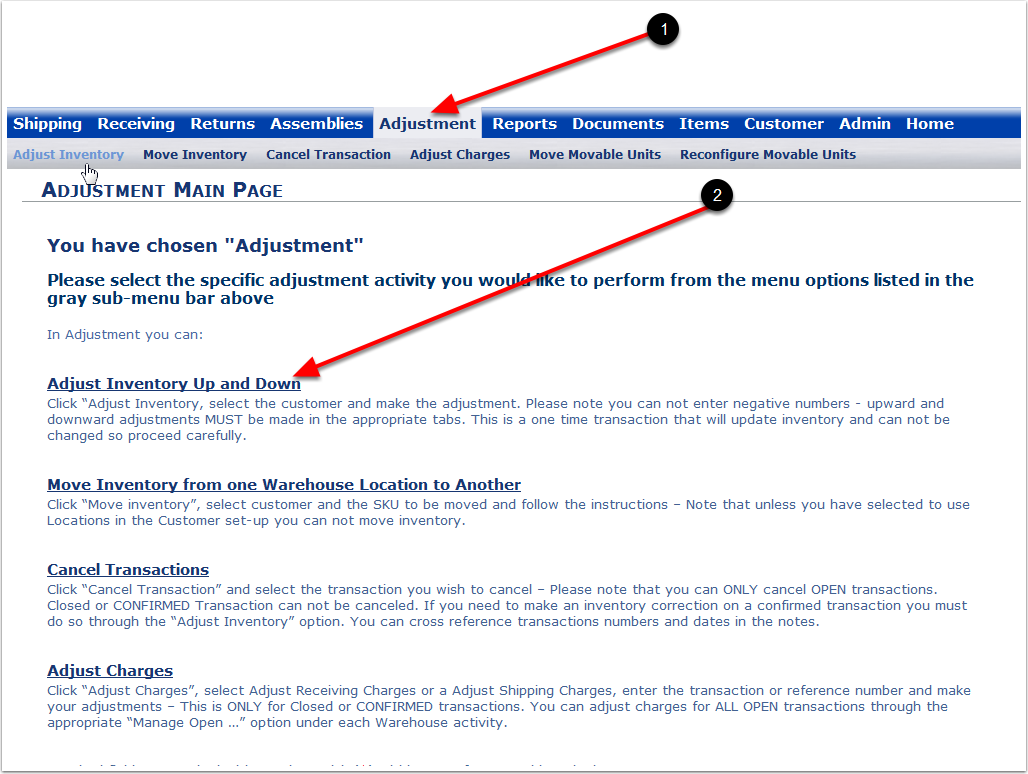
In Adjust Inventory Up or Down, you can:
1.Use Add Inventory to add inventory units to existing inventory.
2.Use Reduce Inventory to reduce inventory units to existing inventory.
3.Use the Price & Notes Tab to make a price change or notation.
Note: Adjusting inventory can be made multiple times. Changes can be made for a reduction or an addition to an inventory adjustment.
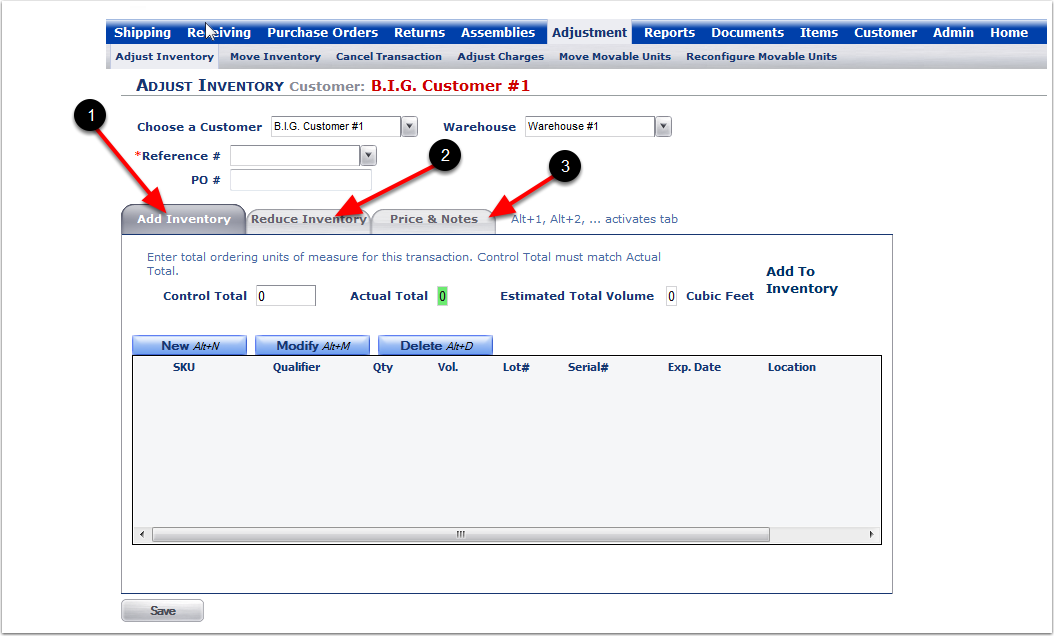
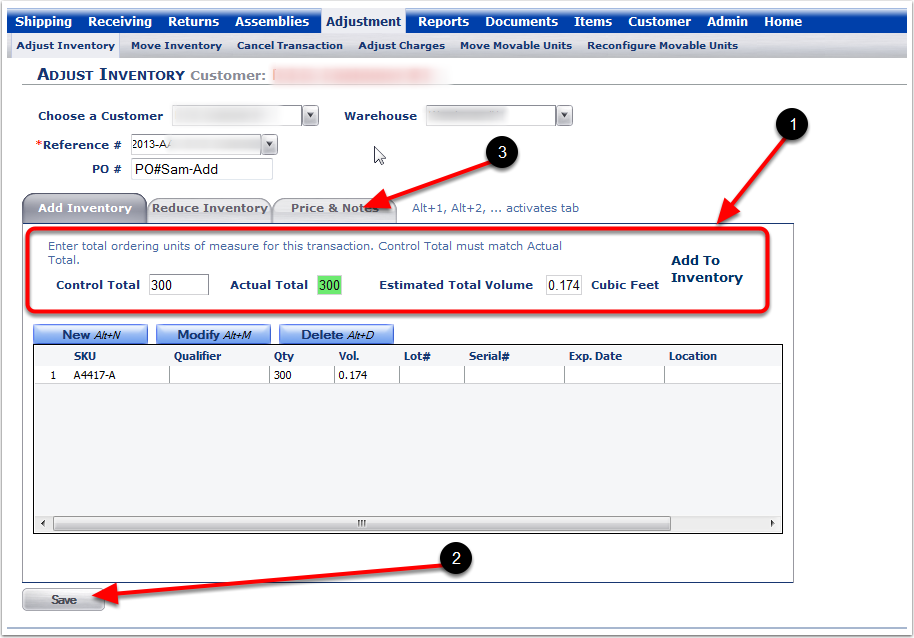
1.Select a Customer from the drop-down menu.
2.Select a Warehouse from the drop-down menu.
3.Select a Reference Number from the dropdown menu.
4.Enter a PO Number (Optional).
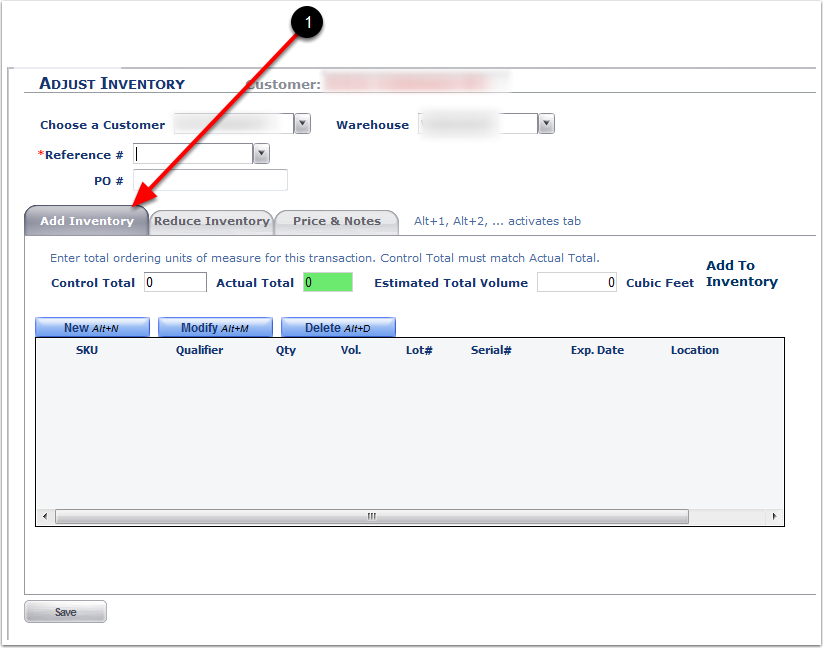
5.Choose the Add Inventory Tab (this is the default tab and should already be selected).
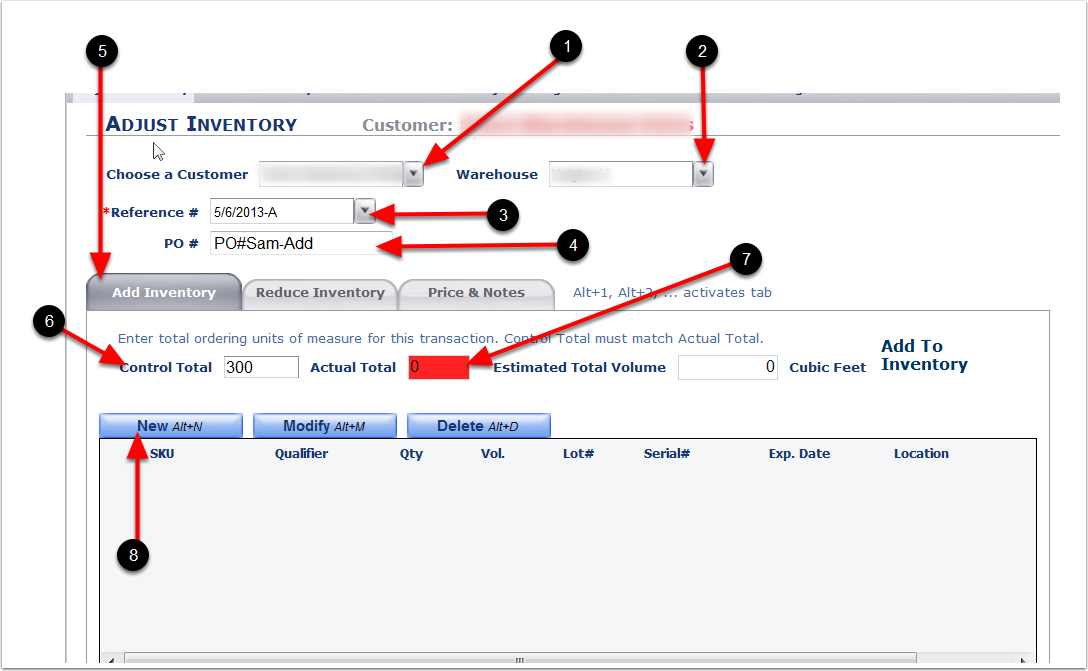
6.This is the quantity of units that will be added to the SKU once we complete the Add Inventory process. For this example, we have entered a quantity of 300.
7.The Actual Total will be in Red until the Control Total is selected during this Add Inventory process.
8.Choose New and the system will take you to the Add Receive Line Item screen to select a SKU and Quantity.
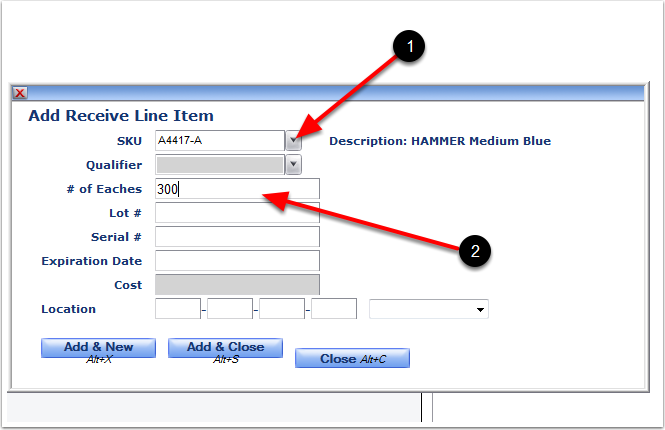
1.After you choose New, the Add Receive Line Item screen will appear. From the drop-down menu, select a SKU. We will choose SKU A4417-A.
2.Enter the Quantity that is being added to the SKU. In our example, we will add 300.
1. Enter additional information (Optional).
Note: Some additional fields may be visible now where they may not have been active when a SKU was first created. You can add specific information to any of these fields in this adjustment. These fields are optional because they were created during the initial item set-up as "non-required fields."
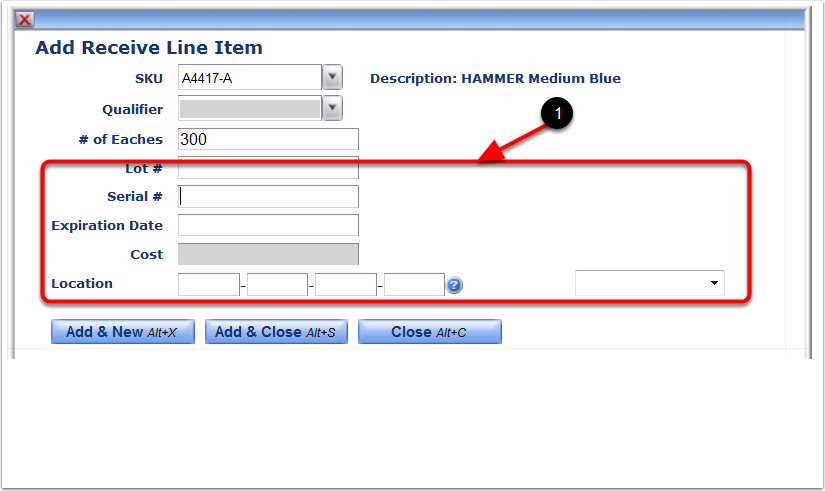
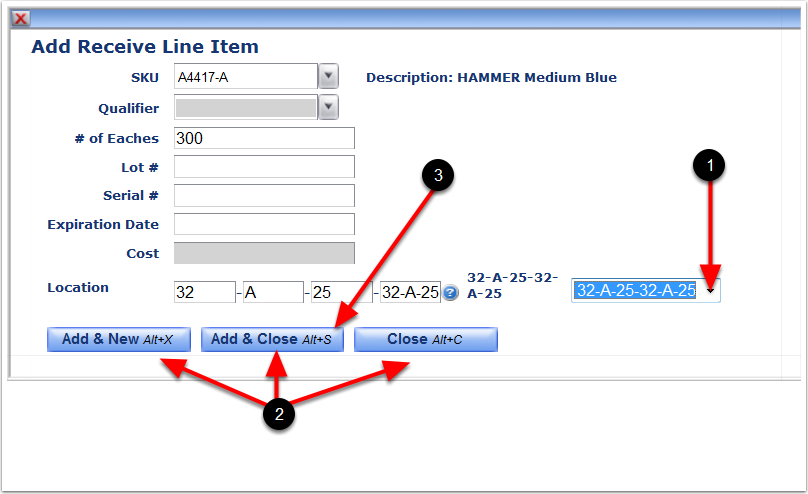
1.For this example, we will select a Location from the drop-down menu. If your Warehouse is using Locations, you will be able to select from all Active Locations (Optional).
2.After entering desired information, there are three options to choose from:
▪Add & New : This adds the current information entered and then add any additional adjustment value.
▪Add & Close: This adds the current information entered and then closes this Add Receive Line Item screen.
▪Close: This cancels out of the current screen without saving any detailed information.
3.For the purpose of this tutorial, we select the Add & Close button because we only have one adjustment of 300 to make.
1.The Control and Actual Totals now match and the Actual Total has changed from Red to Green.
2.If you are finished, you can choose Save.
3.If you have charges to enter for the Adjustment, choose the Price & Notes Tab.
1.Enter charges (Optional).
2.Enter any detail in the Notes field (Optional).
3.Back Date (Optional).
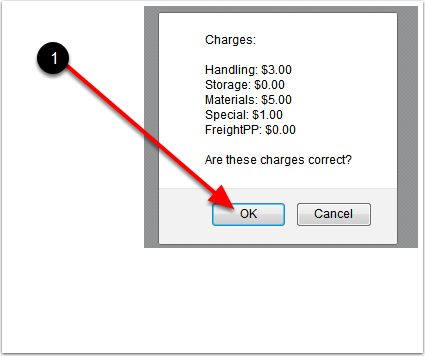
4.After entering all desired information, Choose Save and the system will move you to the accept Charges pop-up window on the Add Inventory Tab.
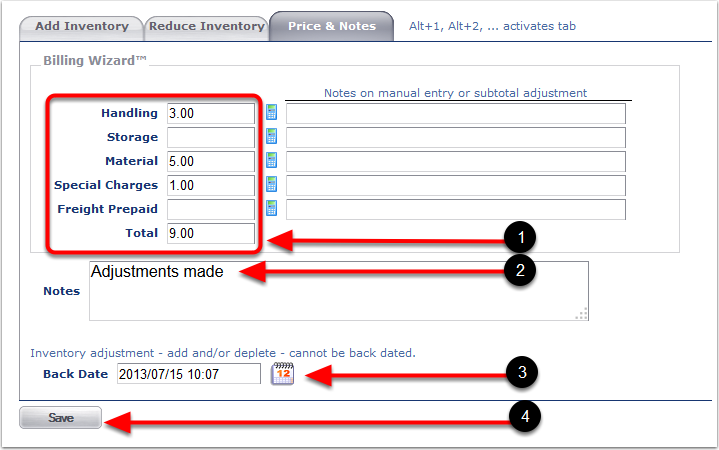
1. Choose OK if the charges are correct or choose Cancel to go back to the Price and Notes Tab. After choosing OK, the system will return you to the Add Inventory Tab.
After choosing Save, the system will return you to the (default) Add Inventory Tab showing a 0 (zero) Control Total.
1.Select a Customer from the drop-down menu.
2.Select a Warehouse from the drop-down menu.
3.Select a Reference Number from the dropdown menu.
4.Enter a PO Number (Optional).
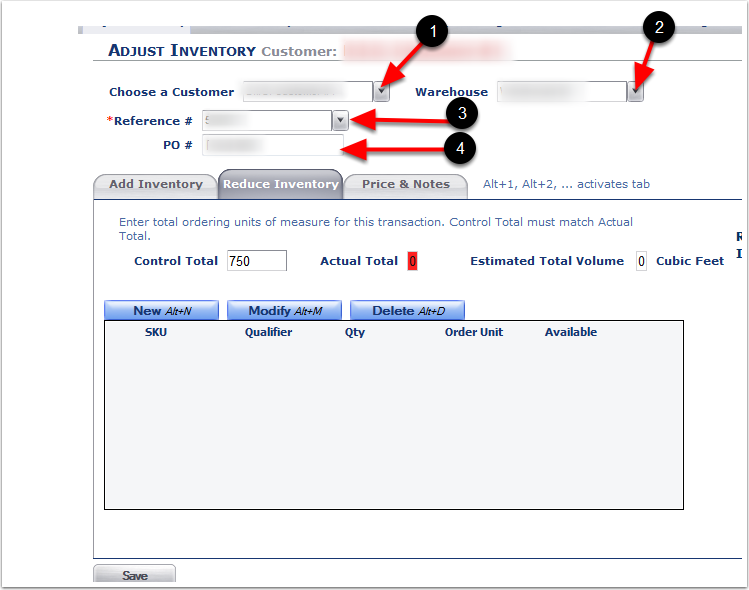
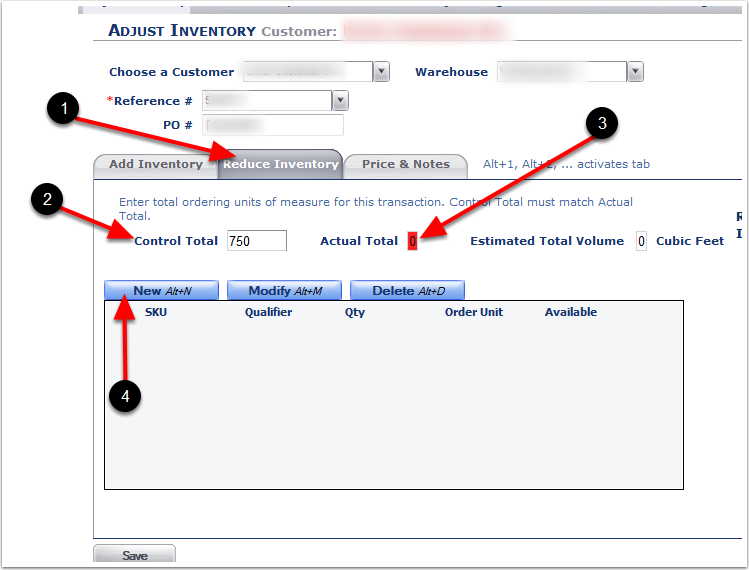
1.Choose the Reduce Inventory Tab.
2.This is the quantity of units that will be added to the SKU once we complete the Reduce Inventory process. For this example, we have entered a quantity of 750.
3.The Actual Total will be in Red until the Control Total is selected during this Reduce Inventory process.
4.Choose New and the system will take you to the Add Order Line Item screen to select a SKU and Quantity.
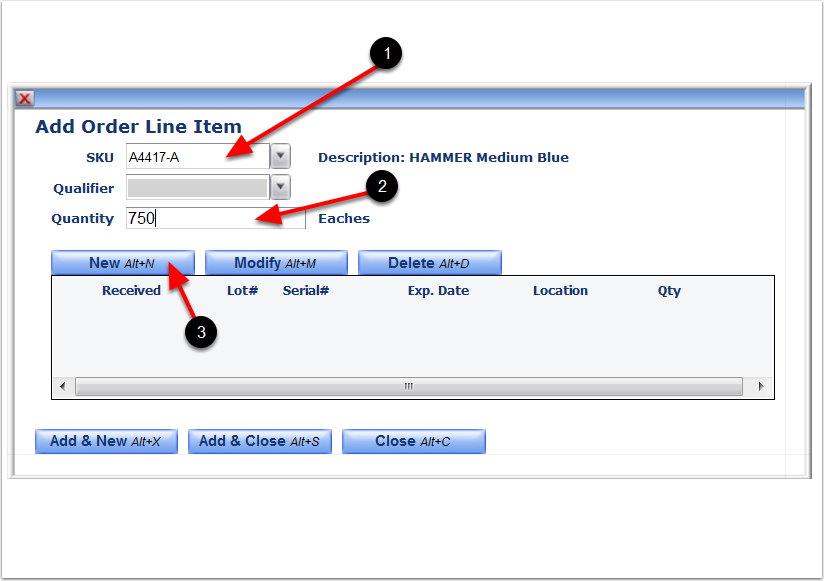
1.After you choose New, the Add Order Item screen will appear. From the drop-down menu, select a SKU.
2.Enter the Quantity. In our example, we will reduce inventory by 750.
3.Choose New and this will bring you to the Manual Allocation screen.
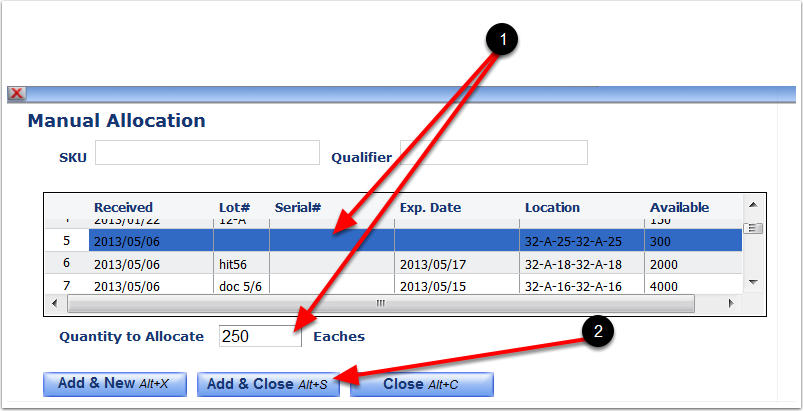
1.Select the line Items to match the Control Total of 750. You can select from one or multiple line items (This example selects from multiple line items to equal the total required).
2.Enter a quantity available from this received line item (Example: we will enter a quantity of 500 from the available 2000 of the first line item chosen).
3.Choose Add & New because we are still going to add another line item quantity of 250 to the reduction total to match the 750 required for the adjustment.

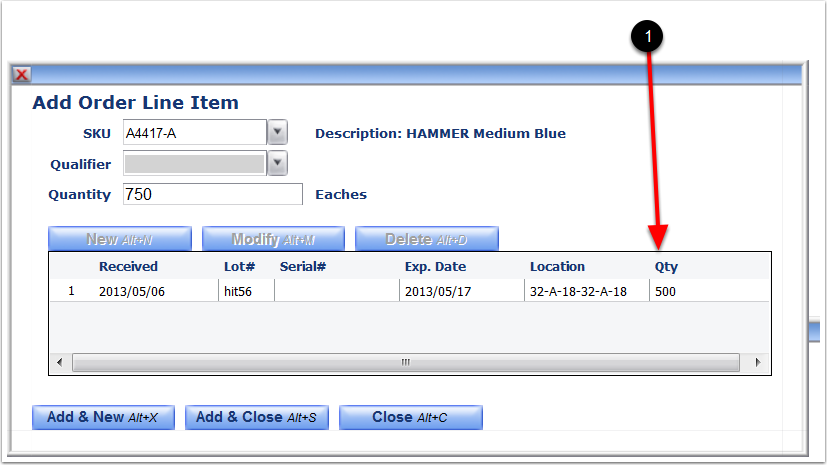
1. View the line item quantity of 500 that was selected.
1.Enter the remaining balance of 250 by selecting a line item and entering the Quantity to Allocate.
2.After choosing Add & Close, the system will move to the Add Order Line Item screen.
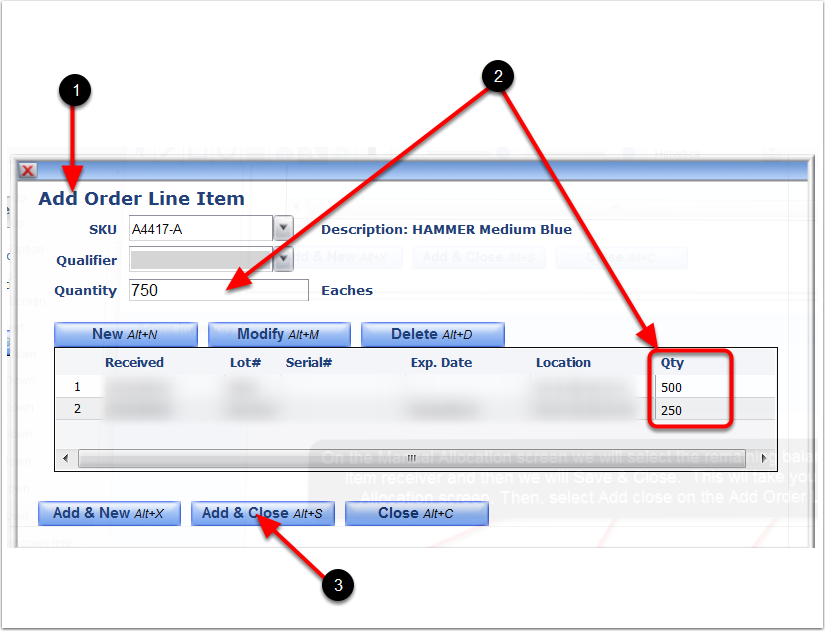
1.The Add Order Line Item screen shows our adjustments in this Reduce Inventory Process.
2.We can see the 750 quantity on the two line items.
3.By choosing Add & Close, the system will take us to the Adjust Inventory Tab.
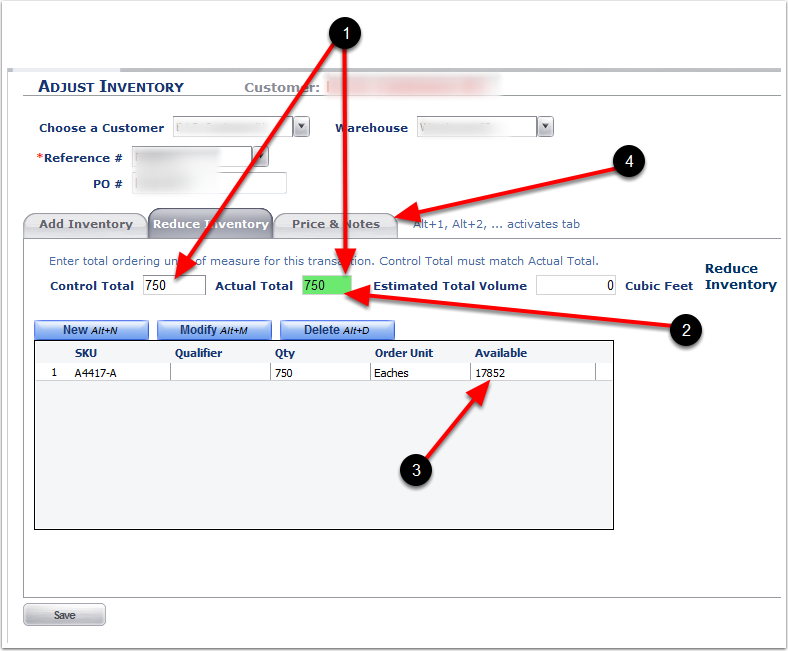
1.The Control and Actual Totals now match.
2.The Actual Total has changed from Red to Green.
3.The system will show the available balance (In our example, we started with the 750 and added one line item of 500 and one line item of 250 to match the total of 750) Note: the current Available balance is 17852. This total will reduce by 750 after we choose Save.
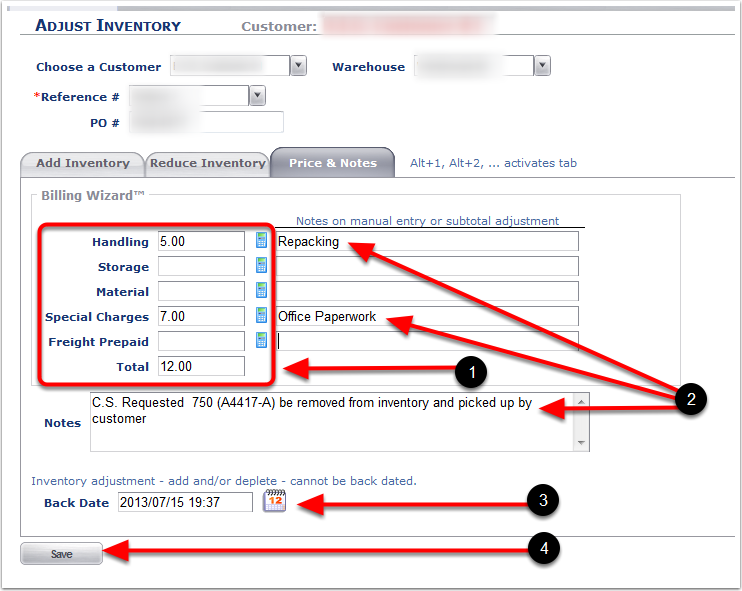
4.Choose the Price and Notes to enter charges (Optional).
1.Enter charges (Optional).
2.Enter any detail in the Notes field (Optional).
3.Back Date (Optional).
4.After entering all desired information, Choose Save and the system will move you to the accept Charges pop-up window on the Adjust Inventory screen.
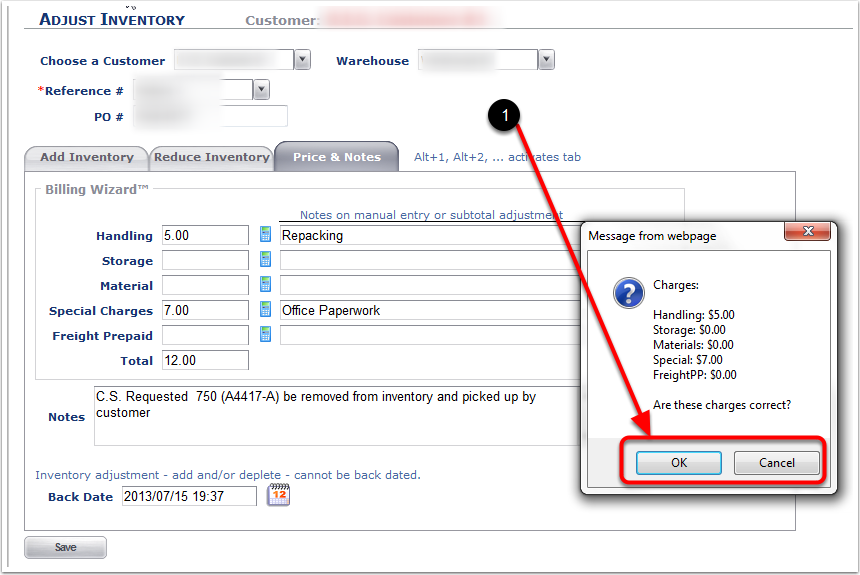
1. Choose OK if the charges are correct or choose Cancel to go back to the Price and Notes Tab. After choosing OK, the system will return you to the Add Inventory Tab.
1. After choosing Save, the system will return you to the (default) Add Inventory Tab showing a 0 (zero) Control Total.
To review inventory, you can use the Stock Status Report.