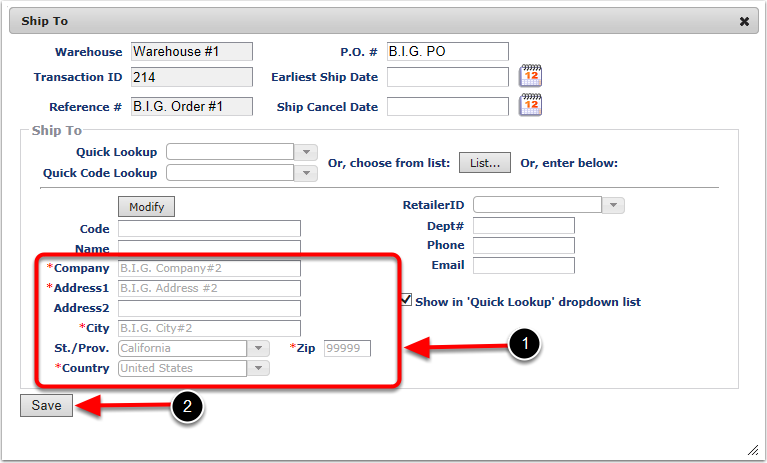
Starting with the Ship To category, complete the fields that are relevant to the order. The only required fields are the fields that have asterisk on this screen:
1.Notice that the Transaction Number is automatically created and displayed here. You can use the Transaction number or Reference number to track your order.
2.To enter general information about the order, click Edit and a screen that lets you edit Ship to information will pop up.
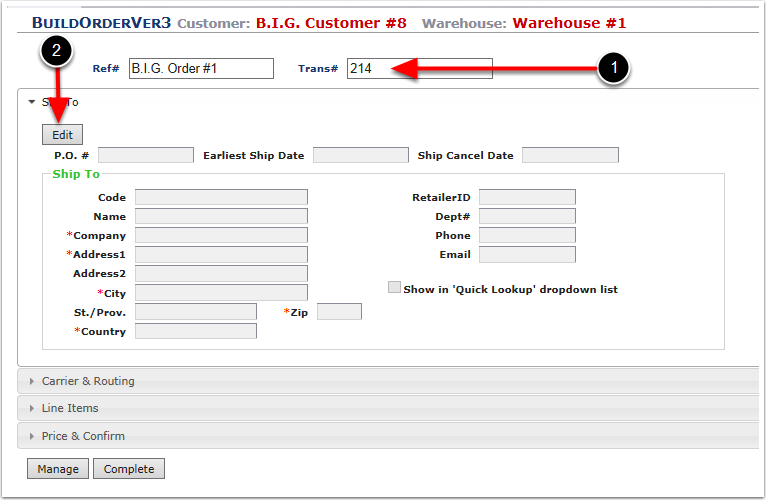
Complete the following steps to enter the shipping information:
1.Notice that the screen has pre-populated basic information about the order.
2.Enter a PO Number (Optional).
3.Select the Earliest Ship Date (Optional). This is the Projected Ship date of the Order which allows you to create "Future or Projected" Ship To Orders in advance.
4.Select Ship Cancel Date (Optional). This is just for reference, this option will not automically cancel any orders.
5.Select Ship To address from Quick Lookup, Quick Code Lookup or List (Optional). (See Shipping- Edit Ship to Address Options for further descriptions of these options.)
6.Enter the Address (Fields with * are required).
7.Enter the Code and Name here. A code could be a unique number for this customer, it could possibly be the ship to customers number the client has on record. The name could be the name of a specific person where this may be going.
8.Click Show in 'Quick Lookup' dropdown list if you would like to Save and display this address in the Quick Lookup and Quick Code Lookup (If you enter a Code).
9.Retailer ID is used for EDI. Refer to EDI documentation for more information Retailer ID.
10.Click Save and the system will automatically take you back to BuildOrderVer3 Screen.
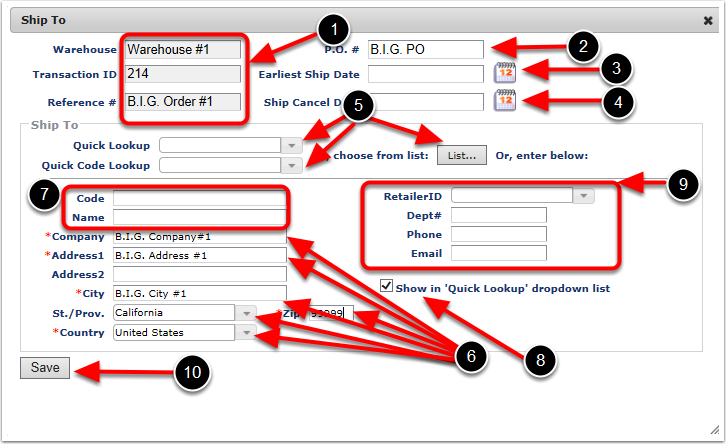
You can make further edits to any of the entered information by choosing Edit. To make edits to specific Ship To information, those are two main edit options:
•Quick Lookup and Quick Code Lookup.
•Drop Down List.
To edit Ship To address:
1. Click Edit and the Ship to Screen will pop up.
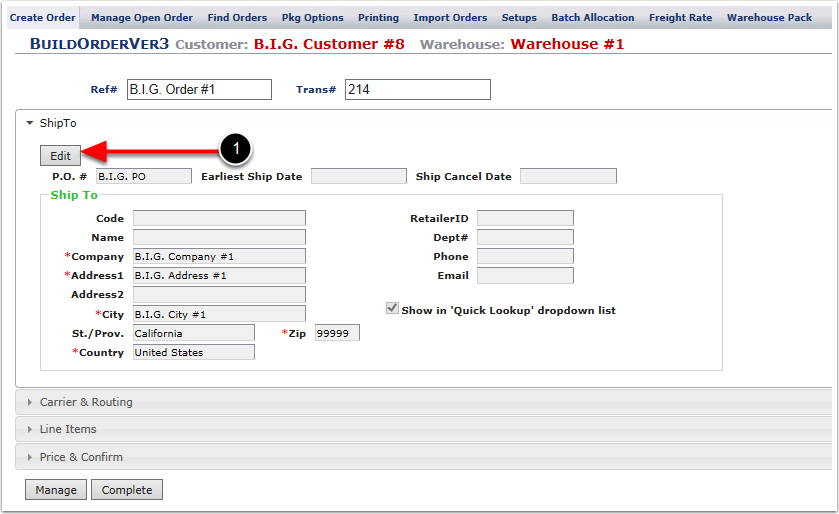
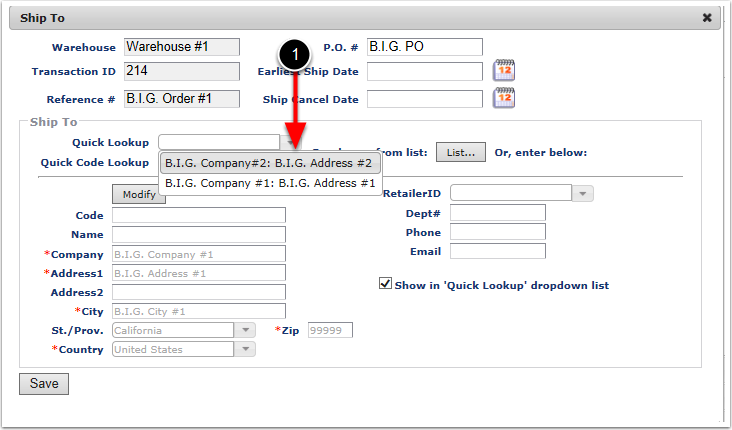
The first option to Edit a Ship To address is to use either the Quick Lookup or Quick Code Look up drop down menus. Quick Lookup code only lists addresses available with Code inputted into address. As for Quick Lookup lists all the addresses that were choosen to add using Show in "Quick Lookup" dropdown list. In this instance we will choose the address from the Quick Lookup drop down. From the Ship To Screen:
1. Choose Quick Lookup address and Select the address
If you click Save, this will update the previous address with the new selected address B.I.G. Address #2. Stay on the Ship To screen to see the Drop Down List edit option for Ship To Address edits.
The second option to edit a Ship To Address is to use the Choose from list Or, enter below. From the Ship To Screen:
1. Click List.
A small pop up screen will appear with all the addresses. Refer to the following screen.
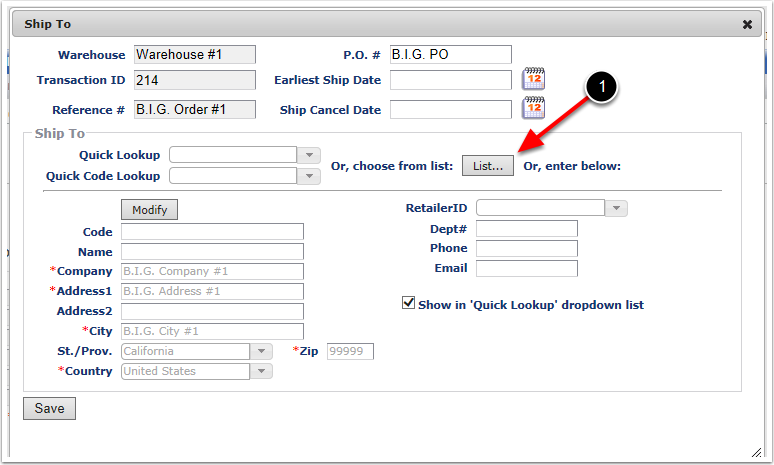
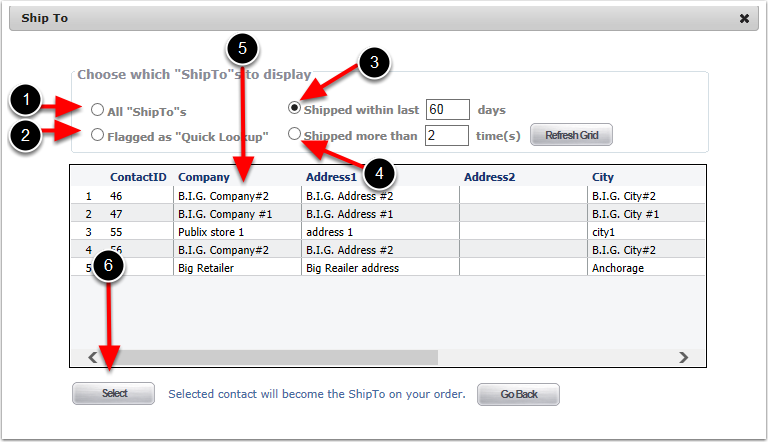
Click List on Ship To screen and the screen displaying below will pop up. Here you can filter your search,There are four options to pick from:
1.Choose All "ShipTo"s and choose Refresh Grid. This will give all saved for this customer.
2.Flagged as "Quick Lookup" and choose Refresh Grid. This will give all the addresses flagged in the Show in 'Quick Lookup' dropdown list on the ShipTo screen.
3.Shipped within last __ days and choose Refresh Grid. This option will narrow search within the specified day range entered.
4.Shipped more than __ time(s) and choose Refresh Grid. This will narrow the search to how many times the Ship To address has been used.
5.Select the Address to edit based on the filters selected. In this instance we will choose B.I.G Address #2.
6.Click Select.
Click Save on Ship to Screen.
To view the edited address:
1.The revised address is now reflected. In this example, Transaction#214 has the new address of B.I.G. Address #2.
2.Click Save.
Once Save is selected, the system will take you back to BuildOrderVer3 Screen.
