Add Location |
  
|
Add Location |
|
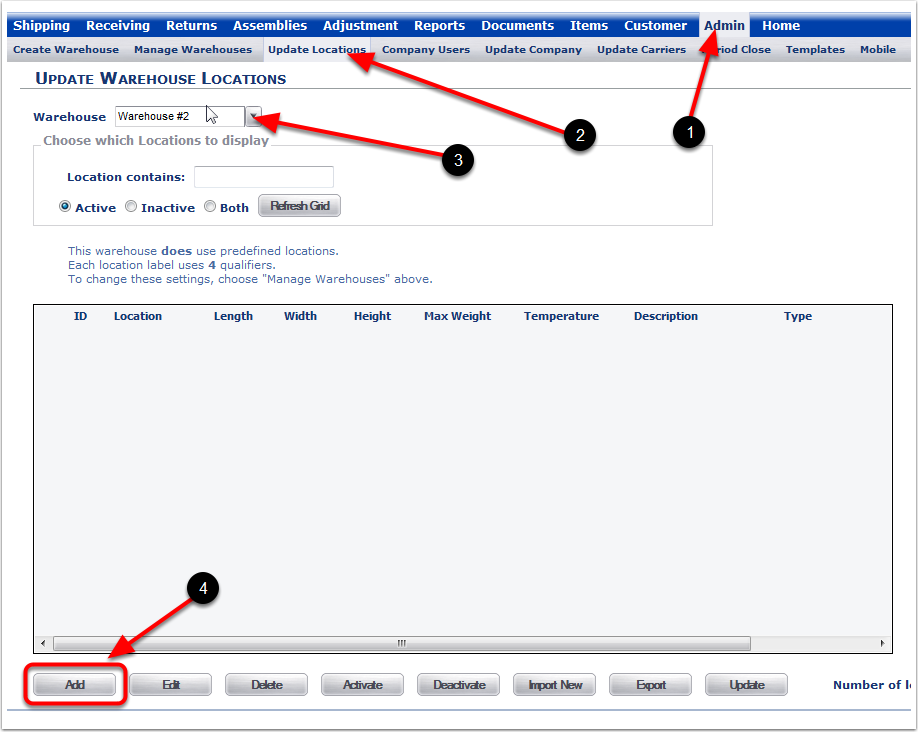
1.Choose the Admin Tab.
2.Choose the Update Locations Tab.
3.Select a Warehouse from the drop-down menu.
4.After choosing the Add button to create a new Location manually, the system will take you to the Add Location screen.
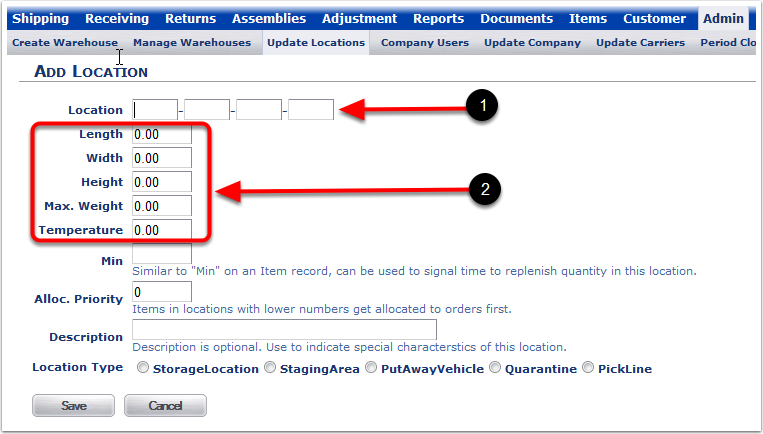
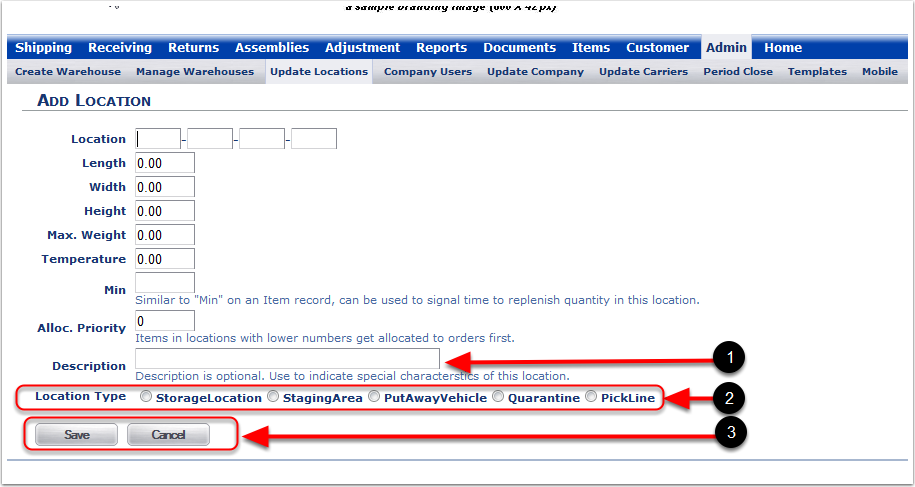
1.The Location fields are set up when you created the Warehouse. Fields 1 - 4 can be used based on the preference of the Administrative level 1 user.
2.The Length, Width, Height, Max. Weight, and Temperature fields can be completed to define the particular Location being created (List 1, if there is no specific space requirement for any of these fields).
oLength being the depth of the Location for the storing products.
oWidth is how wide the Location will be for the storing products.
oHeight is how tall the Location area is for the storing products.
oMax. Weight is the suggested maximum weight that the administrator selects for the Location (not to exceed).
oTemperature is the suggested temperature for this Location to be controlled (for food perishable products as an example).
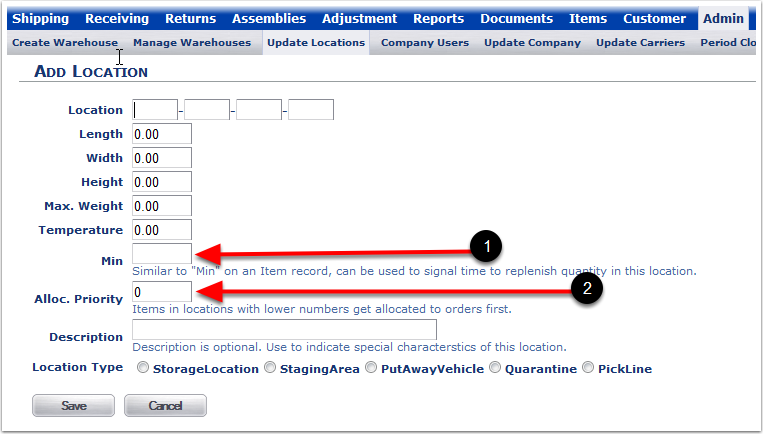
1.Min is the minimum quantity of items count where a replenishment warning can be sent (Optional - leave blank if there is no minimum).
2.Alloc. Priority - Select Allocation picking per Location. The lower the number in the Alloc. Priority that Location will have the product allocated first to orders being shipped.
1.The Description of the Location (Optional).
2.The Location Type will define how items will be stored in a Location.
oStorageLocation is the standard shipping and receiving Location for the Warehouse.
oStagingArea can be used for temporarily hold items that may be moved to another Location (example: after repacking or review).
oPutAwayVehicle is used for mobile scanning locations.
oQuarantine is used for placing products that arrive that have been marked for hold for future disposition. This Location is used to track the product but not allow the product to be shipped from this type of Location.
oPickLine is used for the picking of items that may be a part of a package or an assembly.
3.Choose the Save button after all of the information has been added to the fields. Choose the Cancel button if you do not want to save the information.
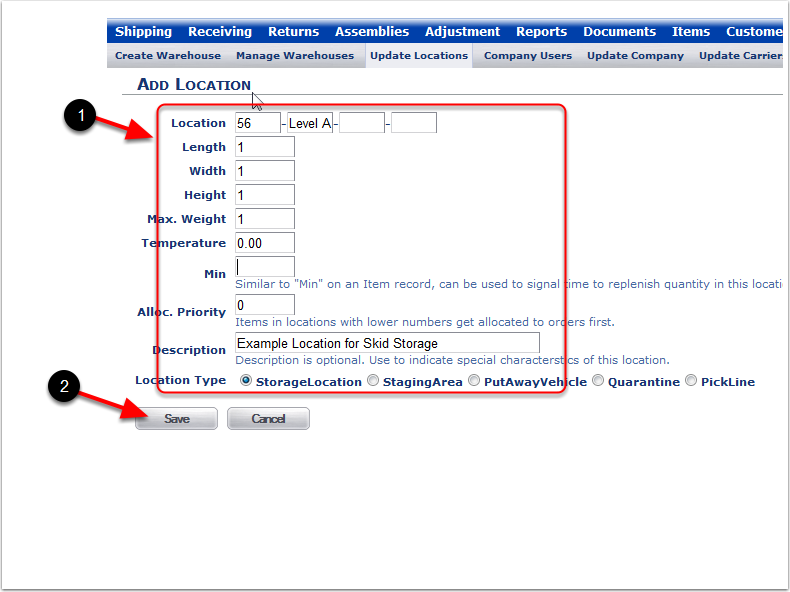
1.Enter the details of a new location.
2.Save the details entered and the system will return you to the Update Locations Warehouse screen.
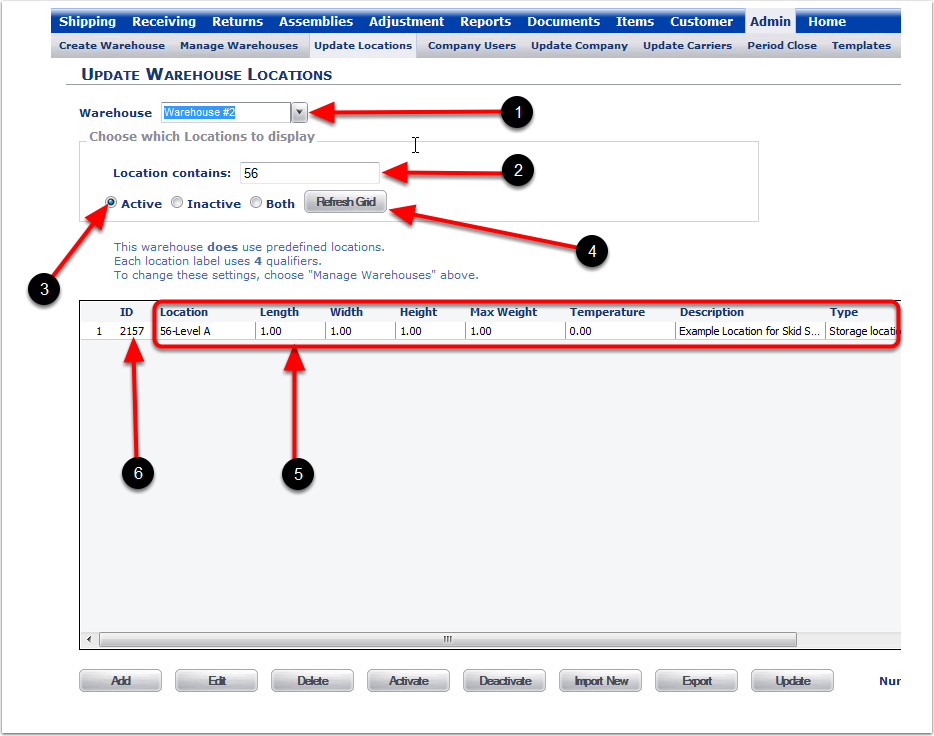
1. After the new Location was created, the system will return you to the Update Warehouse Location screen.
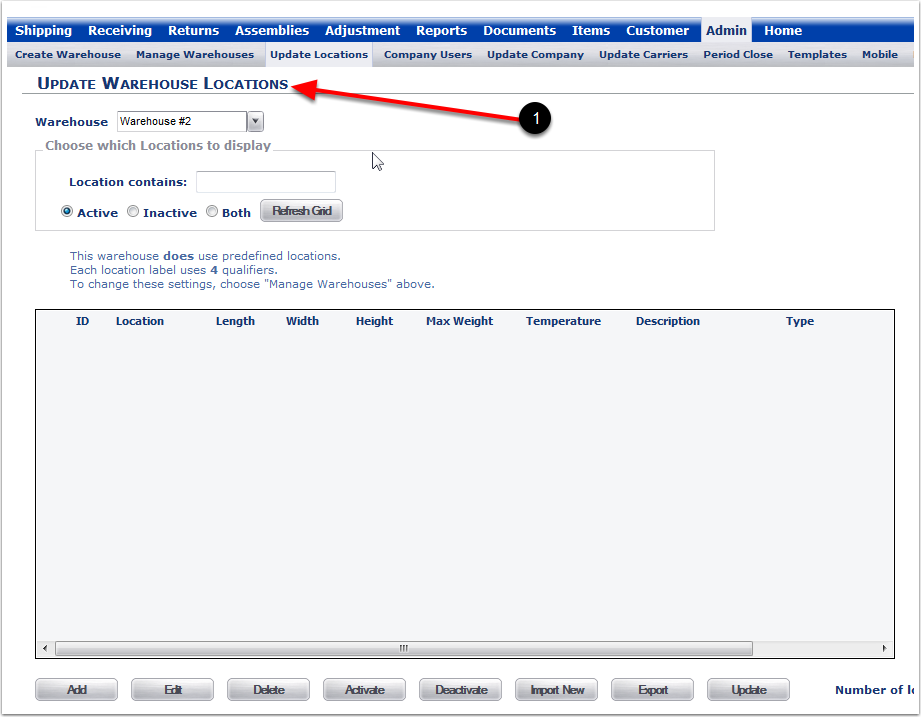
1.Select the Warehouse.
2.Enter the details of the Location contains (Optional, example number 56 for the location 56-Level A).
3.Select Active.
4.Select Refresh Grid.
5.After choosing Refresh Grid, the newly created Location will appear (Example 56-Level A).
6.ID: Each Time a Location is created within the Company, an ID is created in numeric order.