Update Carriers |
  
|
Update Carriers |
|
The Update Carriers guide walks through the general setup of your Company's Carriers.
In this Update Carriers section, you will learn how to:
•Add Shipping Carriers.
•Edit Carriers.
•Specify Custom Series for a Carrier.
•Delete a Carrier (Note: this applies only to Carriers manually created. The system generated default Carrier list containing 11 Carriers cannot be deleted. These Carriers are denoted as the first 11 numbers under the ID numbers by ID numbers 1 through 11 in the system).
These changes can be accomplished by Administrative Level 1 users only.
To Make Changes to the Carrier List:
1.Choose Admin Tab.
2.Choose the Update Carriers Tab. This will bring you to the Carrier List screen.
From the Carrier List Screen, the information provided shows:
•Total count of Carriers.
•Carrier ID numbers. The first 11 ID numbers denote system generated Carriers (and cannot be deleted). ID #12 was created by the Admin user.
•The Carrier column is a list of the Carriers that can be selected in the Shipping Order screen.
•SCAC is the Standard Carrier Alpha Code. This can be added to each of your Carriers (Optional).
•LTL (Less Than Truck Load) shipping Code, asks if this carrier is an LTL carrier - Yes or No.
•Description (Full carrier name description is the visible name on the drop-down menu in the Carrier and Routing screen in Shipping Order).
•The Active column shows whether or not the Carrier is currently active. These should all be 'yes' when Show Inactives is not checked.
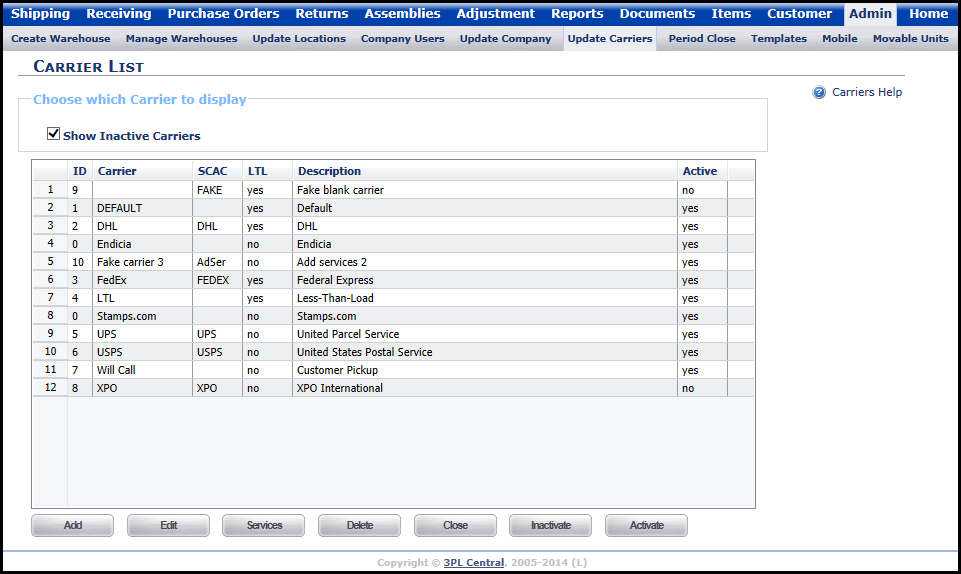
From the Carrier List screen, you can:
•Add a new shipping Carrier.
•Edit existing Carriers.
•Manage the Services associated with the Carrier (Example: Ground, Priority, etc.).
•Delete a Carrier that is not one of the 11 system default Carriers and which hasn't been used on any Transactions.
•Close the Carrier List screen.
•Inactivate an active Carrier.
•Activate an inactive Carrier.