Period Close |
  
|
Period Close |
|
The Admin - Period Close guide walks through general steps used to generate Invoicing and close the period. Generally, the Period Close section will not be used until your customers, their inventory data, and billing details (in the Billing Wizard) have been entered into the system. In this Admin - Period Close section, you will learn how to:
•Review and Adjust Transaction Charges.
•Edit Transaction Charges.
•Generate, Daily, Weekly or Monthly Invoicing.
These reviews, changes, and invoices can be accomplished by Administrative Level 1 users only.
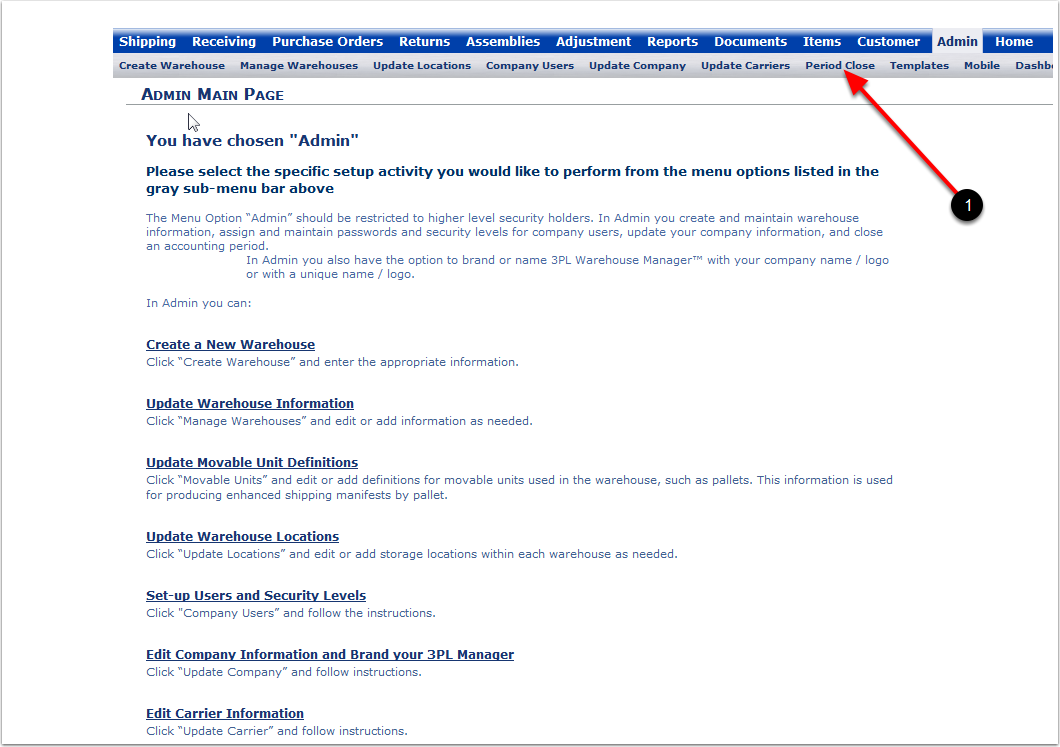
From the Admin Tab:
1. Choose the Period Close Tab and the system will go to the Period Close screen.
Period Close Screen
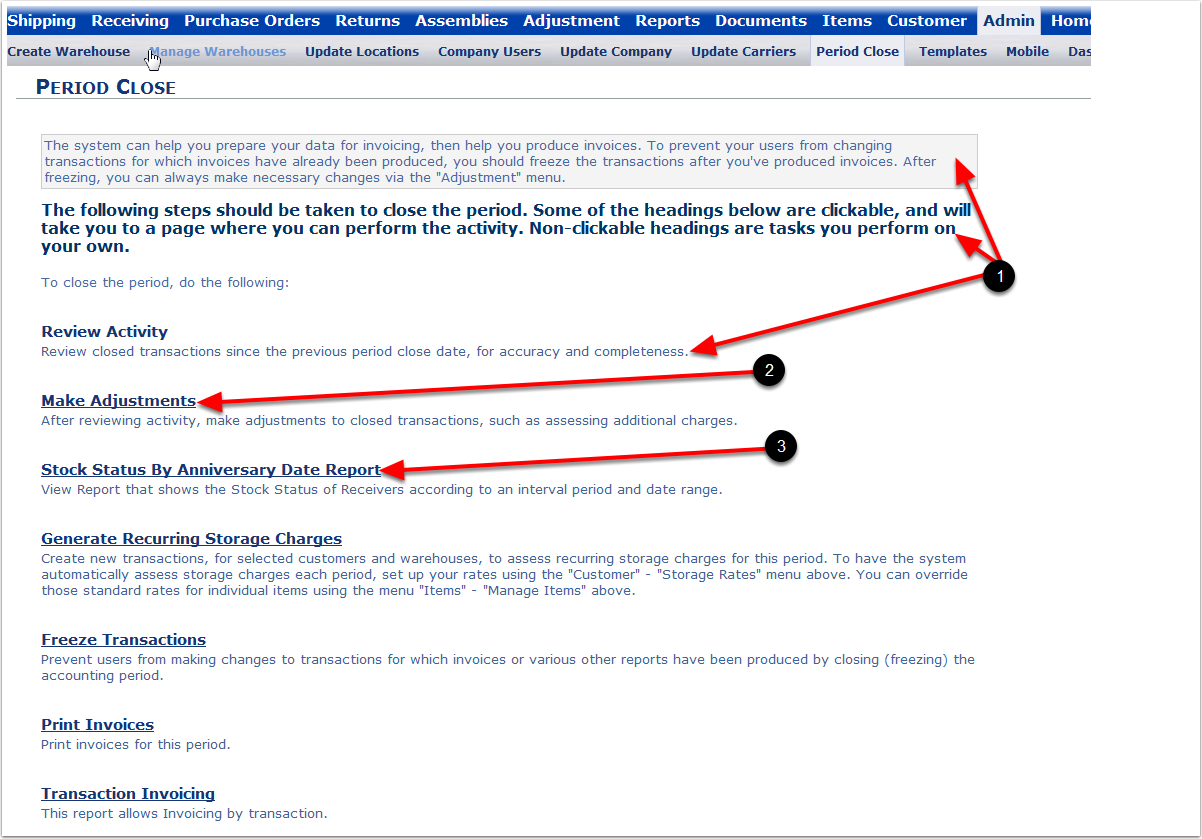
1.Review Activity is a message to the user to review all transactions before proceeding forward in the Period Close section.
2.Choose Make Adjustments and the system will go to the Adjustment Main Page screen. In Adjustments, changes to transactions can be made.
3.Stock Status By Anniversary Date Report is a Management Report. The system will go to the Stock Status By Anniversary Date Report screen.
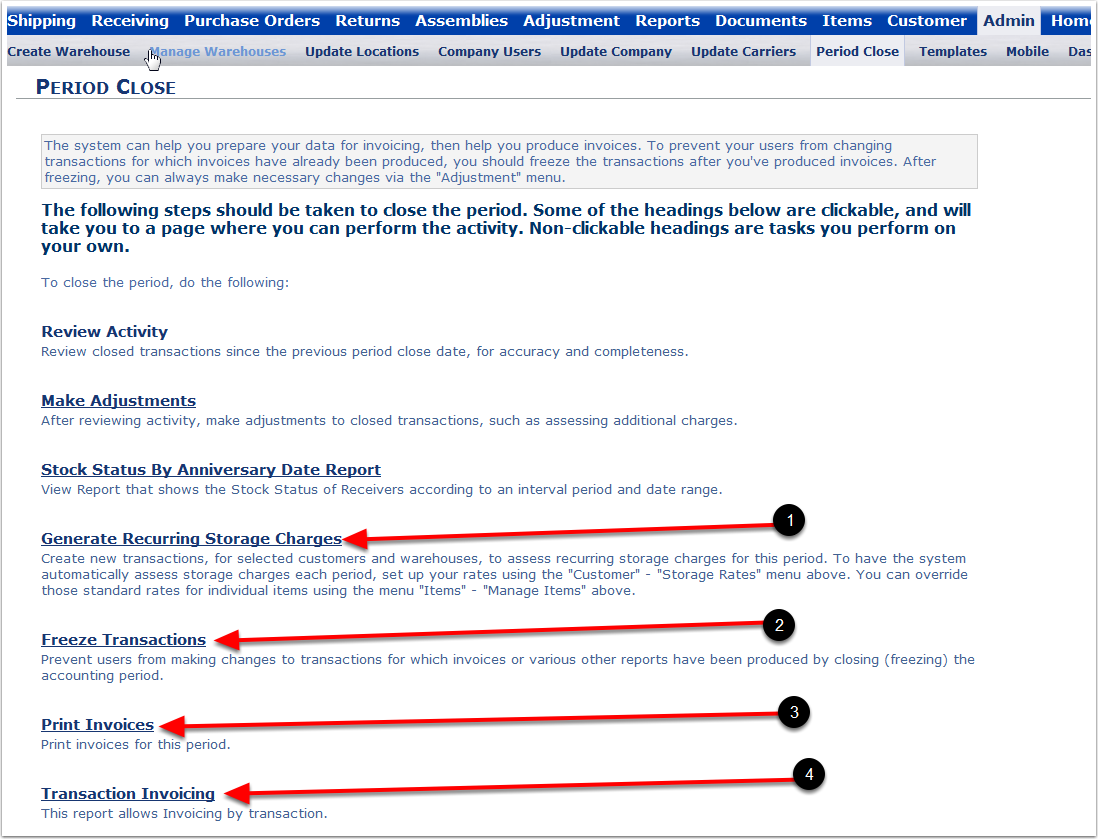
1.Choose Generate Recurring Storage Charges to activate or deactivate a charge for an invoicing period.
2.Choosing Freeze Transactions will lock out everyone from accessing a specific transaction for Invoicing.
3.Choose Print Invoice to allow the printing of invoices for a specific period.
4.Choose Transaction Invoicing to allow the Invoice for a specific Transaction to be run.
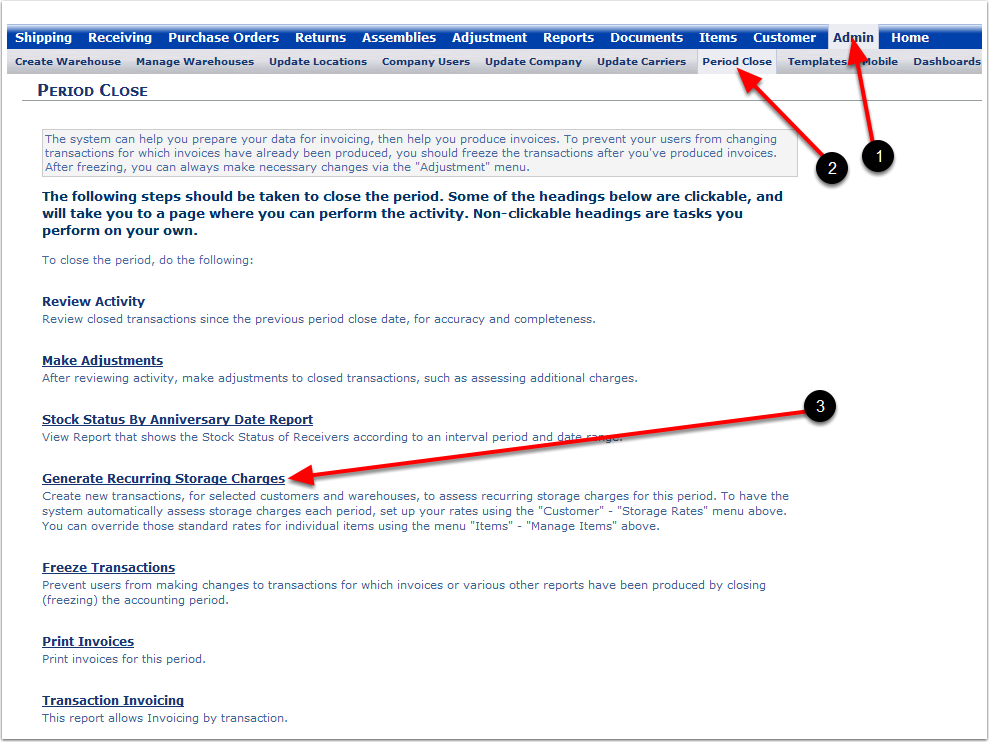
To generate recurring storage charges:
1.Choose the Admin Tab.
2.Choose the Period Close Tab.
3.Choose Generate Recurring Storage Charges and the system will go to the Generate Recurring Storage Charges screen.